Orange Seitan with Green Beans and Peppers ~ ElephantEats.com

My friend Erica came over to dinner a few weeks ago and I cooked up this meal. It was SUPER easy and she liked it so much that she made it for dinner later that week too!

That was also the day I made the fluffy pb frosted brownies, which she got to sample. Lucky girl ;)

She brought one home to her bf and he apparently gave it a thumbs up!

Orange Seitan with Green Beans and Peppers ~ ElephantEats.com

Since Nate doesn’t like the taste of beef, and I hate touching raw chicken, I’m always experimenting with new protein forms. We both love seitan so I picked some up at Whole Foods assuming we’d find a use for it. I went to use it, thinking it was sliced in pieces, but it was actually ground.

I had never had ground seitan before but it was actually a really perfect substitute for ground beef! I love the texture it added to this dish and I’ll definitely be making it again. Be sure to serve it over a big bowl of white (my fave) or brown rice. Mmmm mmm!

Orange Seitan with Green Beans and Peppers ~ ElephantEats.com

Also, I finished another pet portrait! This one was a present for my parents of their long-haired mini dachsund, Sparky. I think it’s my best one yet!

Mini Dachsund Pet Portrait ~ ElephantEats.com

Orange Seitan with Peppers and String Beans
Serves 4
A healthy, vegetarian version of chinese take-out!
Write a review
Print
Ingredients
  1. zest from one orange
  2. 1/2 cup orange juice (juice the orange you zested and add water to get to 1/2 cup)
  3. 1/4 cup brown sugar
  4. 2 Tbsp rice vinegar
  5. 2 Tbsp soy sauce
  6. 2 tsp chili garlic sauce
  7. 2 tsp grated fresh ginger
  8. 2 tsp cornstarch
  9. 2 tsp vegetable oil
  10. 3/4 lb fresh green beans, ends cut and trimmed into 2-inch pieces
  11. 2 red peppers, sliced thin and cut into 2-inch strips
  12. 1 lb ground seitan
  13. 2 scallions, chopped
Instructions
  1. In a medium bowl, whisk the orange zest, juice, brown sugar, vinegar, soy sauce, chili garlic sauce, ginger and cornstarch.
  2. In a large nonstick pan, heat oil over med-hi heat. Add green beans and peppers and cook for about 3 min. Add seitan and cook til beans are crisp tender.
  3. With a slotted spoon, transfer everything to a large bowl.
  4. Give the orange juice mixture a stir and add it to the pan. Cook, scraping up any brown bits until thickened, about 2 min.
  5. Add veggies and seitan back to pan, along with any juices. Warm through.
  6. Serve over white or brown rice to soak up all that yummy sauce!
Adapted from Very Culinary
https://elephanteats.com/

Peanut Butter Frosted Brownie ~ ElephantEats.com

Well, yesterday Nate ran the NYC marathon. It was his 7th marathon overall and his 4th time running New York. A lot was riding on this marathon after the 2012 Boston marathon heat wave, and the fact that Sandy caused last year’s NY marathon to be cancelled.

Nate's 2013 NYC marathon ~ ElephantEats.com

Nate had a goal to finish under 3 hours since his last marathon he ran in 3:03. The temperatures were perfect this year but it was VERY windy. To give you an example, this year’s male winner, Geoffrey Mutai, finished in 2:08:24 which was well off his course record of 2:05:06 set in nearly perfect conditions two years ago. 3 minutes to an elite runner is huge. Nate ended up finishing in 3:24:21, which he wasn’t completely happy with, but it’s still an amazing time! I’m so proud of my hubby :)

On to the recipe…since the last recipe I gave you guys was a healthy one, I figured I’d include a very unhealthy one to go with it. I mean, you’re probably having sugar withdrawal since your halloween binge, so this should help with that.

Peanut Butter Frosted Brownie ~ ElephantEats.com

These brownies were another Nate-inspired recipe. You see, we’ve been stopping by our new house a bunch since we closed on it back in August, and there’s a deli nearby that has the most amazing peanut butter-frosted brownies. The brownie itself is really moist and delicious, but what takes it over the top is this really thick layer of peanut butter frosting- the really sweet kind. That frosting must be like 1/2 inch to an inch thick!

So I set out to recreate the brownies for Nate since I know he loves them so much. Plus, it will probably save us money in the long run since I could see Nate stopping by the deli a little too often to grab a brownie once we finally live nearby ;)

Peanut Butter Frosted Brownie ~ ElephantEats.com

And for those of you that have been wanting to know about how our house stuff is going, we officially got the permits on Thursday! The contractor bids were also due on Thursday and on Tuesday I will be going over everything with the architect so I can make a decision as to which contractor we will hire. 

I think that once I narrow it down to two people, I should probably meet with them to really get a feel for whether I could work with them. I’ll share our finalized house renovation plans with you guys soon! Hopefully demolition can start in the next 2 weeks!!

Peanut Butter Frosted Brownie ~ ElephantEats.com

Thick Peanut Butter Frosted Brownies
Yields 18
Write a review
Print
Brownies
  1. 2 sticks unsalted butter, chopped into small pieces
  2. 6 oz. dark chocolate, chopped
  3. 1 cup granulated sugar
  4. 1 cup brown sugar, packed
  5. 4 large eggs
  6. 2 tsp vanilla extract
  7. 3/4 cup semisweet chocolate chips
  8. 1.5 cups flour
  9. 2 tsp baking powder
  10. 1/2 tsp salt
Frosting
  1. 6 Tbsp shortening (i.e. Crisco)
  2. 2 Tbsp unsalted butter, room temp
  3. 3/4 cup creamy peanut butter (like Jif or Skippy, not "natural" pb)
  4. 2 cups confectioners sugar
  5. 1 tsp vanilla extract
  6. 2 Tbsp water
Brownies
  1. Preheat the oven to 350. Line a 9x13 pan with foil, letting the excess hang over the edges. Lightly grease foil and set aside.
  2. In a medium, microwave-safe bowl, combine the chocolate and butter for the brownies. Microwave in 1 minute increments at 50% power, stirring in between, until the chocolate and butter are melted and smooth.
  3. Whisk in the granulated sugar and brown sugars. Whisk in the eggs and the vanilla. Add the flour, baking powder and salt. Fold the dry ingredients into the chocolate mixture with a spatula until combined. Stir in the chocolate chips.
  4. Pour the batter into the pan and bake for 30 minutes, until a thin knife or toothpick inserted in the center comes out clean or with a few moist crumbs. Remove brownies from the oven and allow them to cool completely.
  5. Once brownies are fully cooled, spread frosting (directions below) evenly over brownies. Remove from pan using foil "handles" and cut into pieces.
  6. Store brownies in airtight container or tightly wrapped at room temperature or in fridge for 3-5 days.
Frosting
  1. Using an electric stand or hand mixer, combine butter and shortening. Add peanut butter and combine til fully incorporated. Slowly add confectioners sugar and vanilla. Add enough water (about 2 Tbsp) to get to a fluffy, moist consistency.
Notes
  1. These could probably last longer than 3-5 days in the fridge, but I personally love them room temp.
Adapted from (Brownies, not frosting) Annie's Eats
https://elephanteats.com/

Light Lemony Tuna Pasta with Fennel, Capers, and Olives ~ ElephantEats.com

I was recently sent some Ocean Naturals canned tuna to try. I rarely eat canned tuna because I just plain forget it exists, so I was so glad that this reminded me how great it is. 

Canned tuna contains high-quality protein and Omega 3 fatty acids. Tuna, especially canned tuna, is a convenient and versatile way for you to add fish to your family’s diet.

Light Lemony Tuna Pasta with Fennel, Capers, and Olives ~ ElephantEats.com

But I’m sure you guys know all that, right? What I didn’t know was that tuna is often over-harvested and some species are more endangered than others. Ocean Naturals guarantees that all of their “responsibly-caught” tuna is harvested:

  • From target species populations that are healthy and abundant and are currently being harvested at a level that promotes the stocks’ longevity
  • Using catch-methods that limit ecosystem impacts
  • In regions where the fishery is managed by regulatory bodies that help sustain the long-term productivity of all impacted species

Light Lemony Tuna Pasta with Fennel, Capers, and Olives ~ ElephantEats.com

Nate has made me really think about our impact on the ecosystem in general, so it made me really happy to know that some companies are doing their part to preserve it and limit their impact on it. 

Lately I’ve also become overly concerned with what I put in my body, and hate that everything seems to contain something that’s unhealthy either from the packaging or the food itself. For example, it scares me that those plastic water bottles I drink from daily could be leaching chemicals into the water. Well, Ocean Naturals  tuna doesn’t have anything added- it’s simply premium tuna with a dash of salt, packed in either olive oil or water. No fillers, additives, or preservatives. It’s nice to know that some foods don’t have anything artificial added!

Light Lemony Tuna Pasta with Fennel, Capers, and Olives ~ ElephantEats.com

Anyway, since I got sent this tuna, I didn’t want to just make a boring old tuna salad. Nate has been training for the NY marathon (it’s this weekend!) so every Friday is pasta day to fuel his long weekend runs. I decided to make a pasta that incorporated the tuna. It’s kind of based on the flavors of a sandwich he loves at ‘WichCraft Sandwiches.

**I was given these products free of charge, but all opinions are my own. I would never post about a product I didn’t love and plan to use again.

Light Lemony Tuna Pasta with Fennel, Capers, and Olives ~ ElephantEats.com

Zesty Roasted Pumpkin Seeds ~ ElephantEats.com

If you’ve been following my blog, you know that for the last few years, I’ve been really getting into pumpkin carving at Halloween. I had seen these really cool pumpkins online and thought “i could do that,” so I picked up some wood-carving tools and was on my way!

Two years ago, I did a “Where the Wild Things Are” pumpkin:

Where the Wild Things Are jack-o-lantern ~ ElephantEats.com

My 2011 “Where the Wild Things Are” jack-o-lantern

Last year was an owl in honor of our wedding (in which there was a real owl!).

I, sadly, missed winning Movita’s Carve-Off 2012 competition by a hair!

Owl jack-o-lantern ~ ElephantEats.com

My 2012 owl jack-o-lantern

Now that I’ve had 2 years to hone my pumpkin-carving skills, I think that I did my best one yet!

Movita actually posted a link on her facebook page  to the Maniac Pumpkin Carvers last week. I had never been to their page before, but when I looked thru their SERIOUSLY AWESOME pumpkins, I saw that the Wild Things pumpkin I had found on pinterest two years ago (that inspired mine) was actually theirs. 

Nightmare Before Christmas jack-o-lantern ~ ElephantEats.com

I wanted to pick up some pumpkin carving tips, so I actually emailed them (not expecting a response) to find out A) where they cut the hole in their pumpkins since it’s obviously not the top and B) how they light them so well.

Nightmare Before Christmas jack-o-lantern ~ ElephantEats.com

Well, they wrote back like immediately which made me so excited. I found out that they actually cut a hole in the back of the pumpkin, which is what I did this year.

Nightmare Before Christmas jack-o-lantern ~ ElephantEats.com

 They also told me they rig it up with LED or CFL lights inside the pumpkin…but I didn’t have time to get the lights, so I just stuck a flashlight in my pumpkin and called it a day :)

Nightmare Before Christmas Jack Skellington jack-o-lantern ~ ElephantEats.com

My 2013 “Nightmare Before Christmas” Jack Skellington jack-o-lantern

We also finally remembered to use the tripod to take pics this year, since that’s really the only way to get a good pic of anything in the dark.

Nate carved the Oogie Boogie Man to go along with the “Nightmare Before Christmas” theme. I don’t know how we’re going to top these pumpkin next year. 

Nightmare Before Christmas jack-o-lantern ~ ElephantEats.com

*I’ve updated this post to include a few pumpkin carving tips:

  1. Find a pumpkin with a nice wide, flat-ish surface on the part you’re going to carve.
  2. Cut a hole in the backside of your pumpkin that’s big enough for your hand to fit through. Remove all the seeds (and save them to eat!) and then scrape away all the stringy pumpkin gook.
  3. Find an image. It’s best to work from an image that’s in black and white. Either find one that is already b+w or convert it with some photo-editing software. Pixlr.com is a good one and I think picmonkey.com might be able to do it too. 
  4. Use dry-erase or washable markers to sketch out the image on your pumpkin
  5. Get some wood carving tools, knives, or any other instruments you think will help with scraping the flesh off your pumpkin- some of these need to have small points as you might have intricate details to scrape.
  6. This is kind of obvious, but the lightest areas on your inspiration image will be the parts that you scrape/carve the deepest.
  7. I don’t actually ever cut all the way through the pumpkin flesh- the light areas are simply scraped quite deep into the flesh.
  8. Start with scraping/carving out the lightest areas on your pictures so you have a reference of how deep the lightest areas are compared to not scraping at all (the darkest areas) and then you can estimate how far to scrape for the in-between gray areas.
  9. When you think you’re done, take one of those pumpkin scooper tools they sell in the pumpkin carving sets and scrape the inside of the pumpkin behind your design as much as you can. This will ensure that there isn’t much flesh between the inside and your “lightest” areas. Your design will show better this way because when you put the light inside, it will be able to shine through best.
  10. Either rig up a light bulb or put a mini flashlight in your pumpkin. The little pumpkin lights they sell in the store aren’t bright enough to shine through a “scraped” pumpkin enough to really show off your design.
  11. That’s it! Now light up the pumpkin and impress all your friends!

Since we had two huge-ass pumpkins, I was able to get quite a few pumpkin seeds from them. Roasting pumpkin seeds has been a tradition in my house since I was little whenever we carved Jack-o-Lanterns. When I made them the first year I knew Nate, he became obsessed with them and now he looks forward to pumpkin carving for the seeds more than for the pumpkin I think :)

Last year I saw a Rachel Ray recipe that recommended boiling the seeds before roasting them. I decided to give it a try and they came out great! So I thought I’d share that recipe with you today. Enjoy!

Zesty Roasted Pumpkin Seeds ~ ElephantEats.com 

Zesty Roasted Pumpkin Seeds
Crispy, salty, spicy seasoned pumpkin seeds!
Write a review
Print
Ingredients
  1. 1 cup cleaned raw whole pumpkin seeds
  2. 1 tablespoon plus 1 tsp fine sea salt
  3. 1 tablespoon olive oil
  4. 1 tsp garlic powder
  5. 1 tsp onion powder
  6. a pinch cayenne
  7. 1 tsp worcestershire sauce
Instructions
  1. Preheat the oven to 375 degrees .
  2. In a small saucepan, bring 4 cups water, the seeds and 1 tbsp. salt to a boil. Simmer for 10 minutes, then drain. Pat the seeds dry between layers of paper towels.
  3. Toss the seeds with the olive oil and remaining 1 tsp. salt. Spread in a single layer on a greased foil-lined baking sheet. Roast until golden, 10 to 12 minutes (or possibly a little longer).
  4. Toss with one of the seasoning blends at right and roast for 5-10 minutes more or until crispy. Keep an eye on them because they burn fast!
Adapted from http://www.rachaelraymag.com/recipe/oven-roasted-pumpkin-seeds/
https://elephanteats.com/

Bread with Pecorino, Honey and Orange Zest ~ ElephantEats.com

Since SO many of my readers requested it, I’ll do a very brief summary of my trip to Italy. I think I will have to do a separate post about my cooking class with some recipes, since there’s too much to tell about that! 

Unfortunately, my family isn’t big on remembering to take photos (thank goodness Nate loves to!), so all the photos I have were taken with my iphone.

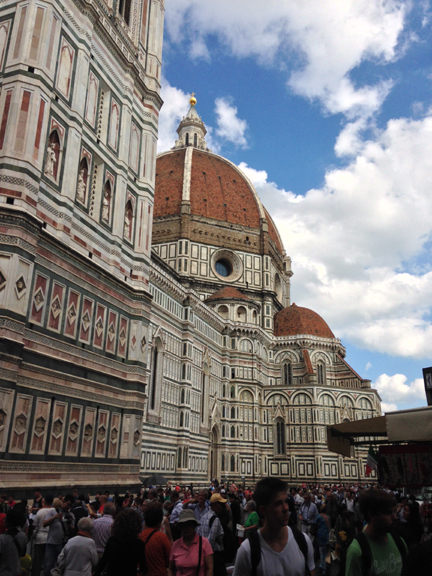
I began my trip in Florence, where I met up with my parents who had already been traveling for a week. Here’s the famous Duomo which was a short walk from our hotel.

Duomo, Florence, Italy ~ ElephantEats.com

Sadly, I didn’t consume as much gelato as i would have liked because my stomach was bothering me for most of the trip…and I was too full after meals to get it. It’s pretty crazy how often you see people eating gelato, though, and at all times of the day!

I’m pretty sure there more gelato stores in italy than Starbucks are in the U.S., and that’s saying a lot since I love in NY where there’s practically a Starbucks on every corner. But in both Florence and Milan there were at least 2 places to get gelato on every single block. 

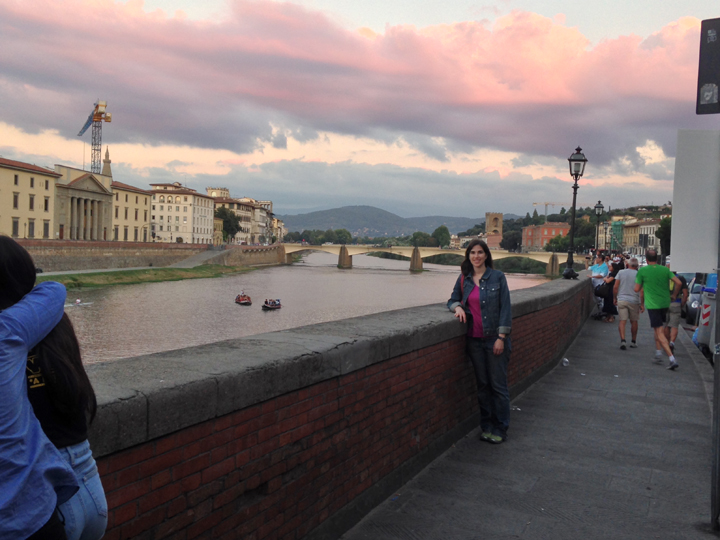
Florence is pretty small, so we could walk pretty much everywhere. The Ponte Vecchio was so close by that we ended up walking over there for shopping and dinner a couple times. 

Ponte Vecchio, Florence ~ ElephantEats.com

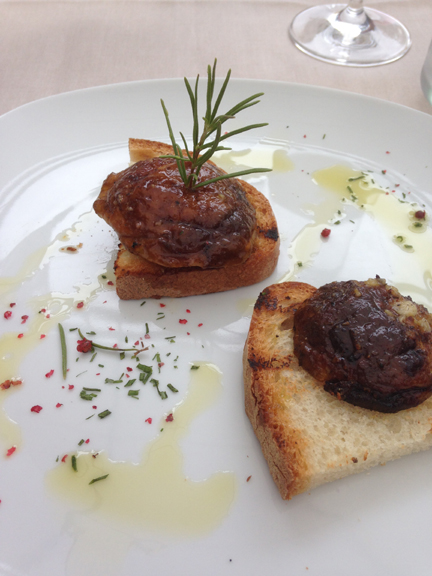
As I mentioned in my other post, we took a day trip to Chianti where we had a private cooking class at the Ristorante Malborghetto with Chef Simone.

Here’s our first course. A juicy, grilled porcini with rosemary, garlic and truffle oil.

Cooking Class, Ristorante Malborghetto, Chianti ~ ElephanEats.com

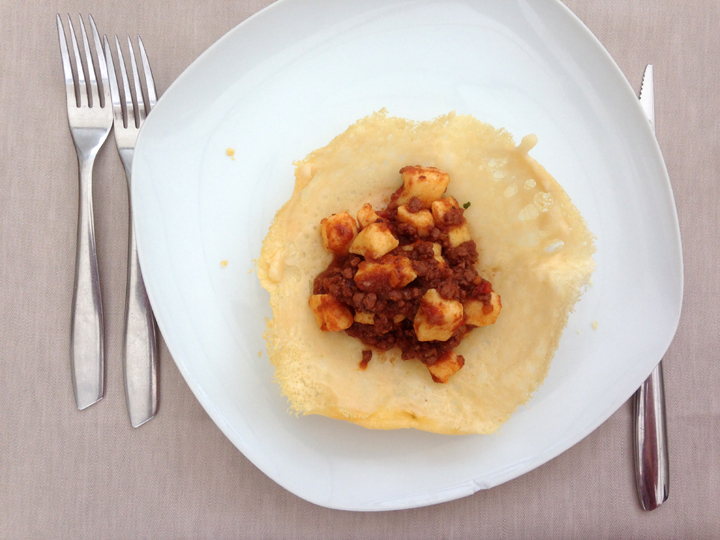
We also made the most amazing homemade gnocchi in bolognese. We made parmesan bowls to serve it. 

Cooking Class, Ristorante Malborghetto, Chianti ~ ElephanEats.com

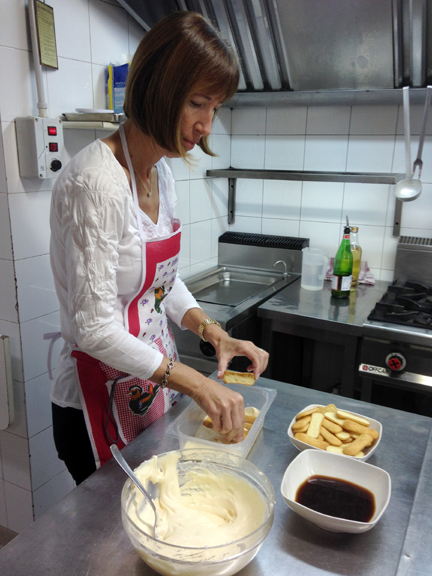
 Here’s my mom helping make the tiramisu.

Cooking Class, Ristorante Malborghetto, Chianti ~ ElephanEats.com
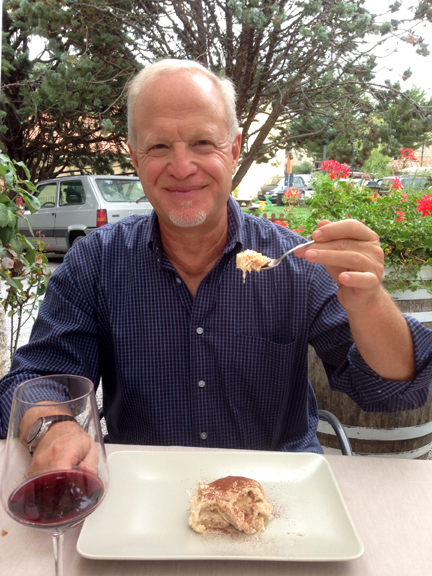
Here’s my dad enjoying the finished product. 

Cooking Class, Ristorante Malborghetto, Chianti ~ ElephanEats.com

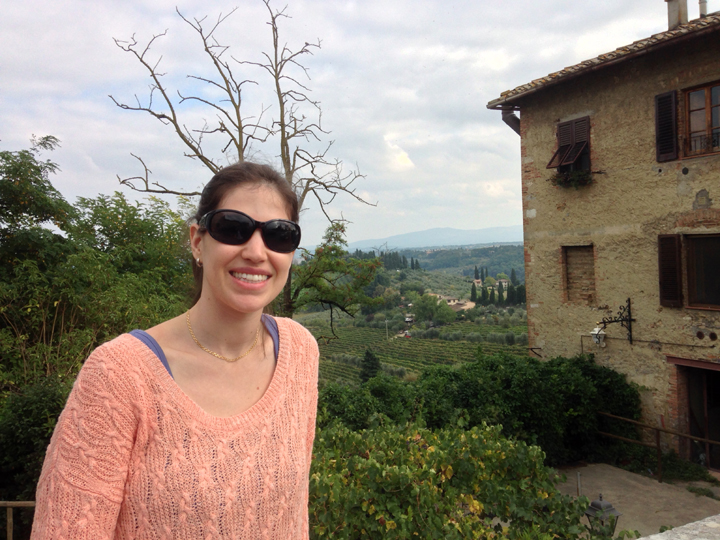
On the way home from Chianti, we stopped at San Gimignano, a small walled medieval hill town in the province of Siena, Tuscany. It was so so beautiful!

San Gimignano ~ ElephantEats.com

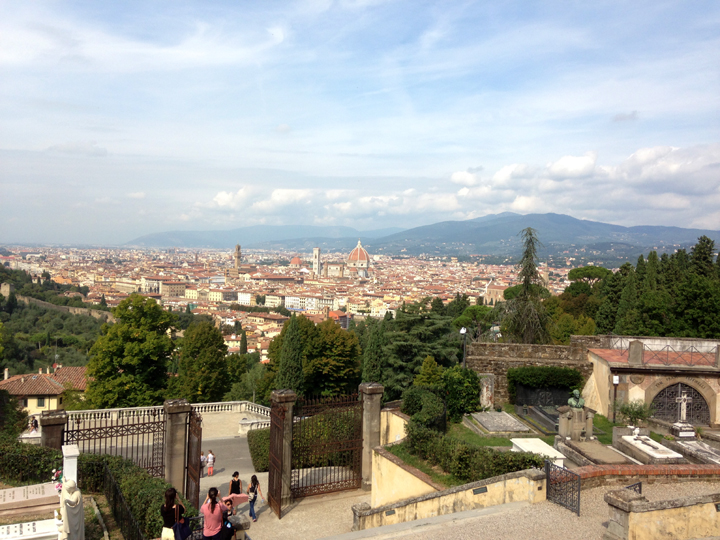
We ended up doing a lot of walking while we were in Florence…we had to go up a bunch of steep staircases and hills to get to Basilica di San Miniato al Monte.Florence, Italy ~ ElephantEats.com

Basilica di San Miniato al Monte, Florence ~ ElephantEats.com

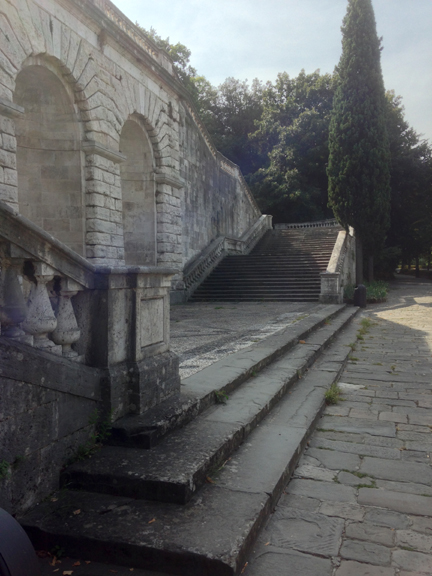
But it was worth it because the view at the top was spectacular.

Basilica di San Miniato al Monte 2 ~ Elephant Eats.com

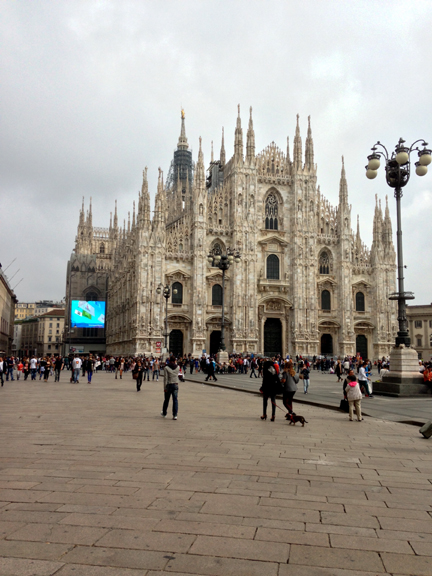
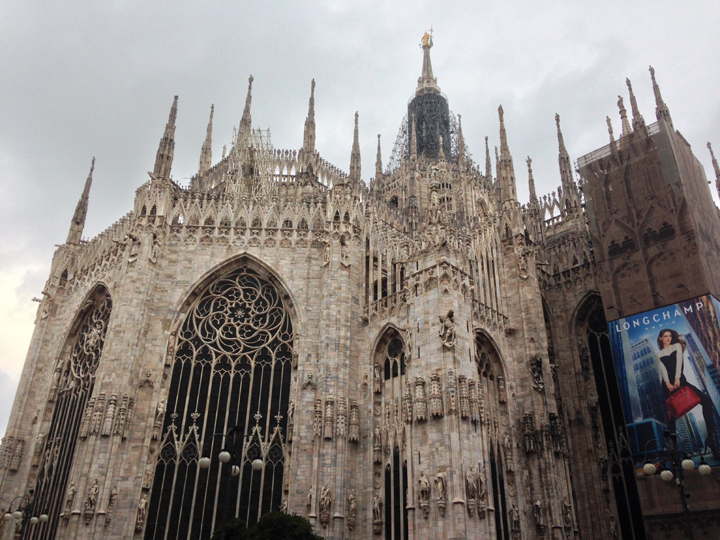
Next up was Milan. The most beautiful Cathedral was near our hotel. The Duomo di Milano is a Gothic cathedral that took nearly six centuries to complete and was literally JUST finished, if you can believe it. It is the fifth largest cathedral in the world and the largest in the Italian state territory.

Milan Duomo ~ ElephanEats.com

We were told that the church needs money, hence the billboards on the scaffolding!

Milan Duomo ~ ElephanEats.com

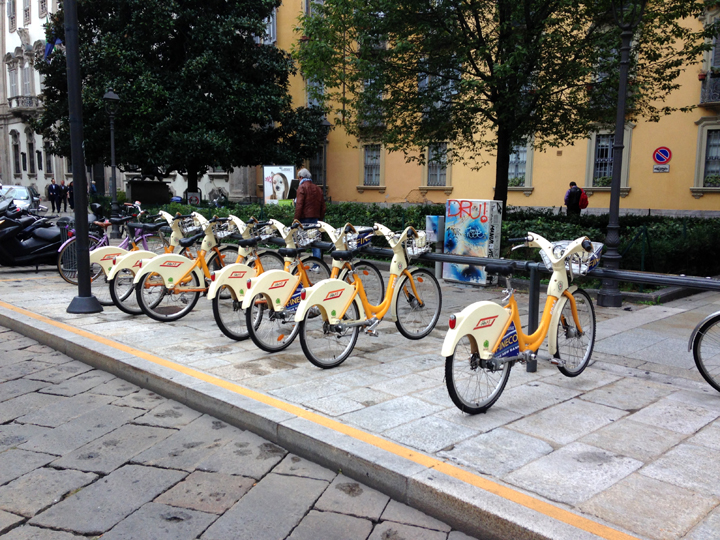
Milan has a bike share program just like the CitiBikes that were recently introduced in NYC. Europe is way ahead of the U.S.!

City Bikes, Milan ~ Elephant Eats.com

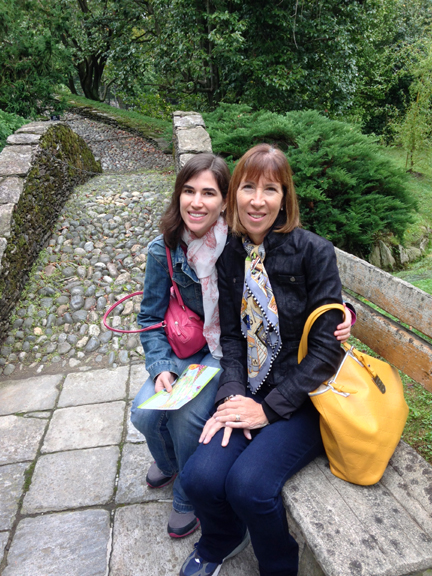
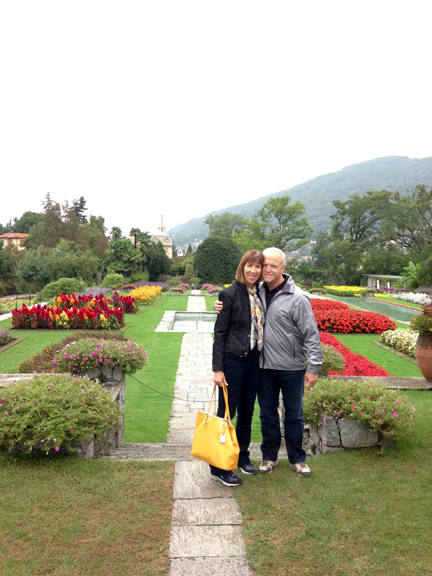
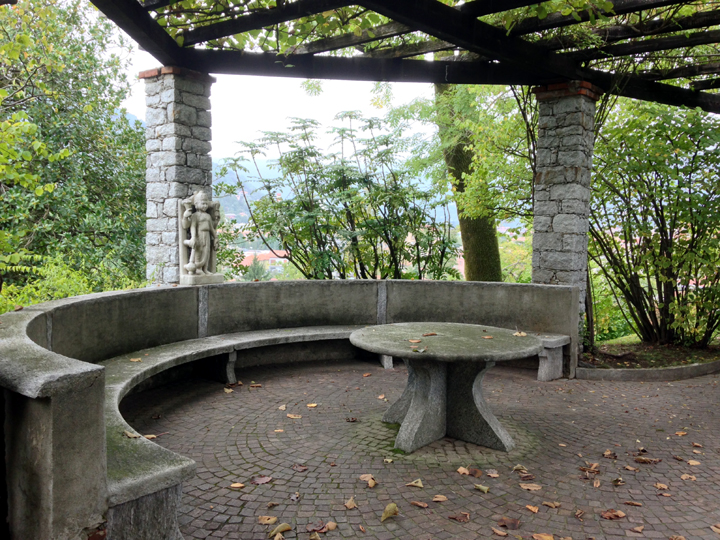
One of the days that we were in Milan, we took a day trip to Lake Maggiore. The climate in the lake region is mild all year long, and so there’s the Alpinia botanical garden above the town of Stresa there.  

We visited it and it was gorgeous.

Botanical Gardens, Lake Maggiore ~ ElephantEats.com

Alpinia botanical garden  ~ ElephantEats.comAlpinia botanical garden  ~ ElephantEats.com

Alpinia botanical garden  ~ ElephantEats.com

But anyway, back to the important stuff…the food!

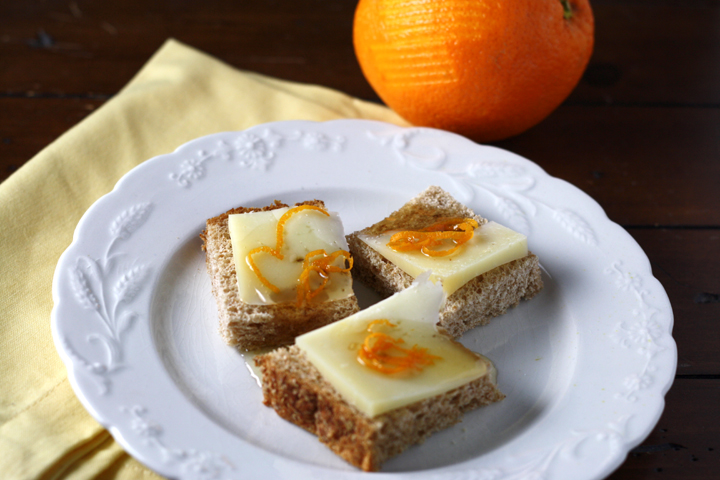
My parents have been to Florence several times now, and this was my second time although I don’t remember the first too well. Anyway, my parents had apparently been to this one little cafe that they really wanted to find again because one of the things they had was this delicious bread with honeycomb, cheese and orange zest. We walked all around trying to find the place but couldn’t. Finally my mom remembered that she had sent an email to her friend with the restaurant name in it so we went back to the hotel just to get the info! Luckily after some searching we found the email and went immediatey back out to go there for lunch. 

cantinetta dei verrazzano, Florence ~ ElephantEats.com

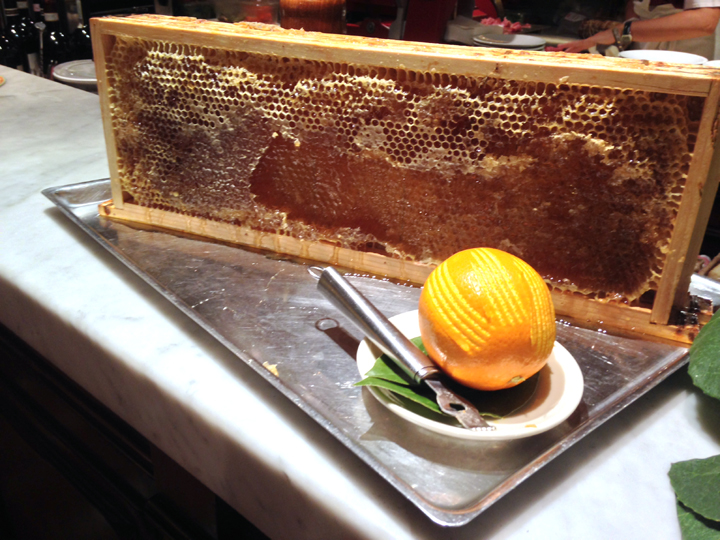
It was called Cantinetta Dei Verrazzano and I HIGHLY recommend that if you’re in Florence, you stop in for lunch or dinner. 

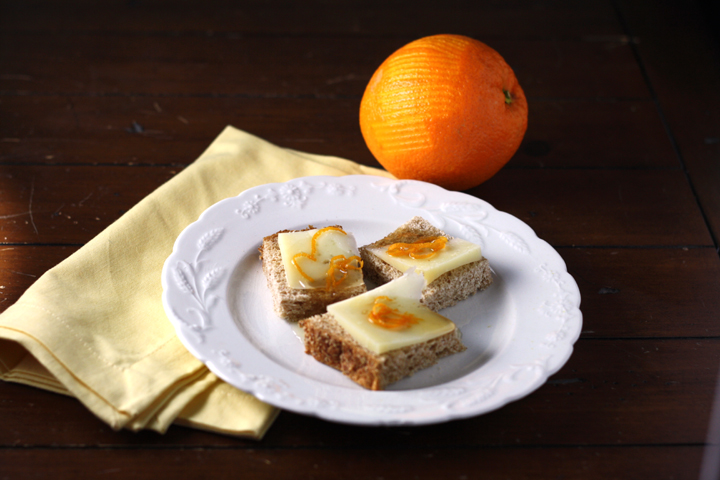
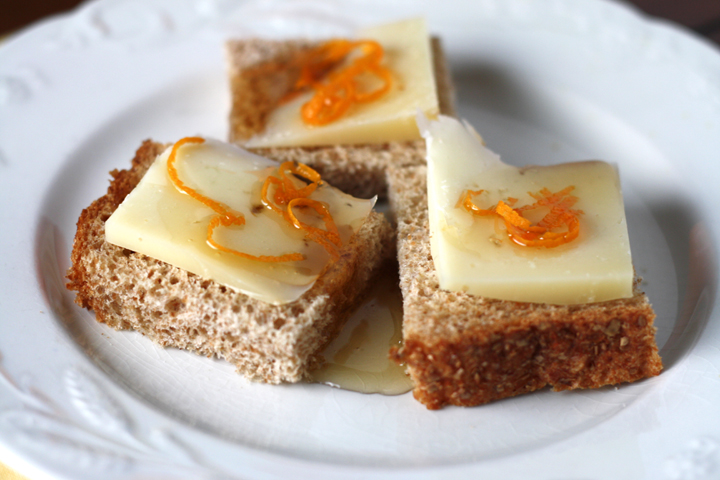
We split some meats and a salad but the highlight of the meal was when the server came to our table carrying a giant honeycomb! He put out plates with a small slice of a whole wheat bread, with a slice of some sort of Pecorino Romano cheese (i think). He then scraped the honeycomb with a spoon and put the delicious honey drippings on top of the cheese. And finally he zested an orange on top. The combination of flavors was incredible and I knew I had to recreate it at home so Nate could experience it!

Bread with Pecorino, Honey and Orange Zest 2 ~ ElephantEats.com

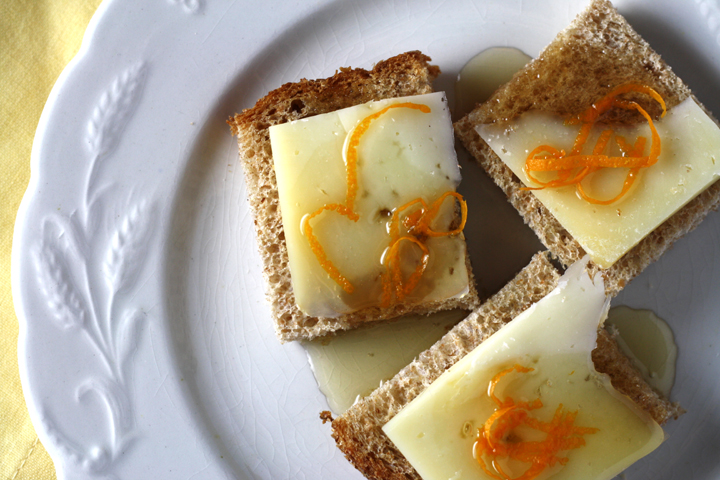
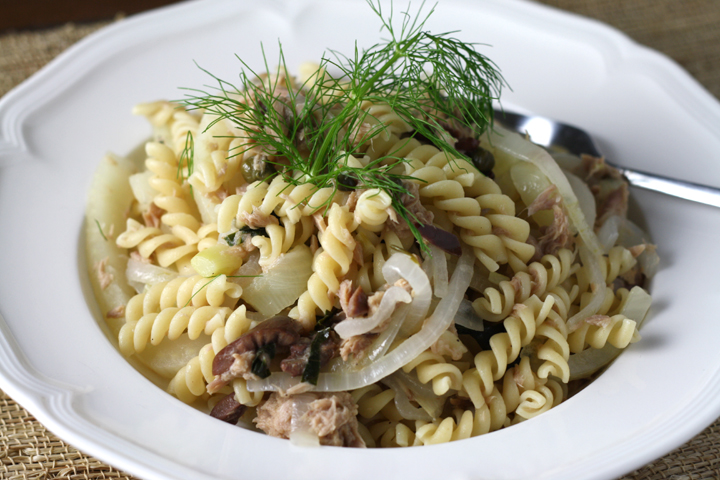
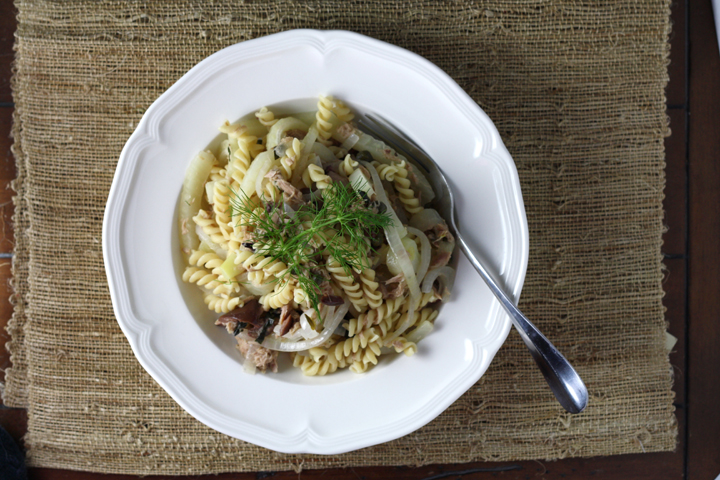
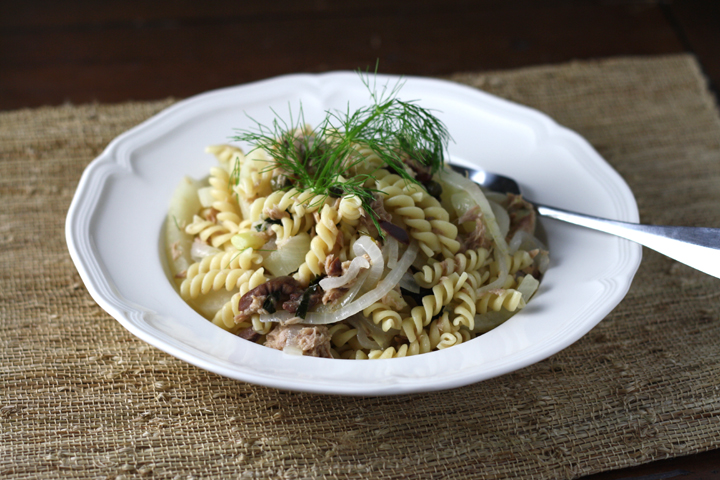
This isn’t a recipe so much because honestly, there are no real amounts, but I thought I should introduce you all to this flavor combination that somehow I had never heard of before. It’s not so easy to find honeycomb around here, so I just used regular honey. I hope you’ll try this at home!

Bread with Pecorino, Honey and Orange Zest  ~ ElephantEats.com

When I finally get a chance to recreate one of the dishes I made in my Italian cooking class, I’ll be back with a recipe for that :)

Bread with Pecorino, Honey and Orange Zest 2 ~ ElephantEats.com


Bread with Pecorino, Honey and Orange Zest
An easy appetizer with the most amazing combination of flavors from Florence, Italy! I don't have any amounts because it really is up to you...
Write a review
Print
Ingredients
  1. Whole Wheat bread, cut into 2-3 inch pieces
  2. Pecorino (or other hard cheese), sliced 1/8 inch thick and cut into pieces
  3. Honeycomb or honey
  4. Orange zest
Instructions
  1. Place bread squares on a plate.
  2. Put a small square of cheese on each slice. Put a large dallop of honey on each and then zest orange on top.
https://elephanteats.com/