Yeah, that’s right, I’m celebrating the 10th of May…whatcha gonna do about it?!

So once again, I’m posting a holiday recipe post late. But it’s not my fault. Also, how appropriate that today is the 10th of May, i.e. Cinqo( x 2) de Mayo :)

Plus, Mexican food is enjoyable every day of the week. This recipe is no exception.

The other night I bought a rotisserie chicken. I wanted to make a quick bbq chicken pizza for dinner using my favorite new quickie, healthy crust: socca. I’ll explain more about that in another post.

Anyway, I was in no mood for cooking up chicken (plus touching raw chicken is disgusting and germy…right Nicole? ;) ), so I got lazy and bought the cooked rotisserie chicken they have at the supermarket.

It may be expensive, but let me tell you, it’s worth every penny for the time, hassle and degree of gross-ness you save! I only used about 1 cup of it on the pizza so I shredded up the rest and stored it in the freezer for another recipe.

Most casserole recipes that I have come across in my searches involve cooked chicken. I find this soooo annoying as you have to either boil up a chicken breast just for the recipe, or have leftover chicken lying around, which I never do. But this time I was prepared!

I went into my recipe collection and pulled out the one for a Chicken Tamale Casserole from Cooking Light that I had been putting off making because it called for cooked chicken. I knew Nate would love it because it has a cornbread base.

It was incredibly easy to make. It took one bowl and only 30 minutes in the oven. It was perfect for a quick weeknight meal if you’ve got some pre-cooked chicken sitting in your fridge or freezer. And it was totally delicious.

I had some black beans leftover from a Black Bean Brownie disaster (don’t even ask) so I threw them in too. Tasty.


Chicken Tamale Casserole

Adapted from Cooking Light
Serves 8 

Print this recipe!

1 cup (4 ounces) preshredded 4-cheese Mexican blend cheese, divided
1/3 cup fat-free milk
1/4 cup egg substitute, or 1 egg
1 teaspoon ground cumin
1/8 teaspoon ground red pepper
1 (14 3/4-ounce) can cream-style corn
1 (8.5-ounce) box corn muffin mix (such as Martha White)
1 (4-ounce) can chopped green chiles, drained
Cooking spray
1 (10-ounce) can red enchilada sauce (such as Old El Paso)
1 cup black beans
2 cups shredded cooked chicken breast
1/2 cup fat-free sour cream
Preheat oven to 400°.
Combine 1/4 cup cheese and next 7 ingredients (through chiles) in a large bowl, stirring just until moist. Pour mixture into a 13 x 9–inch baking dish coated with cooking spray. Bake at 400° for 15 min.
Remove from oven. Pierce entire surface liberally with a fork; pour enchilada sauce over top. Top with beans and chicken; sprinkle with remaining 3/4 cup cheese. Bake at 400° for 15 minutes or until cheese melts.
Remove from oven; let stand 5 minutes.
Cut into 8 pieces; top each serving with 1 tablespoon sour cream.


28. April 2011 · 4 comments · Categories: crafts · Tags: , ,

This post isn’t food related, but I promise my next one will be. Here and there I will be inserting crafty posts since art/crafts are another love of mine.

As usual, Nate and I headed down to PA for the long Easter weekend. His family isn’t religious and I’m Jewish, but ever since I was little, my mom dyed Easter eggs with us. To rekindle memories of childhood and combine my love of crafts,  I knew I wanted to dye some eggs this weekend. Neither Nate nor I had done in it probably 15-20 years.

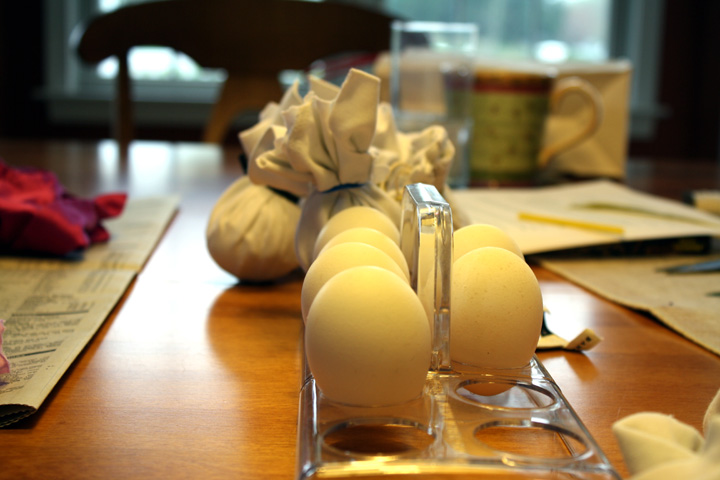
Somewhere amongst my blog reading this year I had come across an awesome technique for dyeing eggs that involves ripping up old silk ties, scarves, or whatever brightly patterned silk fabric you can find at a thrift store. In this case, the uglier the better! Definitely do not use new stuff since you’ll be tearing it into pieces. (I discovered the technique on this site , but I think that this other site’s technique looks even better, and I think I’ll try that one next year).

To perform this awesome egg dyeing method, you first rip the silk fabric into small squares, large enough to cover the egg. You then wrap it in string/dental floss to hold the fabric tightly against the egg. Anywhere fabric isn’t touching the egg will end up white, but having a little white can actually add to the pattern.

Once the egg is wrapped up, you put it in a small square of dye-free cotton fabric (an old tshirt, pillowcase or sheet will work fine) and tie the top with a twisty tie, rubber band, or twine. After all the eggs have been wrapped up, you put them in a big pot and fill with water to cover. Add 1/4 cup of vinegar and bring to a boil. Once the water has come to a boil, continue boiling for 20-30 minutes.

If you’re impatient like me, and want to see the results immediately, you can remove the eggs to a waiting bowl of ice water once they’re done cooking. Otherwise, you can drain them and let them cool.

Unwrap the eggs and behold the magnificence! Being that this was the first time doing this, we discovered that fabrics that are pastel to begin with will not impart much, if any color to the egg. As I said, dark fabrics are best.

There was one fabric that was a solid dark purple which I thought would be plain…but with the parts of fabric that didn’t touch the egg, it ended up a really cool white and purple design.

Finally (and this step is obviously optional), we painted the eggs with a gold glaze that we bought from an egg dyeing kit in the supermarket. You couldn’t really see the gold, but it definitely added a nice sheen. With or without the glaze, the eggs turned out awesome. I can’t wait to repeat it next year and get some really cool fabrics! I hope you’ll give it a try :)

sparkly!

before and after adding gold glaze

Call me crazy, but I love cold weather. The first brisk day in autumn when I get to wear a sweater makes me the happiest girl. Sure, when the temps dip into the teens come winter, I try to avoid being outside for extended periods of time, but something about the frigid air is so refreshing.

But by mid-january, I’m kinda over all the layering. I’m over having to remember to take my scarf, hat, and gloves out the door every day (and freezing my face off on the days when I forget).  So when the weather hit the 50s the other day, I got a little giddy. I guess maybe I like spring more than I’d let on.

With the milder temperature days slowing creeping in, and the holidays approaching, I’ve been trying to come up with a recipe that just screams spring. I knew that in order to encompass this season completely, it had to be bright, fresh, warm, refreshing, light and airy. I wanted something that could be served at any spring holiday meal.

I was going to make something with squash but my mom told me that’s too wintry and suggested carrots. I knew right when she said it that I’d have to make some sort of carrot pudding/souffle.

The orange color is so bright it reminds me of all the beautiful flowers that start popping up at this time of year. I added a touch of orange zest and juice to give it a citrusy and fresh aroma.  The orange/carrot combo is a delicious one.

I wasn’t sure how it would turn out when it was in the oven, but as soon as I took it out I knew it was exactly what I wanted. Fluffy and delicious, it was everything I’d hoped.

I made this recipe with matzo meal instead of flour, and margarine instead of butter to be sure that it could translate well for Passover (not all recipes do), but obviously using flour and butter would work equally well, if not better and could be served for Easter brunch/dinner.


Carrot Orange Pudding Souffle

Recipe by Me

Print this recipe!

serves 6-8

1 3/4 lbs carrots, peeled and chopped
1 Tbsp fresh orange juice
1/2 cup margarine/butter, softened
1/2 cup sugar
zest of 1 orange (about 1 Tbsp)
3 eggs, beaten
1 1/2 tsp baking powder
1/4 tsp salt
2 Tbsp matzo meal/flour
Powdered sugar for garnish

Preheat oven to 350.

Bring a large pot of water to a boil. Add carrots and cook til tender, about 30 min. Drain and transfer to a medium bowl. Mash with a potato masher or fork. Add orange juice and mix. Cool to room temp.

Using an electric mixer, beat margarine/butter til creamy. Beat in sugar and zest til blended. Add eggs and beat til blended and slightly more voluminous. Mixture may look curdled but that’s ok.

Add carrots to egg mixture and blend.

In a small bowl, combine salt, baking powder and matzo meal/flour. Stir completely to blend. Pour into a 2 quart baking dish.

Bake 1 hr 15 min or until top is golden brown. Best served at room temperature or cold. Dust with powdered sugar before serving if desired.

*Note, I double checked and baking powder IS kosher for Passover :)


A lot of people dread the week-long holiday of Passover because of its slightly restrictive dietary rules. In all honesty, it’s really not all that bad. Sure, if you eat a lot of matzo all week long, you may end up being so bloated you resemble a matzo ball. But in reality there are many foods that you’re still able to eat during the holiday, not involving the dreaded matzo.

The key is to find recipes that you make during the year that happen to involve all ingredients allowed on Passover. The fewer Passover substitutions, the better. For example, potatoes are fine, as are eggs, meat, fruits and veggies..or your favorite flourless chocolate cake recipe ;) If you have a recipe that involves a scant amount of flour, replacing it with matzo flour (see below for description) or potato starch is fine. Obviously trying to bake a regular cake wouldn’t work, as flour is a primary ingredient. Catch my drift?

For those of you who are unfamiliar with the holiday, Passover commemorates the story of the Exodus, in which the ancient Israelites were freed from slavery in Egypt.  When Pharaoh freed the Israelites, it is said that they left in such a hurry that they could not wait for bread to rise. In commemoration, for the duration of Passover no leavened bread is eaten. Matzo (flat unleavened bread) is the primary symbol of the holiday.

Thus, many passover foods revolve around this dry (and not very tasty) cracker. Although you can’t use flour during the holiday, the way of getting around this is to use something called Matzo Flour/Matzo Meal which is simply ground-up matzo in a powdered/coarsely ground form. Again, this is only recommended in recipes in which there is not a HUGE amount of flour, but for the most part, it should work.

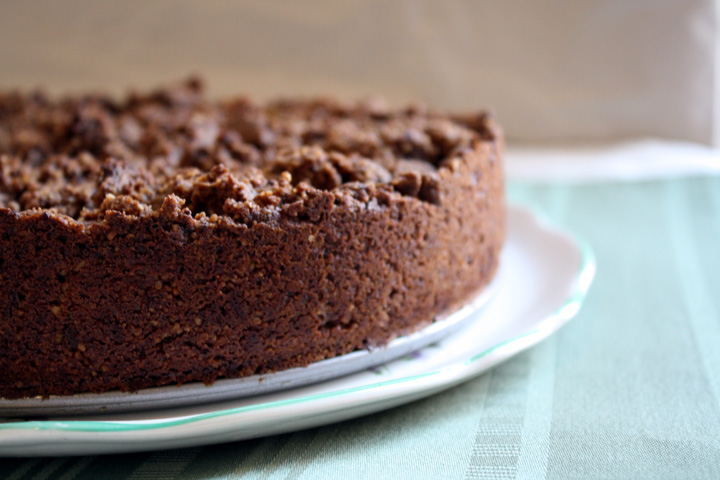
Which brings me to one of my favorite recipes ever: Apricot Chocolate Torte. This recipe actually calls for regular flour and is not a passover recipe at all, but when the simple matzo flour substitution is made, it tastes identical to real thing. This is one of my all time favorite desserts and I often find myself making it at Thanksgiving as well. My mom has been making this for years and I had no idea where it came from (and I’m not sure if she did either) but when I googled the title, it turns out she must have found it on the back of the apricot box :)


Apricot Chocolate Torte

Recipe adapted from the back of the apricot box!

Print this recipe!

Ingredients:

Filling

11 oz. dried apricots, chopped
1-1/2 cups sugar
3/4 cup water
3 Tablespoons matzo CAKE meal-not matzo meal (or regular flour)*
Juice from ½ fresh lemon

Crust
3 oz. Unsweetened chocolate
2 cups whole walnuts
1.5 cups matzo CAKE meal (or regular flour)
3/4 cup firmly packed light brown sugar
1/2 teaspoon salt
1/2 cup (1 stick) unsalted margarine, chilled, cut into pieces **
2 tablespoons cold water
2 teaspoon vanilla
1 oz. shaved semi-sweet chocolate for garnish

Directions:

Filling
Combine all ingredients in heavy saucepan. Bring slowly to a boil over low heat. Reduce heat & simmer, stirring frequently and mashing any large pieces of apricot, until mixture resembles thick jam – about 25 minutes.

Crust
Preheat oven 350°F

Place chocolate in bowl of processor and chop roughly. Add nut and chop coarsely. Add flour, sugar & salt then blend. (Bits of chocolate and walnut should be clearly visible). Add butter & process to blend. Add water and vanilla then mix, pulsing the on/off button of your food process until mixture is crumbly.

In an 8 or 9 inch Springform pan, pat 2/3 of dough into the bottom and 1 inch up the sides. Add filling. Crumble additional dough over the top to cover. Bake 40 minutes. Let cool.

Decorate top with shaved chocolate if desired.

*Feel free to use regular flour in place of the matzo flour and use this recipe all year long!
**Use butter in place of margarine when not making for Passover.

So I know I’m several weeks late for St. Patrick’s Day, but I was already late for Purim, so I was just trying to continue the trend.  Plus, since this recipe is very different from traditional soda bread anyway, it’s really just like a giant cheesy biscuit. The simplest of the simple to accompany any weeknight dinner.
This bread uses one bowl and you don’t even have to dirty your counter or get out your rolling pin!

Traditional soda bread contains sugar and usually raisins, but since I wanted it to go along with a savory dinner I wanted something a little different. I compared a bunch of recipes and kind of combined them all, plus added cheddar because everything’s better with a little cheese.


Cheesy Soda Bread
Recipe by Me

Print this recipe!

serves 4 people (or 1 Nate)

2 cups all-purpose flour
1 tsp salt
3/4 tsp baking soda
3/4 cup milk, or as needed
1 cup shredded cheddar cheese
1 egg

Preheat oven to 375. Line baking sheet with parchment paper.

In a bowl, mix the flour, salt and baking soda until well combined. Add in milk, several tablespoons at a time, until the mixture forms a soft dough (add additional milk if too dry).

The dough will be sticky. Add cheddar cheese and mix until you can handle dough without it sticking too much to your hands. Knead dough in bowl until cheese is fully incorporated.

Roll dough into a ball, flatten slightly. Put on baking sheet and brush with beaten egg. Slice dough in half,  pressing knife at least halfway through the loaf, but not completely severing. Repeat in other direction, forming loaf into 4 equal quarters, still connected on the bottom.

Bake in preheated oven until golden brown, 50 min. or longer if needed.