DIY Dinosaur Planter ~ ElephantEats.com

This post, while being a how-to, is really more to give you a fun idea for a present, since I’m sure you could figure out how to make it like I did. 

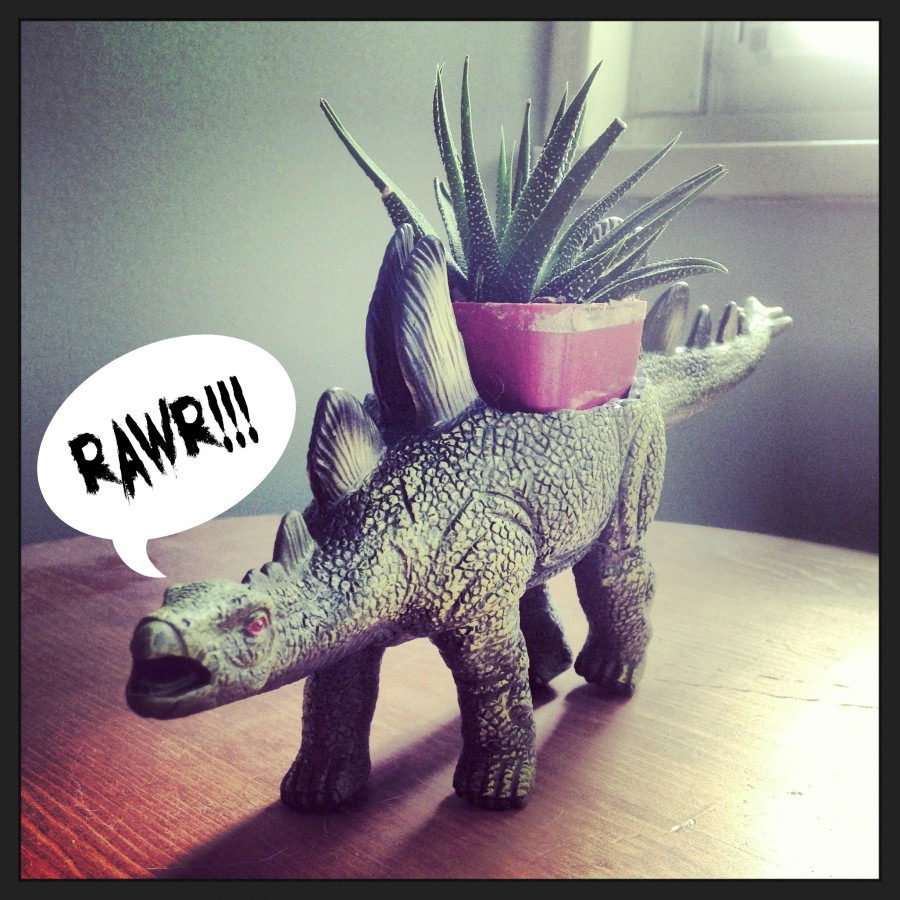
A dinosaur planter is a great decor idea for your dino-obsessed child’s bedroom…or makes a cool desk adornment for your dino-obsessed 30-something year old husband :)

I made this gift to go along with Nate’s bigger birthday present that I got him- a glass blowing lesson! 

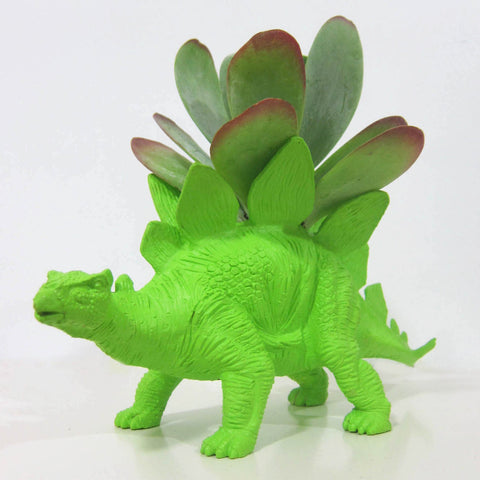
I had gotten the idea to make this after seeing something similar sold on the website theplaidpidgeon.com:

Stanley the Stegosaurus

They were charging $30 for this baby, plus shipping, and of course being the cheap DIY-er that I am, i asked myself the question that I seem to ask myself quite frequently, “why would I pay for that when I could make it for half the price?!”

Well, in the end mine ended up costing about $15 (if you don’t count the extra $10 I paid for the wrong size plant I bought, that I couldn’t return). Plus, it was made with love <3

I’ll admit mine isn’t quite as nice as the inspiration piece, because the dino wasn’t deep enough to hide the planter, but I think it’s still pretty cool. You could easily find a better, deeper dino but I had a limited selection in my over-priced nyc toy store. I imagine Toys ‘R Us probably has some cheaper dinos.

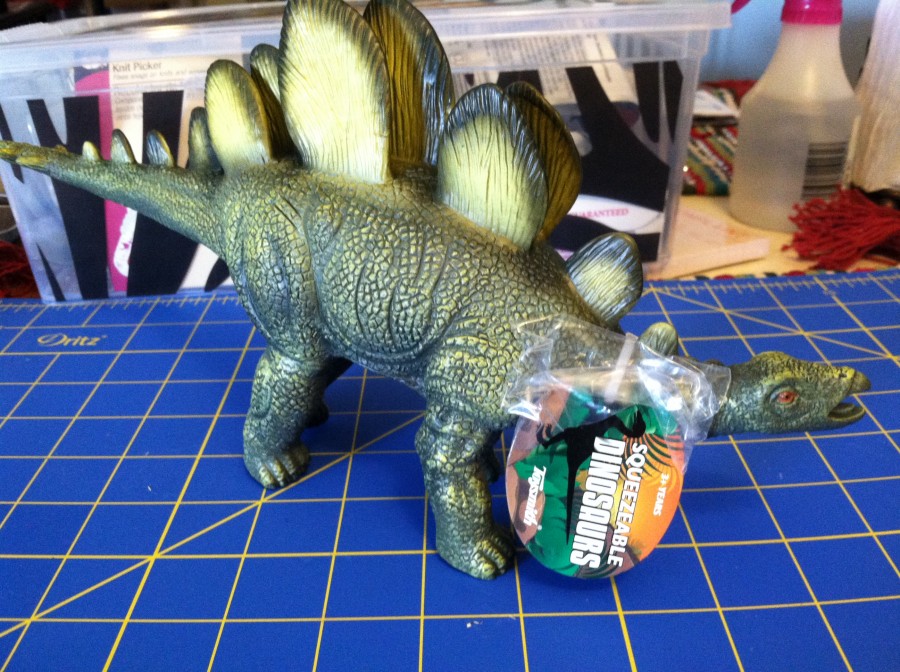
I wasn’t sure I’d be able to find an appropriate dinosaur for my project. The inspiration picture seemed to be a dinosaur made of hard plastic, but I knew I had no tools good enough for carving such a thing. I was on the lookout for something softer, but sturdy enough to stand up on its own.

DIY Dinosaur Planter ~ ElephantEats.com

After checking out a couple toy stores, I finally found this dino for $10 at Mary Arnold Toys on the Upper East Side. I thought $10 was a little steep for something about 4″ high, but what can you do. I mean, this was a birthday present after all.

To get started I estimated about how big the succulent plant I saw at the floral store was (about 2″ in diameter) so i would know how big a hole to cut.

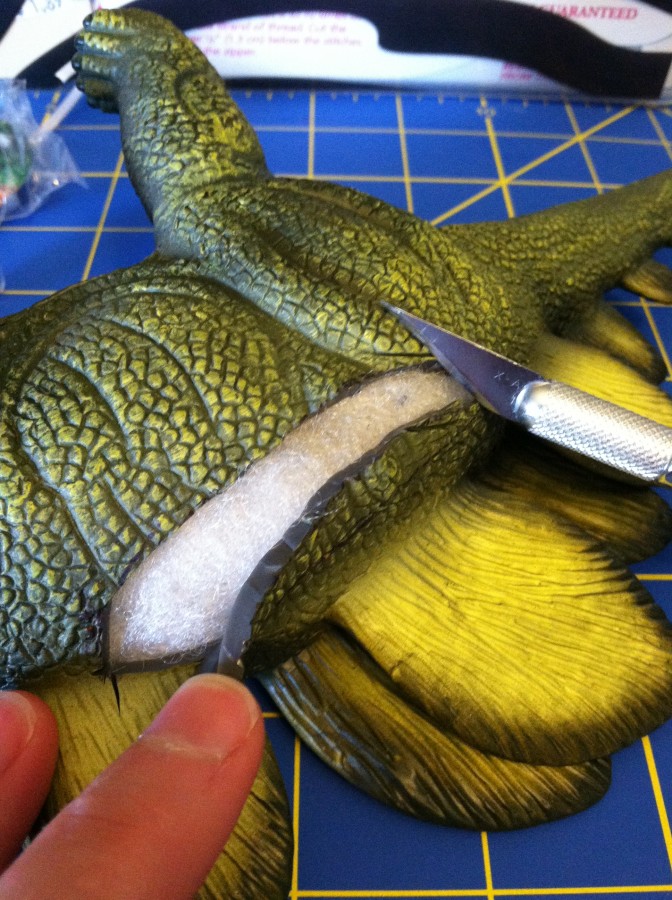
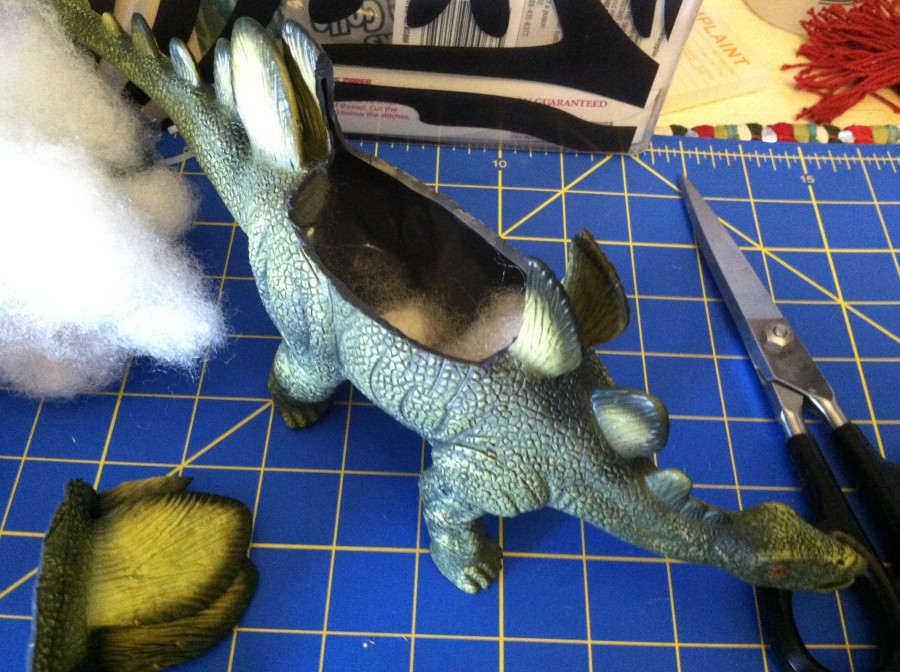
Then I set my little dino on her side, stroked her little head and told her I was sorry. A single tear rolled down her scaley cheek. I wiped it away and performed a small operation to remove a chunk of her back. 

DIY Dinosaur Planter ~ ElephantEats.com

 **No actual dinosaurs were harmed during the making of this project**

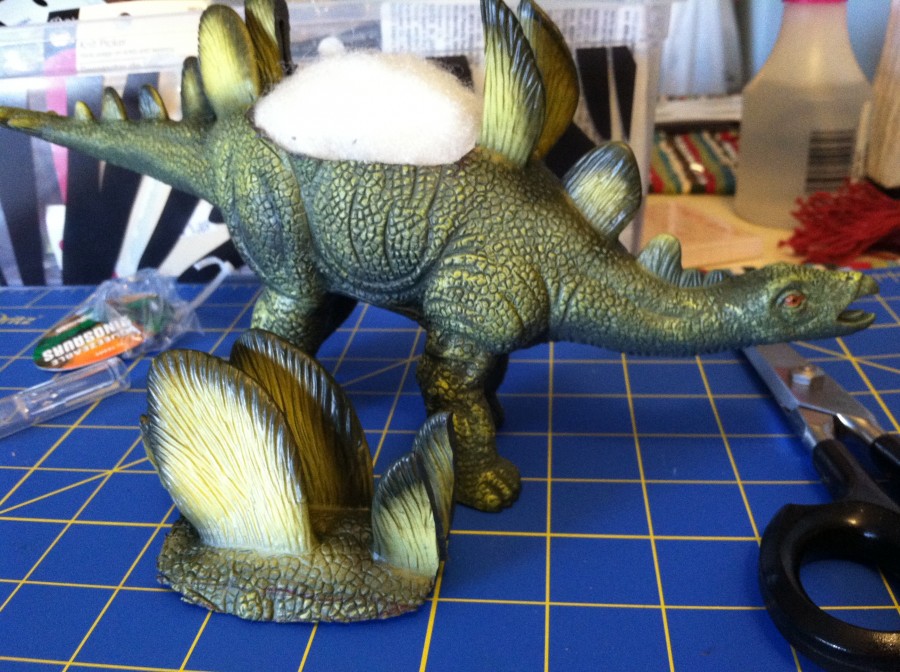
She was fine- no blood at all. In fact, this dino happened to be filled with stuffing, so I took the stuffing out of the middle part but left it in the head and tail pieces so she didn’t completely deflate.

DIY Dinosaur Planter ~ ElephantEats.com

DIY Dinosaur Planter ~ ElephantEats.com

Since I was told the plant needs to breathe and needs drainage, I put the planter in the bottom of a little cup. This way you can pour out any excess water that drains by taking the cup out, since the inside of the dino would be harder to clean.

And then I surprised the birthday boy with a little dinosaur buddy he could share his desk with.

According to Nate, she (apparently it’s a girl)is  currently “guarding his inbox:”

Nate's Birthday 2013

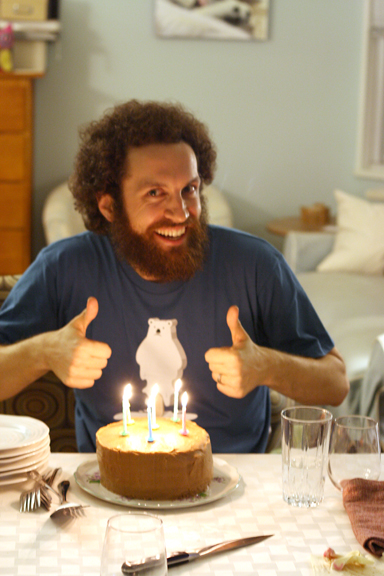
Beardo is how I affectionately refer to my husband, Nate. I think you can figure out why. 

As I mentioned in my last post, we had a little get-together, where I cooked up dinner for 6 of Nate’s closest friends. 

Having vegetarians to dinner always makes it hard for me to plan a menu. It’s easy to leave out any animal protein, but then there’s only so much you can do with legumes as your protein…and I never have the courage to serve soy products, for fear the non-vegetarians in the group would hate me forever.

Butterscotch Cake ~  ElephantEats.com

I decided to try not to think about how balanced the meal was and went with a slow-roasted tomato pasta dish, beets with mint, homemade marinated mushrooms, some asparagus with chopped tomatoes and a vinaigrette, and some good crusty bread. I’ll try to share some of the recipes with you soon.

I also had some cheese and crackers, and nuts for an appetizer, plus there was cheese in the pasta, so I figured that was plenty of protein for the vegetarians. I served some turkey sausage on the side so the meat eaters wouldn’t feel too deprived.

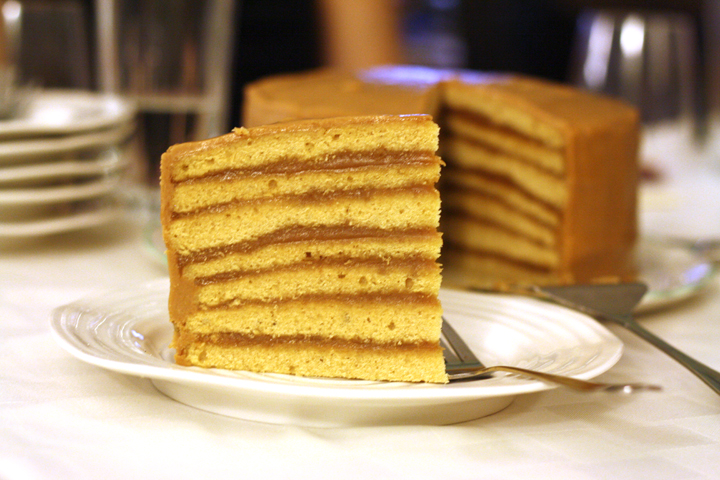
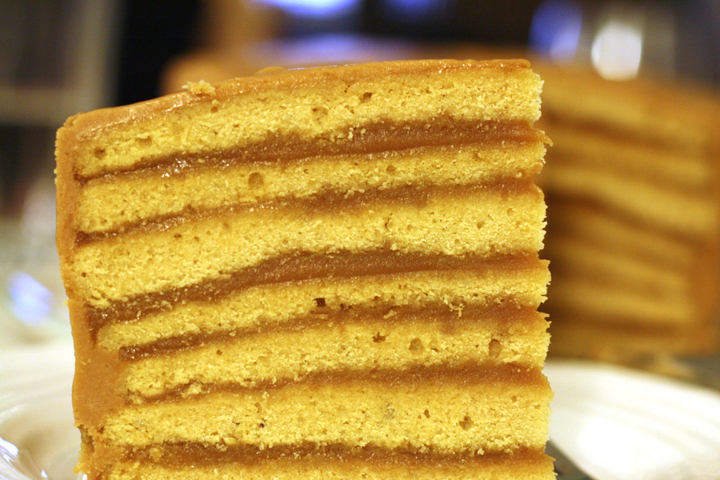
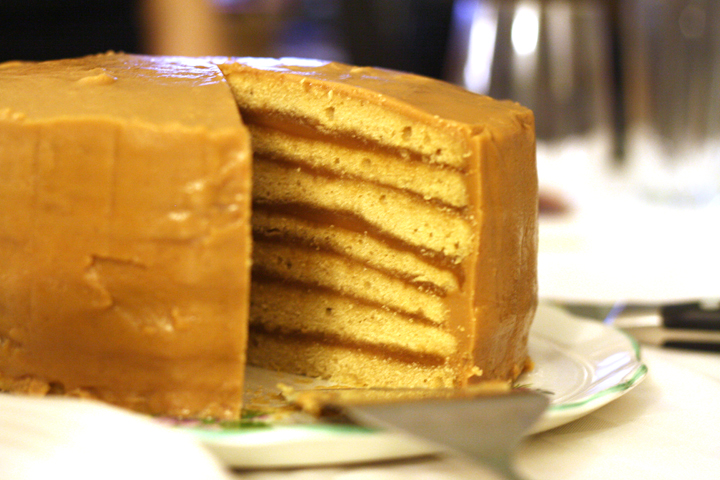
But the real star of the show was this 9-layer butterscotch cake.

Butterscotch Cake ~  ElephantEats.com

If you noticed my cake only has 7 layers, well you’re very perceptive. That’s because I generously scooped the batter into the prepared pans, thinking it was only supposed to be six layers. When I got to layer 4, I realized my error but by that point I had already baked 3 layers. There was still time to correct it to 7 layers but I couldn’t get 9 out of the remaining batter, and figured it would still look impressive and no one would know the difference. Thankfully I was right.  

All of the comments of this cake on the site I got it from raved about it’s amazingness. It was definitely good but was SO rich. I cut Nate a huge piece not knowing, and he proceeded to eat the whole thing, though I’m not sure how. I think, being the sweet husband that he is, he didn’t want to offend me by not finishing what I served him. I cut myself a small piece and made myself nauseous finishing it.

The cake was definitely impressive-looking, tasted good, and I was proud of myself for making a homemade butterscotch… but aside from that I think it wasn’t worth the effort to attempt it more than once in a lifetime.

Butterscotch Cake ~  ElephantEats.com

*Helpful notes if you try this yourself:

When you go to reheat the butterscotch for the top and sides of the cake, make sure you use a heavy-bottomed saucepan over EXTREMELY low heat.

I think my pan wasn’t “heavy” enough and the butterscotch completely separated. I was ready to cry since it took me about 45 minutes of stirring over a hot pot to make that damn butterscotch, but I was thankfully able to salvage it. The butter basically separated out so I poured it off and had a butterscotch that was more spread-able than pourable, but still tasted exactly the same. So it worked out…phew! If it hadn’t worked, I probably would have thrown my brand new pot out the window, along with the cake and anything else nearby. Hopefully my cat would know well enough to run into the bedroom to hide. 

Also, since there was so little batter that you had to spread it as evenly as possible in the pan, the layers were all slightly uneven/lumpy. When I stacked them I noticed they were sagging on the sides since the middles were so much higher. So i took each cake layer and very carefully shaved off the top of the middle section to make them as flat and even as possible. It wasn’t too hard to do with a good, sharp serrated knife.

I didn’t change a thing, so you can find the recipe here at Leite’s Culinaria

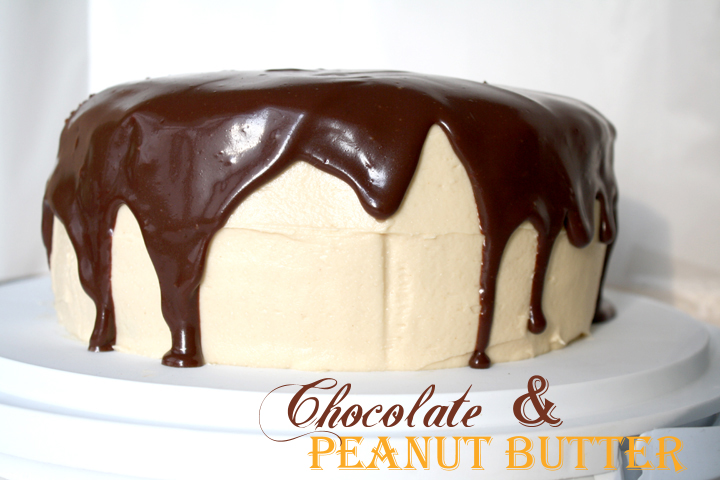
Chocolate Peanut Butter Cake

As you all know, this past Thursday was Nate’s birthday….or as Nate likes to call it, the day he’s “on vacation.” By this he means that I’m not allowed to make him run any errands.

Nate’s currently home during the day while I’m at work, and as most of us working folk know, most stores that you need to run errands at are only open during the hours we’re at work. So annoying, right?! I’ve been having Nate run some errands for me and he’s been none too pleased.
Chocolate Peanut Butter Cake

I did really want to give him “the day off” on his birthday, but my library books were about to expire so I asked him to do me a favor and return my books to the library across the street from our apartment. I don’t even want to tell you how much he complained….but then I reminded him about this wonderful cake that I’d be serving him that evening. I didn’t hear another word. At least for a day.

Nate is a man of simple tastes, so when it came time to figure out what to bake up for his bday, I only had to think of his few favorite combos: chocolate-mint, red velvet/carrot cake + cream cheese frosting, and of course, chocolate peanut-butter.
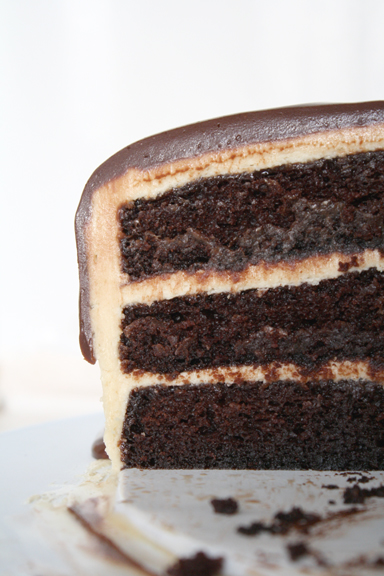
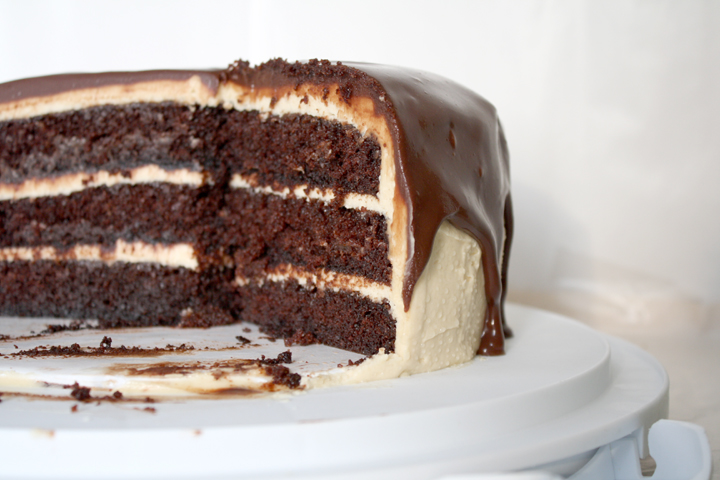
Chocolate Peanut Butter Cake

It seems that Deb’s ( from Smitten Kitchen) husband is a choco peanut butter fan too, and so when I saw this recipe on her site, I knew I had to make it. I’ve had good luck with the recipes on her site because they’re well-tested, so I was pretty sure this one would be a winner.

I have to say that as I added the 1.5 cups of water the recipe calls for and stirred it up, I was slightly skeptical. The batter before the water was added had normal cake consistency but after it was incredibly watery. I checked the site and no one had said anything in the comments about a typo, so I forged ahead.
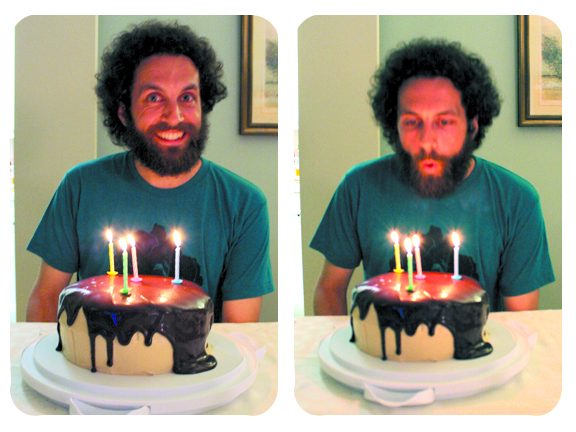
please ignore the giant glob of glaze puddled on that side…

35ish minutes later I had the most fluffy looking cake I’d ever seen. After cooling the cakes in the pans for 20 minutes, I following Deb’s advice and shoved them in the freezer for about 30 minutes, which seems to have been a good choice given how delicate these cakes were.

My only other comment is that the glaze seems kind of clumpy when you melt the chocolate, pb, etc in the pan, but after adding the half and half and vigorously mixing, it smooths out nicely….so fear not!

Anyway, I know this is a bold statement, but I think it may be the most delicious cake I’ve ever made or eaten. Ever. 
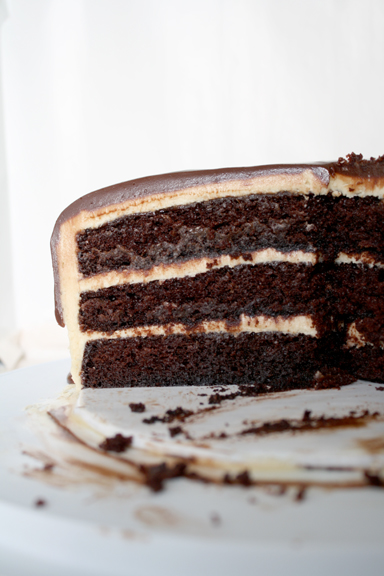
Chocolate Peanut Butter Cake

And I wasn’t the only one who thought that. Nate and I had 3 friends over to dinner and the only sounds coming from them after biting into the cake were ooohs and aaaahs…and a few “this is amazing”s.

I know it may look complicated, but following Deb’s tips regarding the cooling times, it was surprisingly easy. I made the cake and pb frosting and frosted it all within 3 hours or so after I got home from work. After sticking it in the fridge overnight, I made the chocolate glaze the next evening, poured it onto the cold cake, stuck it back in the fridge to firm up while we started eating dinner. I then took the cake out about 30 min to an hour before we were ready for it so it could soften up.

YOU NEED TO MAKE THIS. Seriously, you don’t know what you’re missing.

Sour Cream-Chocolate Cake with Peanut Butter Frosting and Chocolate-Peanut Butter Glaze

From Smitten Kitchen via Sky High: Irresistable Triple-Layer Cakes

Print this recipe!

makes one 8 inch 3 layer cake

2 cups all-purpose flour
2 1/2 cups sugar
3/4 cup unsweetened cocoa powder, preferably Dutch process
2 teaspoons baking soda
1 teaspoon salt
1 cup neutral vegetable oil, such as canola, soybean or vegetable blend
1 cup sour cream
1 1/2 cups water
2 tablespoons distilled white vinegar
1 teaspoon vanilla extract
2 eggs

1. Preheat the oven to 350 degrees F. Butter the bottoms and sides of three 8-inch round cakepans. Line the bottom of each pan with a round of parchment or waxed paper and butter the paper.

2. Sift the flour, sugar, cocoa powder, baking soda, and salt into a large bowl. Whisk to combine them well. Add the oil and sour cream and whisk to blend. Gradually beat in the water. Blend in the vinegar and vanilla. Whisk in the eggs and beat until well blended. Scrape down the sides of the bowl and be sure the batter is well mixed. Divide among the 3 prepared cake pans. **Note batter will be incredibly watery

3. Bake for 30 to 35 minutes, or until a cake tester or wooden toothpick inserted in the center comes out almost clean. Let cool in the pans for about 20 minutes. Invert onto wire racks, carefully peel off the paper liners, and let cool completely. (Deb’s note: These cakes are very, very soft. I found them a lot easier to work with after firming them up in the freezer for 30 minutes. They’ll defrost quickly once assembled. You’ll be glad you did this, trust me.)

4. To frost the cake, place one layer, flat side up, on a cake stand or large serving plate. Spread 2/3 cup cup of the Peanut Butter Frosting evenly over the top. Repeat with the next layer. Place the last layer on top and frost the top and sides of the cake with the remaining frosting. (Deb note 1: Making a crumb coat of frosting–a thin layer that binds the dark crumbs to the cake so they don’t show up in the final outer frosting layer–is a great idea for this cake, or any with a dark cake and lighter-colored frosting. Once you “mask” your cake, let it chill for 15 to 30 minutes until firm, then use the remainder of the frosting to create a smooth final coating. Deb note 2: Once the cake is fully frosted, it helps to chill it again and let it firm up. The cooler and more set the peanut butter frosting is, the better drip effect you’ll get from the Chocolate-Peanut Butter Glaze.)

5. To decorate with the Chocolate–Peanut Butter Glaze, put the cake plate on a large baking sheet to catch any drips. Simply pour the glaze over the top of the cake, and using an offset spatula, spread it evenly over the top just to the edges so that it runs down the sides of the cake in long drips. Refrigerate, uncovered, for at least 30 minutes to allow the glaze and frosting to set completely. Remove about 1 hour before serving. Decorate the top with chopped peanut brittle.

Peanut Butter Frosting
Makes about 5 cups

10 ounces cream cheese, at room temperature
1 stick (4 ounces) unsalted butter, at room temperature
5 cups confectioners’ sugar, sifted
2/3 cup smooth peanut butter, preferably a commercial brand (because oil doesn’t separate out)

1. In a large bowl with an electric mixer, beat the cream cheese and butter until light and fluffy. Gradually add the confectioners’ sugar 1 cup at a time, mixing thoroughly after each addition and scraping down the sides of the bowl often. Continue to beat on medium speed until light and fluffy, 3 to 4 minutes.

2. Add the peanut butter and beat until thoroughly blended.

Chocolate-Peanut Butter Glaze
Makes about 1 1/2 cups

8 ounces semisweet chocolate, coarsely chopped
3 tablespoons smooth peanut butter
2 tablespoons light corn syrup
1/2 cup half-and-half

1. In the top of a double boiler or in a bowl set over simmering water, combine the chocolate, peanut butter, and corn syrup. Cook, whisking often, until the chocolate is melted and the mixture is smooth. **Note the consistency will be incredibly thick and slightly grainy but this is normal.

2. Remove from the heat and whisk in the half-and-half, beating until smooth. **It will separate before it combines and smooths out. Use while still warm.
Nate has told me before that the dinner he always looked forward to his mom making when he was growing up was pasta with sausage and tomato sauce, with broccoli and garlic bread. So when his 30th birthday was fast approaching, I knew this is the meal I would make for him.

However, when we were down at the shore visiting my parents the weekend before his bday, my mom made a delicious red sauce, and being that Nate’s bday was only a couple days later, I asked him for his next choice.

He told me his second favorite pasta sauce is a light garlic sauce. I immediately thought of a sausage and broccoli rabe combo…but Nate insisted on broccoli. And I’m not one to argue with the Birthday Boy.

*As some readers have pointed out, this sauce wasn’t actually a garlic sauce, but when I set out to make the recipe I thought it was. The sausage and chicken broth impart a seasoned/salty flavor that tastes a lot like a light garlic sauce but without all the oil. And if you really wanted, you’re more than welcome to add garlic!

I knew I wouldn’t have much time to cook when I got home from work, so I did all my market shopping the day before. It’s not like me to do this, but I bought some premade garlic bread…you know the one that comes in foil that you put right in the oven? It made my life a whole lot easier. This really came together super quickly and is perfect for dinner on a birthday, or any day of the year!


Pasta with Turkey Sausage and Broccoli
Adapted from Gourmet (3/06)

Print this recipe!

Makes 4-6 servings

Ingredients:

cooking spray
1 lb italian turkey or pork sausage, casings discarded and sausage crumbled
1/2 lb broccoli florets, coarsely chopped
3/4 lb dried pasta (whatever shape you desire)
2/3 cup reduced-sodium chicken broth
1 oz finely grated Pecorino Romano (1/2 cup) plus additional for serving

Spray a 12-inch heavy skillet over moderately high heat until hot but not smoking, then cook sausage, breaking up any lumps with a spoon, until browned, 5 to 7 minutes.

Meanwhile, cook pasta in a pot of boiling salted water. When pasta is al-dente, remove using a slotted spoon and set aside. Add broccoli to the pasta water and blanch, 1 min.  Reserve 1 cup pasta-cooking water, then drain broccoli in a colander.

Add broccoli to sausage in skillet and sauté, stirring frequently, until just tender, about 1-2 min. Add broth, stirring and scraping up any brown bits from bottom of skillet, then add pasta and 1/2 cup reserved cooking water to skillet, tossing until combined. Stir in cheese and thin with additional cooking water if desired.

Serve immediately, with additional cheese on the side.

Ever since Nate’s last birthday, I’ve been plotting and planning a cake to top what I made him last year. He told me that his fave cake flavors are Red Velvet or Carrot Cake.

But I knew a Red Velvet Cake alone wouldn’t be special enough for his 30th birthday. So I thought bigger.

Nate told me that when he was younger, he loved rainbow sherbert and tye-dye, and basically all things colorful. So I knew when I was scoping the web and saw pictures of Rainbow Cakes, I’d have to do something similar.

However, I don’t have 6 separate pans for different colors, so I thought about putting all the colors in one pan, for more of a tye-dye effect, and only used 2 pans for 2 layers. I had seen that others had already tried this so I knew it would work out.

The only thing that worried me is that all of these were done with white cake, so the colors were very vibrant. I’d be using red velvet batter, though, which is already tinted slightly brown from the cocoa.

In the end, it certainly wasn’t as bright as it would have been with white cake, but it was pretty darn awesome.

But the best part was seeing everyone’s face when I cut the first slice. Nobody had a clue of what was inside that innocent looking white-frosted cake :)

Happy 30th Birthday, Nate! I can’t wait to celebrate many more with you…


Rainbow Velvet Cake with Raspberries and Blueberries
Adapted from Bon Appetit

Print this recipe!

Make one 9-in layer cake

Ingredients:

Cake
2 1/4 cups sifted cake flour (sifted, then measured)
2 tablespoons unsweetened cocoa powder
1 teaspoon baking powder
1 teaspoon baking soda
1/2 teaspoon salt
1 cup buttermilk
1 teaspoon distilled white vinegar
1 teaspoon vanilla extract
1 1/2 cups sugar
1/2 cup (1 stick) unsalted butter, room temperature
2 large eggs
Red, Orange, Yellow, Green, Blue, Violet food gels

Frosting
2 8-ounce packages cream cheese, room temperature
1/2 cup (1 stick) unsalted butter, room temperature
1 tablespoon vanilla extract
2 1/2 cups powdered sugar

3 1/2-pint baskets fresh raspberries
3 1/2-pint baskets fresh blueberries

Preparation:

Preheat oven to 350°F. Butter and flour two 9-inch-diameter cake pans with 1 1/2-inch-high sides.

Sift sifted flour, cocoa powder, baking powder, baking soda, and salt into medium bowl.

Whisk buttermilk, vinegar, and vanilla in small bowl to blend. Using electric mixer, beat sugar and butter in large bowl until well blended. Add eggs 1 at a time, beating until well blended after each addition. Beat in dry ingredients in 4 additions alternately with buttermilk mixture in 3 additions.

Divide batter evenly into 6 small bowls. Add food gel to each of 6 bowls, about 1/4 tsp each or until desired color is achieved.

Drop the colours, one by one, into the middle of the pan, in neat concentric blobs.

When you’re three colours in, start doing the reverse with the other pan. Since I’m going in rainbow order: red, orange, yellow, green, blue, purple, I got from red to yellow in the first pan, then purple, blue, green in the second. This is so that your two pans are equal if your measurements aren’t exact (and they’re not likely to be).

For a good visual of how to do this, view here.

Bake cakes until tester inserted into center comes out clean, about 25-30 min minutes. Cool in pans on racks 10 minutes. Turn cakes out onto racks; cool completely.

Beat cream cheese and butter in large bowl until smooth. Beat in vanilla. Add powdered sugar and beat until smooth.

Place 1 cake layer, flat side up, on platter. Spread 1 cup frosting over top of cake.

Arrange 1 basket raspberries and 1/2 basket blueberries atop frosting, pressing lightly to adhere.

Top with second cake layer, flat side down.

Spread remaining frosting over top and sides of cake. Arrange remaining berries decoratively over top of cake. (Can be made 1 day ahead. Cover and refrigerate. Let stand at room temperature 1 hour before serving.)

Cut into cake and watch the amazement on everyone’s faces!