Nate, his mom, and I are up in Cape Cod this weekend for the marathon. He’s taking a break from his usual full marathons and only running the half. Yeah, this is like a piece of cake to him. Meanwhile, I doubt I could even run 1 mile right now.

I totally forgot about posting this for the Daring Bakers today so I’m getting this post up quick.

In case you were wondering, Povitica (pronounced po-va-teet-sa), is traditional Eastern European dessert bread that is usually served during the holiday season. It is also known as Nutroll, Potica, Kalachi, Strudia, just to name a few.  I’m not sure if it’s related to Babka, but it seems very similar to that as well. Each loaf is filled with a sweet filling and rolled, and weighs an amazing 2.5 pounds!

The traditional filling for this bread is an English walnut filling, but other typical fillings also include apple/cinnamon, apricot preserves, and a sweet cheese (like cream cheese). I chose to make one traditional and one with a chocolate twist on the traditional.

The recipe called for ground walnuts, but I used chopped, and it really messed up the traditionally-filled one. Rather than having a sweet paste in the middle, the sugar got absorbed by the dough and I was left with just a nutty bread.

For the chocolate one, I replaced one cup of the nuts with a cup of dark chocolate chips and decreased the sugar amount by half. It was mighty tasty!

You’ll have to excuse me for not writing much, as we’re about to head out to get dinner! Anyway, I took off work today and tomorrow so I’m psyched for this long weekend :)

Blog-checking lines: The Daring Baker’s October 2011 challenge was Povitica, hosted by Jenni of The Gingered Whisk. Povitica is a traditional Eastern European Dessert Bread that is as lovely to look at as it is to eat!

The recipe was long and detailed, but if you’d like to make the recipe, visit here

The weather in NYC is finally starting to feel like it should for this time of year. I’ve had to wear long sleeves AND a jacket, when I only needed one or the other up til now. And I’m loving it!

The leaves are changing, the air is crisp and it smells so good out! Nate and I went up to New Paltz this past weekend to go rock scrambling and the leaves were totally gorgeous. It was quite a hike up to the top, but when we got there, the view was absolutely worth it…

…don’t you think?

Despite working up a sweat during the climb, as soon as we got back to normal walking I was chilled to the bone. Weather like this makes me crave a thick, steaming bowl of something comforting. I’ve been wanting to make chili but Nate doesn’t like beef and we both love vegetables so much that I decided to go vegetarian all the way :)

I have to say that this came out a bit less “meaty” than I typically think of chili, but it was good none-the-less. I think perhaps adding more beans would have bulked it up and improved on the lack of meat, but I’m not a huge fan of beans.

You can totally customize this by adding whatever veggies you want. I bet anything would be delicious! I served mine over pasta because Nate needs something besides veggies to fill up his belly…and I happened to have some pasta in the fridge. Over rice would be great too.

*Disclaimer: if you live in a teeny apartment like mine, your whole place will smell like chili for the next week.

Smoky Vegetarian Chili

Recipe by Me

Print this recipe!

Serves 8

Ingredients:

1 Tbsp olive oil
2 large sweet onions, chopped
1 red bell pepper, chopped
1 orange bell pepper, chopped (or red if unavailable)
2 yellow summer squash, diced
3 cloves garlic, minced
1 bunch fresh cilantro, stems and leaves separated but both chopped
10 oz. frozen corn kernels, thawed
1.5-2 cups vegetable stock (i actually used chicken but that obviously would make it non-vegetarian)
Three 15-oz cans diced tomatoes with chiles
One 15-oz can kidney beans, rinsed and drained
2 tsp salt
2 Tbsp chili powder
2 Tbsp ground cumin
1 bottle dark Mexican bear
2 tsp liquid smoke (can be found in all supermarkets)
Sour Cream, shredded cheese, limes, avocado as desired for garnish

Preparation:

Heat oil in large pot over medium heat. Add onions and peppers and saute until they’re beginning to caramelize, about 8 min.

Add squash and garlic, and saute til tender, about 5 min.

Add cilantro stems and tomatoes to pot and bring to a simmer. Add beans, salt, chili powder, cumin, beer and the stock (start with 1.5 cups and add more if you like your chili thinner). Simmer uncovered, stirring frequently until the chili thickens and the vegetables soften, about 30 min.

Garnish as desired, and dig in!

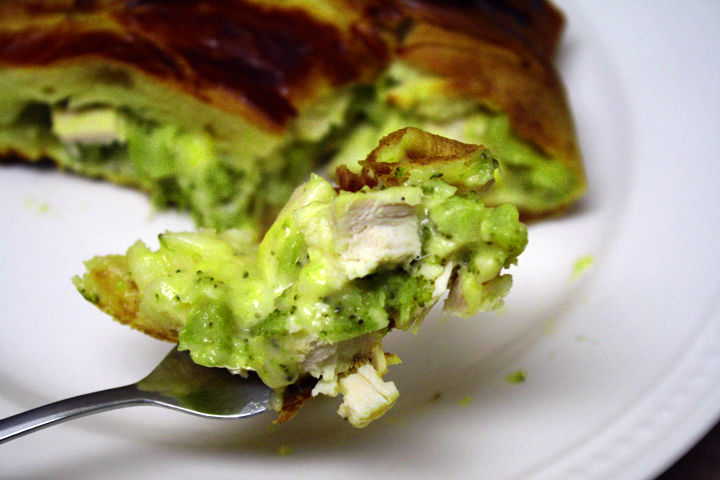
Broccoli Chicken Cheese Braid ~ ElephantEats.com

I’ve been hoping I’d come across a recipe to use that leftover chicken breast I had from a different recipe that was all cooked and chopped in the freezer.

So when I was doing my usual browsing on Pinterest yesterday and came across a pic that looked tasty, I was excited to see its main ingredient was 2 cups of chopped chicken!

I checked out the rest of the recipe and it seemed like it couldn’t be more simple. It was 6 ingredients and only took 30 min to bake.

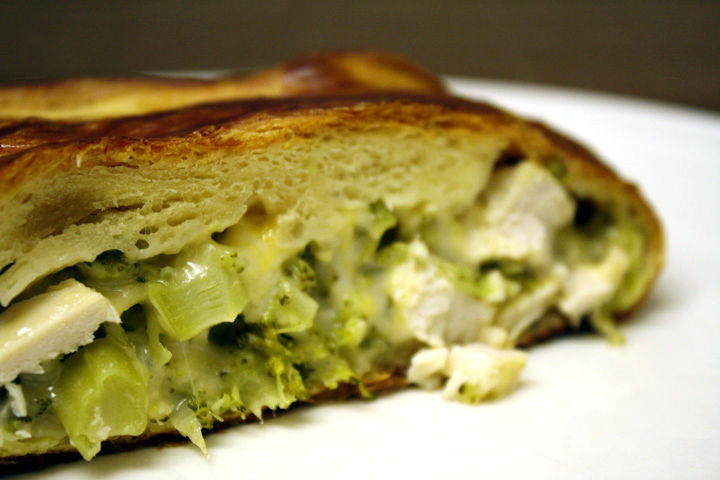
Broccoli Chicken Cheese Braid ~ ElephantEats.com

Since you all know I’ve been super busy and short on time, I thought this would be the perfect opportunity to finally get a blog post up.

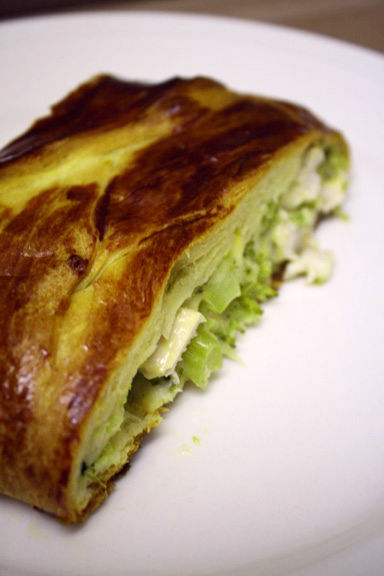
Broccoli Chicken Cheese Braid ~ ElephantEats.com

This turned out totally delicious and I think it’s extremely kid friendly! I hope you enjoy :)

P.S. Sorry the color in my pictures stinks. For a more appetizing view of this recipe, click on the Food Family Finds link below.


Broccoli Cheddar Chicken Braid

Adapted from Food Family Finds

Print this recipe!

serves 5

Ingredients
2 cans Pillsbury Original Crescent Rolls or 2 cans Pillsbury seamless sheet
2 cups chicken chunks, cooked
2 cups cheddar cheese
1 10-oz box frozen chopped broccoli, thawed and drained
1/2 cup light mayonnaise
1 egg yolk

Preheat oven to 375 degrees F.

On a parchment paper lined cookie sheet, spread both cans of crescents, sealing the long edge of one sheet to the long edge of the other.

Press each of the seams to form a single layer of dough.

In a large bowl, combine chicken, cheese, broccoli and mayonnaise

Spread mixture over the center of the croissant dough evenly to create a log. It should be in a rectangle perpendicular to the seam.

Using a sharp knife or kitchen shears, cut horizontal strips 1 inch apart down each side of the crescent dough bordering the chicken mixture.

Fold the end up and over the chicken. Then fold the dough strips over the top of the chicken mixture, alternating left and right to create a braid.

Brush the top of the braid with a beaten egg yolk.

Bake for 28 – 30 minutes until golden brown. 

Nate and I went down to PA this weekend to visit his mom. We also went to an open house at the venue we wanted to possibly use for the wedding and loved it. So we put our deposit down and officially booked the venue and have a date! So exciting. I can’t believe we’re going to be married next October!

While there, we went pumpking picking because Nate had decided that I was going to carve a Where the Wild Things Are pumpkin. There were slim pickins at the pumpkin patch this year. I think maybe all the rain we got wiped out their supply?

I did a lot of walking around and comparing, assessing my canvas, until I found one that would be perfect for carving the image I wanted.

Nate found a good one too.

I spent a little while browsing pictures online til I found one I liked:

I then removed the pumpkin top and scraped it out. I saved the seeds and roasted them with some salt, paprika and garlic powder…taaasty! Totally reminds me of carving pumpkins when I was little because my mom would roast the seeds for us.

Next I sketched out the image freehand on the pumpkin with a pen.

Then I used some wood carving tools I got at Michaels to scrape away the image to the best of my ability. I realized that you have to kind of carve a reverse relief. The parts that you want to look the closest have to be the deepest, and hence the brightest. I found putting the pumpkin in my lap made the carving easiest.

And here’s the final product, all lit up on the front porch!…Nate chose to do a traditional Jack-O-Lantern :)

Now, what should I carve next year. Ideas?!

I was on my way to my friend’s apartment recently, and as usual was running seriously early. I never really understood people who are always fashionably late. I get so nervous that the subway will be delayed or the walk will take longer than expected that I allow WAY too much time.

It doesn’t really bother me, though, because I’m pretty good at keeping myself entertained. Sometimes this involves window-shopping, other times I find a good place to sit and either read the book that I always carry with me, play on my phone (i.e. pretend I’m doing something really important so people don’t look at me weird), or just occupy myself with my own thoughts.


It’s amazing how many random thoughts are going on in my head at any one time. Nate can attest to this, as I blurt out irrelevant things that makes sense to me at the time (Duh, I’m thinking about them!), but make no sense to Nate. He actually caught my incoherent blabbering on video the other day, unbeknownst to me. After watching it played back for me, I gotta say that I feel pretty bad for the guy and don’t know how he puts up with me.

As you can see, I’m very good at going off on a tangent! Aaaaanyway, so the other day when I was early and needed to waste some time in the Times Square area, I saw a store called World of Chocolate and could not refuse a quick time-wasting trip. I have to say, the name of the store was quite deceiving. It was a pretty big let-down considering it was all of about 100-200 sq feet of space and only had Hershey’s products.

While perusing the aisles, I came across a bag of mini Reeses Peanut Butter cups. Not only were they totally adorable (I love anything miniature!), but I imagined they’d be absolutely perfect for a cookie recipe. I was thinking pb or chocolate base but hadn’t made a final decision yet.

So I took these adorable chocolates home and waited til I had a spare moment to create something. I started with the recipe I had created for the Chocolate Chocolate chip cookies, but to add some extra pb flavor, I subbed peanut butter in place of the butter in the recipe. I wasn’t exactly sure whether this would work or not.

As I started to blend the batter I realized how dry and thick it was, so I threw in another egg. Again, I had no idea what this would do.

While the batter was still rather thick, I put giant 1/4 cup balls of dough on the sheets a

nd baked them up. When I took them out of the oven and onto the drying rack I was a little worried since each cookie felt like a brick. I swear, so heavy! So don’t get worried when your cookies turn out heavy too.

At this point I was slightly worried that they’d be all dried out on the inside. But lucky for me, this recipe ended up a win! They were the fudgiest chocolate cookies ever. Nate gave them a giant thumbs up!!

If you can’t find mini pb cups, you could easily chop regular pb cups into 1/4-1/2 inch sized pieces.


Chocolate-Peanut Butter PB Cup Cookies

Recipe by Me

Print this recipe!

makes 18-ish LARGE cookies

2 cups all-purpose flour
1/2 cup dutch processed cocoa powder
1/2 tsp baking soda
1/2 tsp salt
1/2 cup peanut butter
4 Tbsp melted butter
1 cup packed brown sugar
1/2 cup white granulated sugar
3 eggs
2 tsp vanilla extract
1 1/2 cups mini reese pb cups (or chopped reeses pb cups)

Heat oven to 325 degrees and have racks on upper & lower middle positions. Put parchment paper on 2 oversized cookie sheets (or do it in batches with smaller cookie sheets).

Whisk together flour, cocoa powder, salt & baking soda in medium size bowl. Set aside.

Mix peanut butter,  butter & sugars until thoroughly blended by hand or with electric mixer. Beat in eggs and vanilla until combined.

Add flour mixture to butter mixture and beat at low speed until just combined. Stir in pb cups.

Roll scant 1/4 cup dough into ball. Put ball on cookie sheet leaving 2.5 inches between each ball.

Bake about 15 – 18 minutes, switching sheets halfway through reversing sheets front to back and top to bottom. Cool cookies on cookie sheets. When cool, peel from parchment.

*Note, cookies will be very heavy when cooked!