Smoked Cheddar Sweet Potato Pot Pie

While Nate’s been gone, I’ve been getting my fill of girly activities. This past weekend one of my best friends (and one of my Maid of Honors at my wedding), Emily, came into the city from Jersey. She spent all day Saturday with me, and we did a ton of walking.

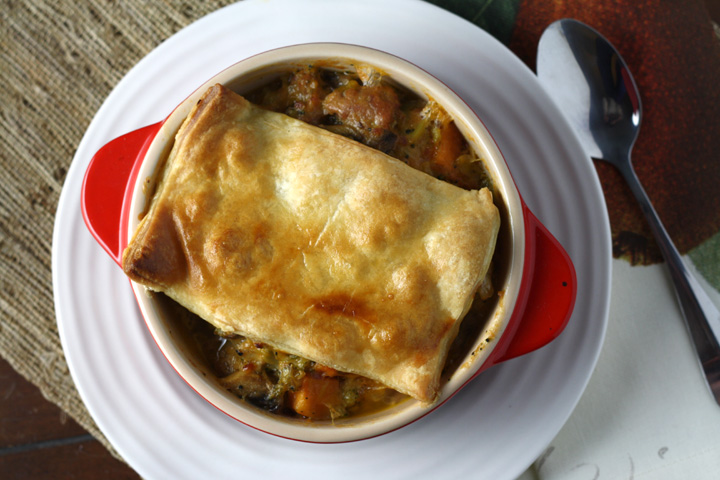
Smoked Cheddar Sweet Potato Pot Pie

Since she had travelled so far to get to me, we planned for a sleepover! Since we had worked up an appetite walking around the city, we decided to make this yummy dinner. Then we watched chick flicks :) As much as I miss my hubby, getting to have girl time was great.

If you can believe it, I actually lightened up the recipe I based this from considerably, while adding veggies to give it more bulk per serving. It’s still fairly high in fat content (due to the turkey sausage…who knew??), but it’s only about 500 calories per serving, which is pretty reasonable for a tasty and filling dinner.
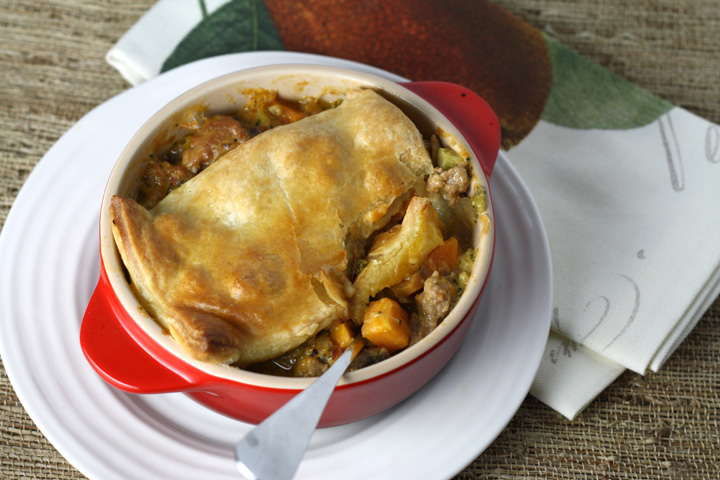
Smoked Cheddar Sweet Potato Pot Pie

The smoked cheddar is vital to this recipe, as it adds an amazing flavor. I don’t think it would be nearly as good with regular cheddar. In fact, the cheese sauce was so yummy, I feel like it would be great to make Mac and Cheese out of. I bought way too much cheddar, not knowing how much it would increase in volume when I shredded it, so I may just have to try it out that way next ;)

Smoked Cheddar Sweet Potato Pot Pie

This recipe is delicious and Emily gave it two thumbs up. Sadly it’s also a recipe that Nate would love. Plus, I have so much left and I’m sick of it, whereas he would have made short work of the leftovers. Another reason I need my husband to come back to the east coast!

Smoked Cheddar Sweet Potato Pot Pie

Sausage, Sweet Potato and Smoked Cheddar Pot Pie (lower cal)

Adapted from Cinnamon Spice and Everything Nice

Print this recipe!

Serves 8

1.25 lb lean italian turkey sausage
1 Tbsp olive oil
1 small onion, diced
3 cloves garlic, diced
2 cups sweet potatoes, peeled and diced into 1/2″ pieces
8 oz sliced mushrooms, coarsely chopped
10 oz. chopped frozen broccoli, thawed and well drained
pinch of red pepper flakes
2 Tbsp butter
2 Tbsp + 1 Tbsp flour
2 cups chicken stock
3/4 cup fat free evaporated milk
1 heaping cup shredded smoked cheddar cheese
1 sheet puff pastry
1 egg

Take puff pastry sheet out of freezer so it has time to thaw (about 40 min at room temp). Preheat oven to 400.

Put sweet potato pieces in a pot with water. Bring to a boil and cook 8-10 minutes or until cooked but still firm. Drain and set aside.

Heat a large saute pan over med-hi heat and add turkey sausage to pan, removing casings. Cook turkey sausage, breaking it up into small pieces with a wooden spoon. When no longer pink, remove turkey with a slotted spoon to a bowl and set aside.

Add the olive oil to the pan. Add onions and saute until translucent. Add mushrooms and garlic and cook until mushrooms are soft. Add the broccoli, sweet potato and turkey to the pan and warm up. Turn off heat and set to the side.

In a saucepan, add butter until melted. Whisk in 2 Tbsp of the flour, continually cooking for 2 minutes. SLOWLY add the broth, whisking well so no clumps form and it evenly distributes in the broth. Whisk in the evaporated milk and the last tablespoon of flour.

Bring to a boil, whisking often. Simmer for 2-3 minutes or until it thickens. Turn off the heat and whisk in the cheddar. Add red pepper and salt/pepper to taste.

Pour the cheese sauce over the veggie/turkey mixture and mix thoroughly.

Place mixture in serving dish(es). I used individual ramekins for portion control, but it should fit in a 9×13 pan. Cut puff pastry into 8 pieces and place one on each portion.

Whisk egg with 1 Tbsp of water and brush tops of puff pastry. Place in oven, putting a foil-lined pan underneath to catch drips. Bake for 35-40 min or until puff pastry is golden brown.

Cool for 5-10 minutes before eating, as it will be VERY hot. Also, it thickens as it cools.

Indian Cauliflower and PotatoSorry to barrage you all with cauliflower recipes, but as you know, I have a limited time period during which I can make them. I actually made this recipe once before but never got around to posting it. I’m kinda mad about that because I know I added something else last time that made it even tastier, but oh well. This was still really delicious.

In addition to my love of cauliflower, I have a love for Indian spiced dishes. Add a little Garam Masala and Tumeric, and I’m a happy girl.

Indian Cauliflower and Potato

I had some leftover potatoes laying around and knew I wanted to make something with cauliflower, so this recipe came to mind. I had every intention of using a higher cauliflower to potato ratio, but alas the stupid NYC supermarket I went to only had the most tiny cauliflowers you have ever seen…and to make matters worse, they were $5.99 each! How absurd is that?! I would have just gotten two of them, but not at that price.

Indian Cauliflower and Potato

I also wanted to use up these potatoes I had laying around, so unfortunately there was more potato to cauliflower which, had I followed the original recipe, would have ended up being really dry. This was the main reason I edited the recipe. Also, I like things a little more moist and acidic, so I threw in some diced canned tomatoes and yogurt.

This dish was perfectly spicy and satisfying. Although i suppose you could eat it as a side dish, I put a hefty dallop of greek yogurt on top rounding out a great dinner for one.

Indian Cauliflower and Potato

Indian-Spiced Cauliflower and Potatoes

adapted from Spicie Foodie

Print this recipe!

Serves 4-6

1 cauliflower head, cut into large florets
4 small potatoes, peeled and cut into large pieces
1 tbsp. vegetable oil
1 small onion, finely chopped
3 garlic cloves, minced
small piece of fresh ginger, ginger and finely chopped
1 tsp-1 Tbsp chile garlic sauce (depending on how spicy you like it)
11/2 tbsp. garam masala
1 tsp. ground turmeric
salt to taste
1- 14.5 oz can diced tomatoes
1/4 cup greek 2% yogurt, plus 1+ cup more for garnish
1/2 cup cilantro, chopped, plus more for garnish

Boil the cauliflower and potatoes until tender. Drain and set aside.

Heat the oil and cook the onion until soft and translucent. Add the ginger, garlic and chile sauce and saute for another 3 minutes.

Place the boiled cauliflower and potatoes into the pan. Add the spices to the pan. Use a potato masher and mash until the vegetables have broken up into a thick mash, leaving chunky. Stir well and cook for another 10 minutes.

Add tomatoes, 1/4 cup yogurt, 1/2 cup cilantro and salt to taste. Stir to combine all ingredients well, and cook another minute or two.

Serve with a large dallop of yogurt and a handful of chopped cilantro.

As I said in my last post, my husband is gone for the next few weeks, and as much as I want to spend every day cooking things I love (that I know he hates), a girl can only eat so much.

And so, while I’m finishing up some leftovers, I’m going to share a tutorial of the signs I made for my wedding.

But first I want to tell you that our wedding is going to be featured on the awesome wedding blog Green Wedding Shoes!!! I’m so so excited. It’s not going to be til March, but I’ll be sure to post the link when it happens.

(Here’s where I shared some wedding photos, in case you missed)

courtesy Jodi Miller Photography

courtesy Jodi Miller Photography

Anyway, I had seen lots of wedding signage around the internet, but I got it in my head that I wanted my signs to be made out of an old picket fence.

Lucky for me, I found one laying on the side of the street on my way home from work one day.  I stood there mentally calculating how to dismember the partially deconstructed fence and then tried to figure out how I’d carry the pieces to my apartment that was a couple blocks away. The superintendent of the building that discarded the fence saw me assessing the goods. I told him that it was for a project for my upcoming wedding,and he asked if I wanted a newer fence he had in the basement.

DIY picket fence wedding signage

courtesy Jodi Miller Photography

I told him that I actually preferred the old, decaying fence to the new one he was offering, and I saw in his eyes that he obviously  took me for an idiot. Despite that, however, he offered to take the old fence apart for me and remove the nails. As he spent the next 15-20 minutes dismembering the fence, he told me that he too was engaged, and that his wife would kill him if she knew he was helping someone else on their wedding project instead of helping with his own wedding :)

I offered to pay him for his troubles but he refused. I walked away with exactly what I had been searching for, and I can’t tell you how happy I was. I think I grinned the whole way home.

If you can’t find an old fence to do this with (which really adds to the rustic charm), I guess you could try distressing some wood yourself, although it’s way more effort. You can easily find people giving away old fences on Craigslist.

Anyway, here’s what I did:

First I went to home depot and got some wooden posts that are 2 in  (i think?) square and like 8-10 feet long. I had home depot cut them for me into sign height. Sorry I don’t have the exact info- I couldn’t find the item on their website. You’ll see it, thought, if you go to their lumber area. It’s basically the smallest size lumbar you’ll see.

I took some walnut stain and brushed it on, then wiped the excess off with a towel. I wanted them to have a brownish finish, so I used Walnut stain. I used a weatherproof spray polyurethane on top, once the stain was dry.

Next, I took the filthy picket fence outside and hosed it down. I wanted it to look weathered, but not dirty. I then let it dry for a day, since the old wood really absorbed the water.

IMG_5907sm

I found a font I liked and printed out the words I wanted so they were almost as tall as the fence was wide- I wanted about 1/4-1/2″ space above and below the words. I placed the longest word I needed on the fence to see how long I should cut them. I centered it and left some room on each side. I then cut all the fence pieces to this length, using a hand saw.

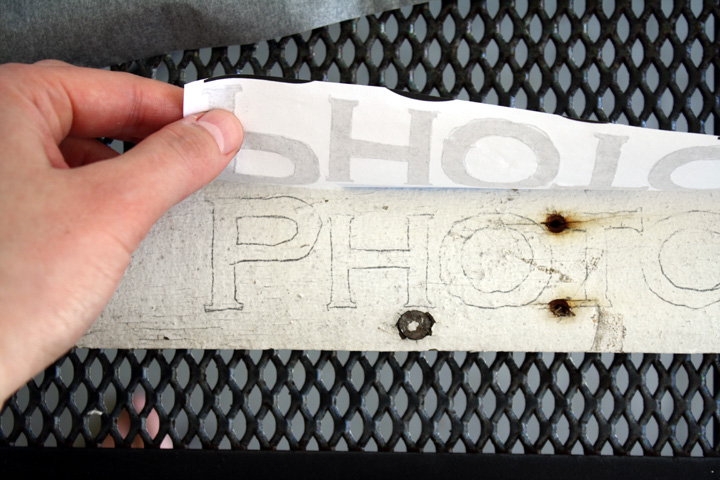
Next I arranged the pieces facing the directions I wanted (depending on where they needed to point in real life), and one at a time I traced over the letters using transfer paper.

IMG_5903sm

DIY picket fence wedding signage


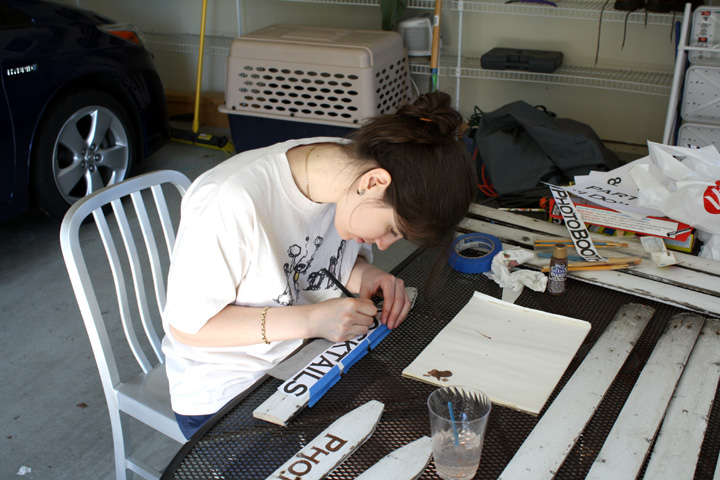
I then VERY carefully painted within the lines with a teeny brush and some craft paint. I had to go over each letter twice because the paint wasn’t very thick- definitely annoying. If you do this, test the paint somewhere to see it’s coverage and use a more expensive, thicker paint if you can, to save yourself some time.

IMG_5906sm

Once everything was dry, I gave them all 2-3 coats of the weatherproof poly spray, allowing several hours in between each coat. I’m pretty impatient so I probably didn’t wait as long as I should have, but I knew these wouldn’t be outdoors for more than a day, and it most likely wouldn’t rain.

DIY picket fence wedding signage

Then I arranged the signs on each post the way I liked and, since the wood was old and I didn’t want it to splinter, I drilled a pilot hole through both the sign and post. I then screwed them together with some deck screws that were slightly shorter than the fence + post combined thickness.

And, done! I completely love how they turned out :)

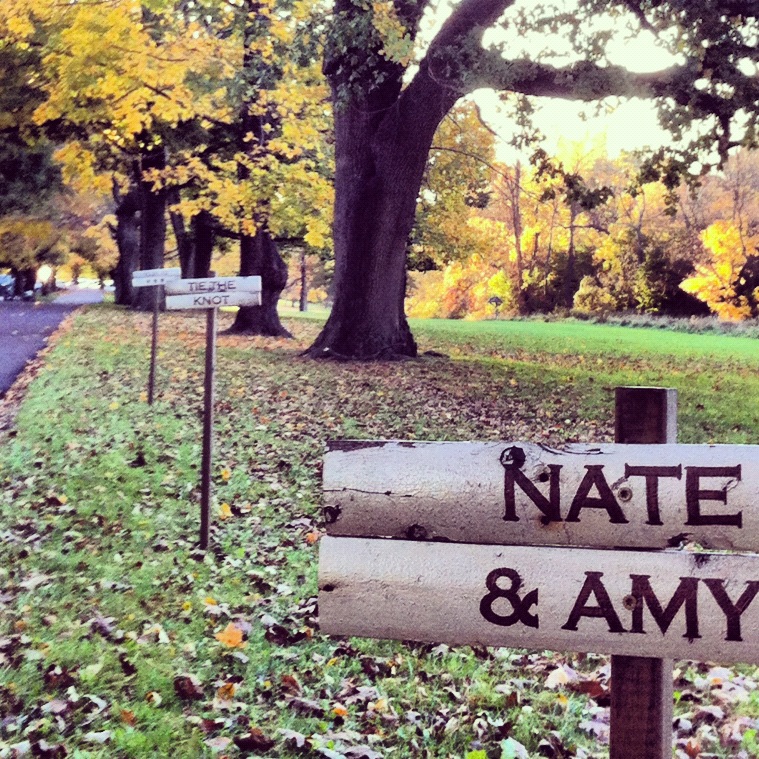
I put several non-directional signs leading down the driveway that said “Amy & Nate” “Tie the Knot” “10-21-12 <3.” They were spaced about 10-20 feet apart.

wedding fence signs

Then I had one directional sign (first picture of the post), since not everything was in the same building.

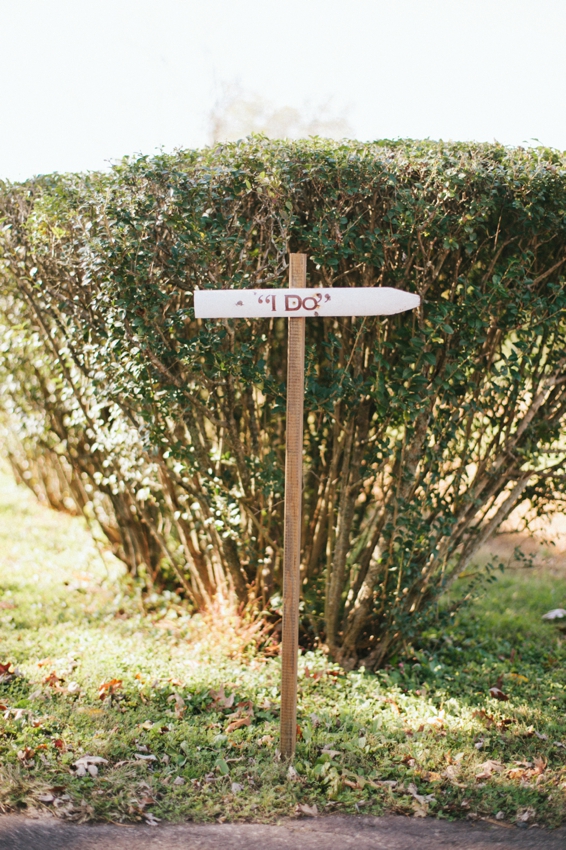
And finally I had an “I Do” sign in front of the orchard where the ceremony was held.

DIY picket fence wedding signage

courtesy Jodi Miller Photography

I had so many fence pieces left over that I used them for one more project! Here’s a sneak peek- My how-to will come soon.

Amy + Nate; October 21, 2012; John J. Audubon Center

courtesy Jodi Miller Photography

cauliflower soup

Sorry for my absence. I was sick with some stomach virus and then a cold, and then I was in California for the long weekend. Being sick totally sucked, especially since I lost my appetite. I had poor Nate ordering pizza for dinner while I slept.

California, on the other hand, was so much fun. I got to spend time with my family and one of my closest friends, all of whom live in L.A. The weather was totally gorgeous. We went on a beautiful hike (and I realized how out of shape I truly am), and just spent a lot of time relaxing and eating yummy food. Thank goodness my appetite fully returned.

IMG_7220sm

I came back on Monday, while Nate is staying there for a month or so doing some job-searching. Since Nate’s gone, this is my perfect opportunity to cook all the foods I love that Nate doesn’t…starting with cauliflower!

The inspiration for this soup is another one of our honeymoon meals. Everyone told us we had to get a meal from one of the many food trucks while we were in Portland. Nate is kind of a picky eater, despite his claims otherwise, so the only food truck that seemed ok was a soup truck called Savor Soup House. Plus, it was a cold, rainy day and i love soup. We decided to get a 3 soup sampler- we ended up going with a basic tomato soup, a chicken tortilla and I think black bean with ham. They were all pretty awesome.

cauliflower soup

It was hard to decide between all the yummy choices, but I knew the cauliflower soup on their menu wasn’t an option since Nate says he detests caulflower. I guess the truck owner heard my lament about the fact that I couldn’t order the cauliflower soup, and so he gave me a little taste. It was seriously amazing.

The soup was so simple but so flavorful. I asked what was in it, and he told me it was just cauliflower, vegetable broth, salt, pepper and a little olive oil. I knew immediately that I’d have to find a way to make it myself.

cauliflower soup

In addition, I’ve been dying to use one of our wedding presents- an immersion blender! I made sure to keep my fingers away from the blade after this horrific article Nate sent me last week. Although, those people sound like idiots.

The soup came out great, but I honestly can’t remember if it was as good as the one in Portland. I wasn’t in the mood for plain cauliflower soup, so I added a drizzle of buffalo sauce and a sprinkle of blue cheese to take it up a notch. Seriously yummy.

cauliflower soup

Simple Cauliflower Soup

Print this recipe!

Serves 5-7

1 head cauliflower
4 cups vegetable or chicken broth
1 Tbsp extra virgin olive oil + more for garnish
salt and pepper to taste

Cut end and core out of cauliflower. Cut into chunks and put in large pot. Add the stock, cover and bring to a boil.

Simmer covered for 15 minutes or until cauliflower is tender.

Using an immersion blender, puree cauliflower and broth until smooth.* Alternatively, add soup and cauliflower in batches to a blender. Make sure not to fill blender more than half full because hot liquids expand.

Add olive oil, salt and pepper to taste.

Serve with a drizzle of olive oil and a sprinkle of pepper. (or for something different, do what I did and drizzle with buffalo sauce and sprinkle with blue cheese- so good!)

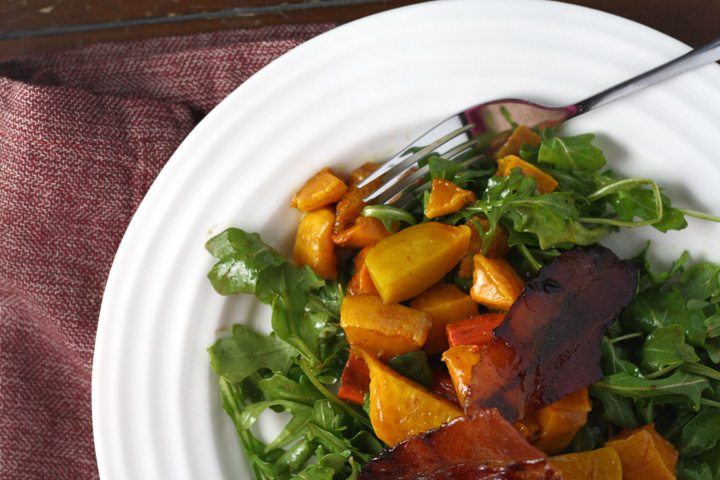
Roasted Vegetable and candied bacon salad

One day on our honeymoon, we had been hiking all day in the cold, pouring rain and after visiting several of the orchards on the Fruit Loop, petting some very cute alpacas and checking out a glass-blowing shop, we had nothing left to do that day before dinner.

Roasted Vegetable and candied bacon salad

The cabins we were staying at were a long and treacherous drive away and since I was the designated driver, I didn’t want to deal with driving back to the cabins for an hour or two and then back into town. You see, we were staying in Washington and dinner was in Oregon, and so we had to go over this really really really really scary little metal bridge to get from one to the other. The bridge probably wouldn’t be so scary in broad daylight on a nice clear day, but we had neither weather or sun in our favor on this occasion.

And so Nate and I headed early to dinner and played Letterpress (a highly addicting word game) against each other in the car for an hour while we waited for it to be late enough for us to legitimately arrive for our dinner reservation. We had plans to eat at this delicious restaurant in the Hood River Valley called Nora’s Table, as per Nate’s father’s recommendation.

Roasted Vegetable and candied bacon salad

The restaurant is small and cozy and I believe they vary their menu based on the season. On that particular day, there was something on the menu that was cold roasted veggies in a balsamic dressing on top of arugula, with candied bacon. I can’t remember the exact combo of veggies but I know there was definitely butternut squash and beets…and i remember there being some other squash or root veggie.

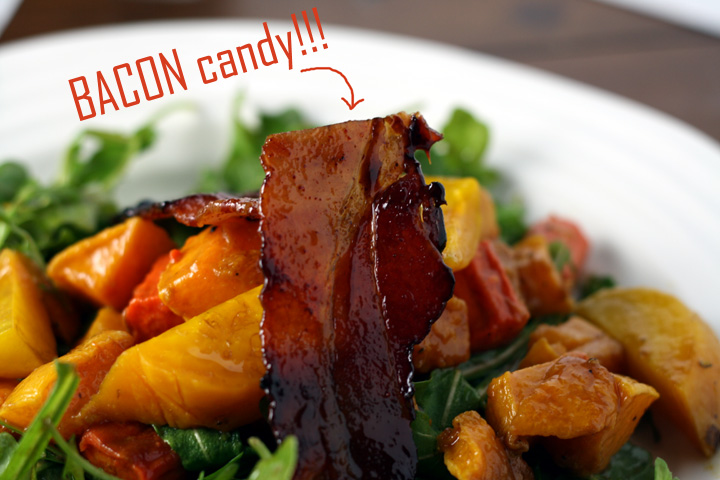
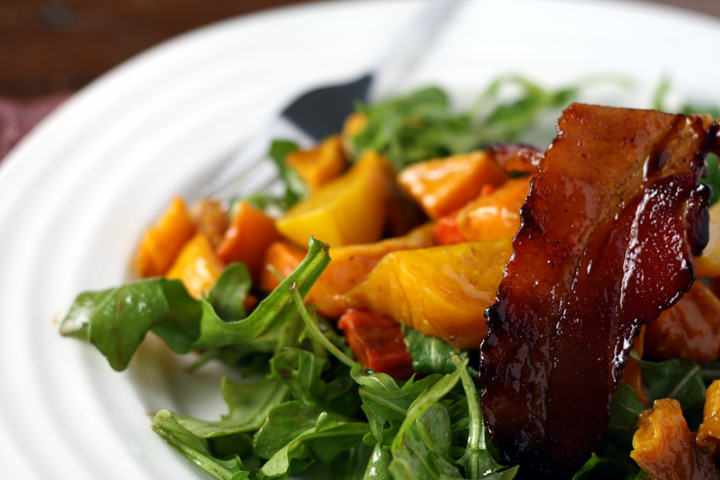
I had meant to recreate this recipe because the candied bacon was the most delicious thing either Nate or I had ever eaten….but I just never got around to it. Then a couple weeks ago, Shannon posted a recipe for bacon candy, and I knew it was a sign from the food blog gods that I really needed to get on this recipe recreation, STAT. It was also because after telling Shannon about said meal, she threatened my life if I didn’t begged me to immediately make this recipe and share it with her.

Roasted Vegetable and candied bacon salad

And so I took this threat request very seriously. Plus I now had a recipe for the most delicious part of the recipe (bacon candy!), courtesy of her. So I came up with a little something that I think gives Nora’s Table a run for their money. I hope you enjoy it.

*Just a note/warning: I tried using yellow beets for this recipe to maintain a yellow/orange color theme. However, I unfortunately learned that yellow beets oxidize to an ugly blackish color when left in the fridge overnight. Since these veggies need to be made the day before (or earlier in the day to cool to room temp), I recommend using red beets. If you were going to make the veggies same-day and serve room temp, then yellow would probably work.

Roasted Vegetable and candied bacon salad

Roasted Balsamic Squash & Root Vegetable Salad with Candied Bacon

Print this recipe!

Serves 4-6 large servings

1 bunch red beets* (see note above recipe)
1 medium butternut squash, peeled, seeded and cut into 1″ cubes
3 carrots, peeled and cut into 1″ chunks
olive oil
5 oz. arugula
Dressing:
1/4 cup balsamic vinegar
1/4 cup + 2 Tbsp olive oil
2 Tbsp dijon mustard
salt and pepper

Candied Bacon (recipe to follow)

*It’s best to roast the vegetables the day before you want to eat this so you can serve them cold, or room temperature

Preheat oven to 400

Thoroughly wash beets, trim off greens leaving 1 inch (you can saute the greens for a yummy side dish!). Wrap beets individually with a bit of olive oil in a piece of foil and wrap tightly. Put on a baking sheet in case of leaking. Roast for an hour or until beets are easily pierced with a knife. Let cool until easy to handle and rub skin off under running water. Pat dry and cut into 1″ thick slices.

Toss squash and carrots with 1-2 Tbsp olive oil, 1 tsp salt and some pepper. Spread on a foil-lined baking sheet. Add to oven after beets have been cooking for 15 min. Roast for 45 min total or until slightly browned, tossing halfway through.

Cool veggies to room temp or refrigerate over night.

When ready to serve, combine dressing ingredients in a bowl and whisk well. Add salt and pepper to taste. Toss all veggies with about half of dressing, or however much you like.

Toss arugula with more dressing. There will probably be a little extra, depending on how much you like.

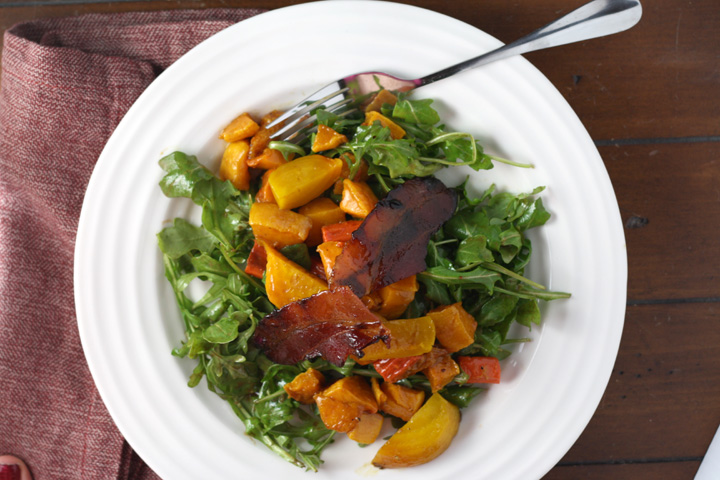
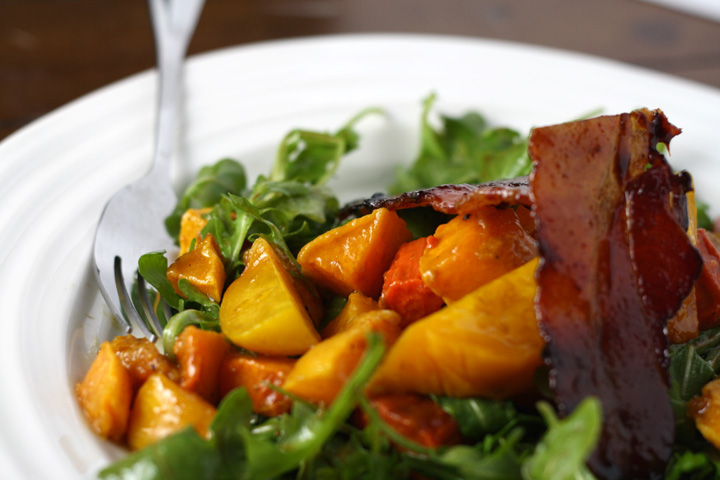
Put arugula on plate, top with mound of veggies and a couple slices of the halved candied bacon.

Candied Bacon
adapted from Shannon’s blog

1/4 cup + 2 Tbsp brown sugar
1/2 teaspoons chili powder
6 slices thick-cut bacon

Preheat oven to 400˚F. Line a lipped baking sheet with heavy duty foil, completely covering.

In a small bowl, whisk together the brown sugar and chile powder with a fork until evenly distributed and all brown sugar lumps are out. Press bacon into brown sugar mixture, heavily coating both sides.

Spoon excess brown sugar mixture onto the bacon.

While your bacon is baking, get out a metal cooling rack, overtop some paper towels.

Bake in the oven for 18-22 minutes, checking at the 15-minute mark and watching like a hawk from that point on. Watch for your bacon to turn a deep red color towards the center and darker at the edges. Take it out when it is almost crisp and the sugar is caramelized. DO NOT BURN.

Remove the bacon from the oven and transfer the pieces to the wire rack using tongs. Be careful as it will be VERY hot. Allow to cool, as it will and crisp up. Cut each piece in half.