Chunky Pumpkin Spice Granola ~ ElephantEats.com

I had a wonderful couple weeks off of work. I still haven’t caught up on my blog reading and at this point it seems seriously overwhelming….I think I may follow a few too many blogs on feedly but it’s just so hard to eliminate some when there are so many good ones!

For Christmas we went down to Nate’s moms, as I told you guys last week, and I got some great Christmas presents that can be used in the kitchen! I got a scone pan (I’ll let you know how it works), a donut pan (expect a recipe using this when I break it in!), an Alice Waters cookbook and the Flavor Bible. The Flavor Bible is something I read about on another blog and it tells you all kinds of awesome flavor combos to help develop recipes. I can’t wait to get into it. 

Chunky Pumpkin Spice Granola ~ ElephantEats.com

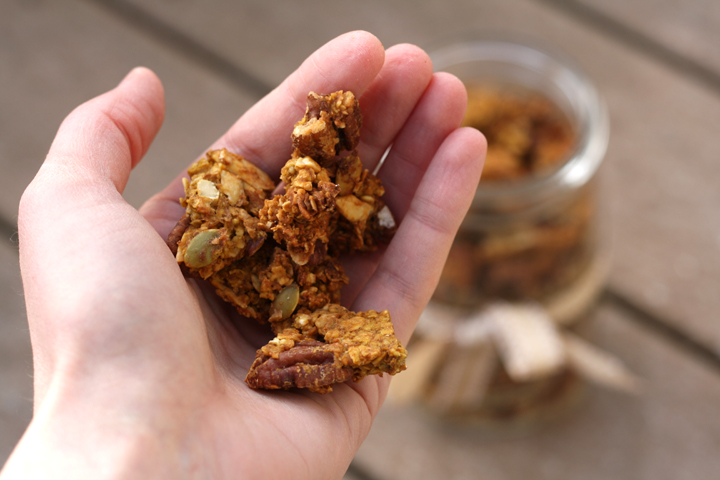
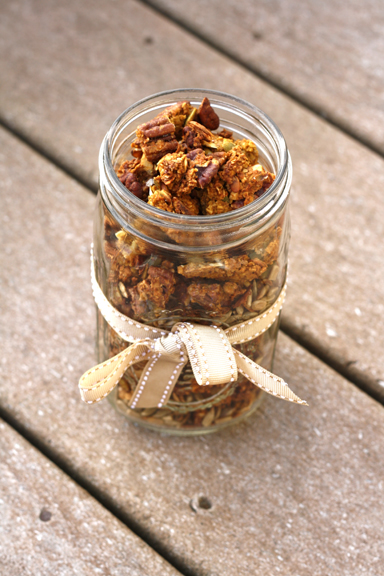
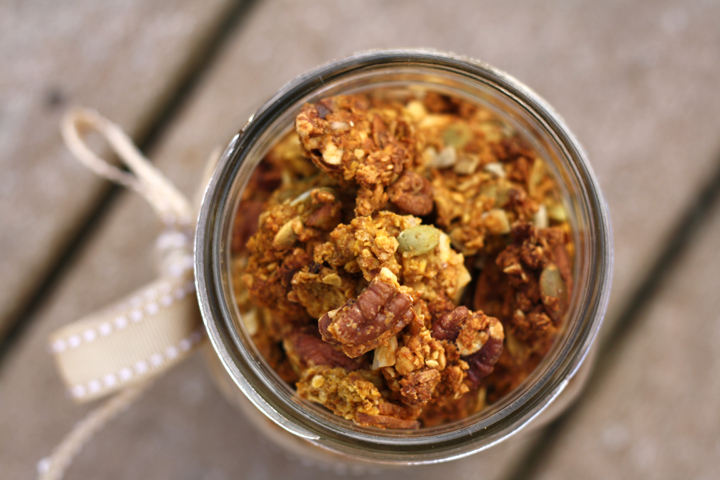
Nice big chunks!

A present that I gave rather than received, however, is this Pumpkin Spice Granola. My mother-in-law eats granola for breakfast every single day (you can see where Nate gets his routine eating habits from) and she told me that she specifically likes nuts and seeds in her granola but no dried fruit, and that she likes the kind that has big clumps. According to her, this combo is quite hard to find, so I thought making her some would be the perfect Christmas present. 

I also gave her one of the awesome paperweights we made when we went glass-blowing for Nate’s bday present. I forgot to tell  you guys about that! 

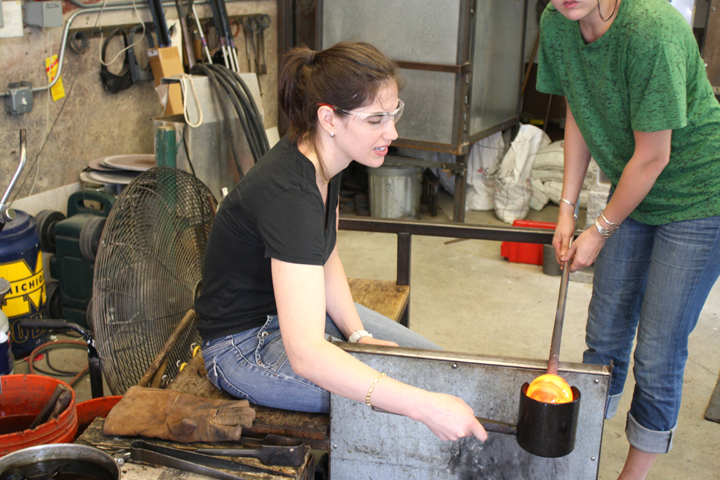
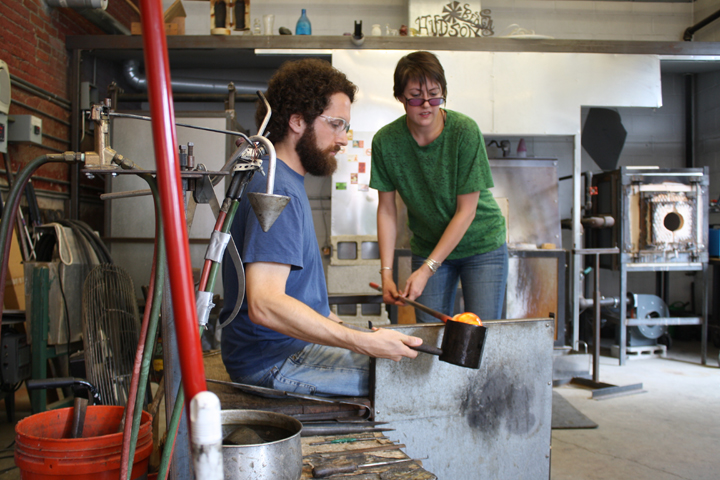
We went up to Beacon, NY to this awesome little shop call Hudson Beach Glass. For Nate’s bday I got us a lesson to do together, which really involved each of us separately making a paperweight while the other person watched.

Hudson Beach Glass glassblowing lesson ~ ElephantEats.com

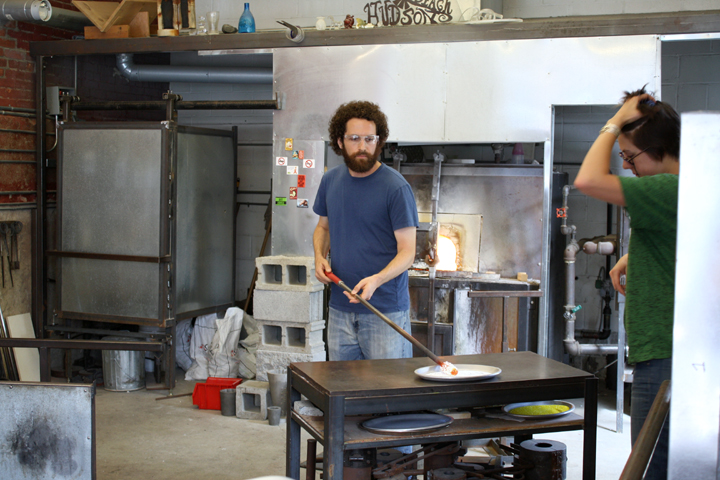
Nate went first. We were allowed to chose the style of paperweight we wanted, and we both chose the kind that has that swirl inside.We got to choose 2-3 colors to swirl. Nate chose red and gold, while i chose purple, blue and green. The pic of him above is putting the first color on his glass. Because he only chose two colors, he had to put a white background color so those colors would stand out better.

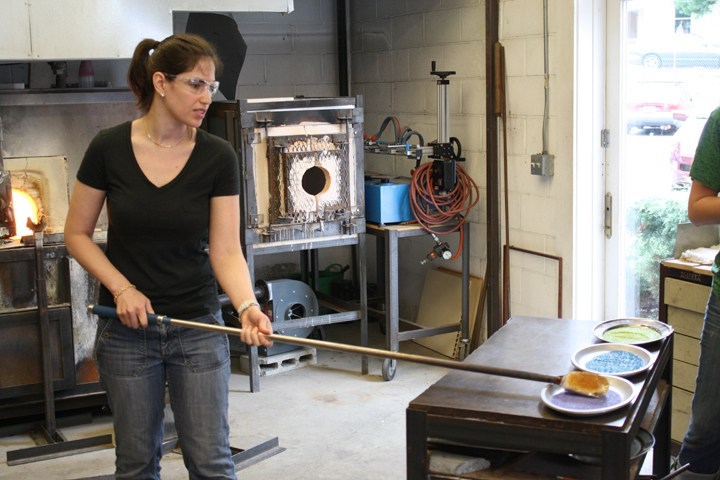
And here’s me with my three colors.

Hudson Beach Glass glassblowing lesson ~ ElephantEats.com

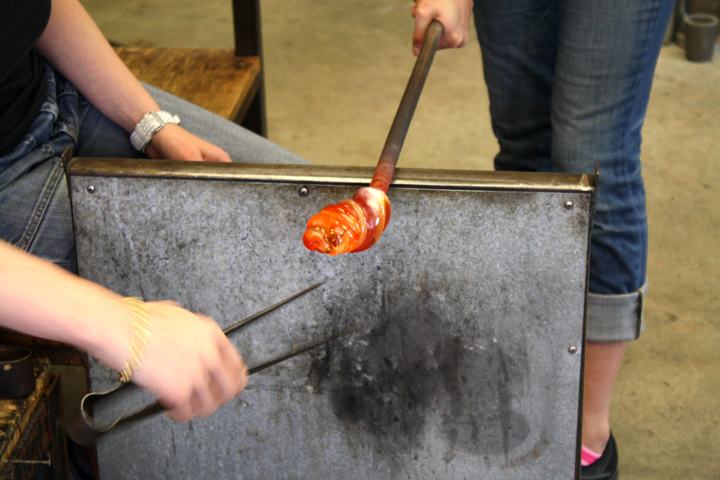
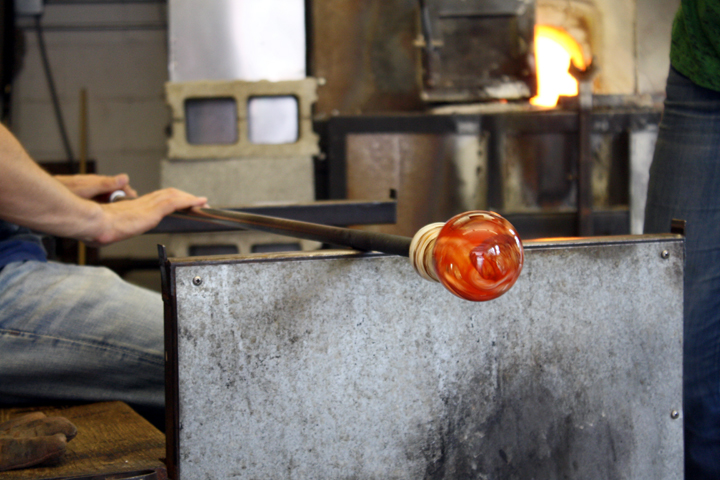
After the colors go on and you melt them in the hot furnace, you twist them together:

Hudson Beach Glass glassblowing lesson ~ ElephantEats.com

After twisting the colors together, you smooth the glass out using this wooden cup so it ends up round.

Hudson Beach Glass glassblowing lesson ~ ElephantEats.com


Hudson Beach Glass glassblowing lesson ~ ElephantEats.com

And here’s Nate’s finished piece right before it went in the oven to slowly “cool” from the super hot temp it was to, eventually, room temp. You can’t see the true colors until it has cooled. The red you see now is mainly the hot glass that would eventually become clear.

Hudson Beach Glass glassblowing lesson ~ ElephantEats.com

So pretty, right?!

It was super fun and our teacher, Kathleen, was so knowledgeable and cool. I highly recommend it! Sorry I didn’t take a pic of the finished paperweights but they looked kind of like this but multicolored in the colors we chose.

But back to my granola! I read that the trick for clumpy granola is to add an egg white before baking and not to stir it! Halfway through I gave the giant clumps a flip and then just left it alone. Obviously you can alter the ingredients you put in this (dried fruit, more or less sugar, etc). 

Chunky Pumpkin Spice Granola ~ ElephantEats.com

 It’s great served with yogurt or milk! 
Chunky Pumpkin Spice Granola
Yields 6
A chunky seed and nut granola with spiced pumpkin flavor!
Write a review
Print
Ingredients
  1. 3 cups quick oats
  2. 2 tsp pumpkin pie spice
  3. 3/4 tsp salt
  4. 3/4 cup brown sugar
  5. 3/4-1 cup pumpkin
  6. 2 Tbsp oil
  7. 1/2 cup maple syrup
  8. 1 tsp vanilla extract
  9. 3/4 cup chopped pecans (not toasted)
  10. 2/3 cup sliced almonds
  11. 1 egg white, lightly whisked
  12. 3/4 cup sunflower seeds, roasted (if you can find unroasted then add them along with the nuts)
Instructions
  1. Preheat oven to 325 and line a large baking sheet with parchment paper.
  2. In a large bowl combine everything except nuts, egg white and seeds.
  3. When thoroughly mixed, add in nuts and egg white and mix well. You can add the seeds now too if you managed to find raw/unroasted seeds.
  4. Spread everything out onto the prepared baking skeet in an even layer.
  5. Bake for 30 minutes then flip the granola over, taking care not to break it into pieces more than necessary.
  6. Sprinkle seeds onto granola and bake an additional 20-25 min or until crisp and golden. Remove the outer crispy pieces as necessary to prevent them from burning. The largest pieces may still seem slightly chewy inside but they will crisp up when they dry.
  7. Remove pieces to a wire rack over a baking pan to catch the smaller pieces. Once cooled, break granola up as desired into smaller pieces. Store in an airtight container.
Notes
  1. Great topped with yogurt or milk!
https://elephanteats.com/

Orange Iced Gingerbread Bars ~ ElephantEats.com

This past weekend I had my annual gingerbread house decorating brunch with my friend, Erica. We do it every year, but it has gradually been changing for the better, I think.

The first year we did it we used graham crackers and tried to attach the structure together with icing. Anyone who has attempted a gingerbread house knows that this method works, but only if the structure has a day to dry before decorating it. Since we only had an afternoon, we found out the hard way that royal icing takes a while to set.

Orange Iced Gingerbread Bars ~ ElephantEats.com

The next year I had read online that you could use melted sugar to instantly bind the crackers together. This works awesomely, as long as you’re SUPER careful not to burn yourself on molten sugar. Don’t say I didn’t warn you. We did this for a couple years, but you still have to set aside time to assemble it. 

But this year I decided to just buy a couple of those gingerbread house kits.

gingerbread house kit ~ ElephantEats.com

The kits come with pre-assembled houses, saving us hours of aggravation, and they also come with candy included and an idea for how to decorate. I knew the kit was great because I decorate a house from a kit every year when I go down to my mother-in-law’s for Christmas. 

photo 2

Anyway, it ended up being perfect. We had a tasty brunch that Erica prepared and then got to spend a couple hours decorating our houses. I think Erica did a much neater job with the icing, but it was fun nonetheless.

Gingerbread Houses 2013

Today’s recipe is related because it’s for gingerbread bars! Not only that, but I literally think they’re the best thing to come out of my kitchen this year…and that’s saying a lot since it’s now December.

Orange Iced Gingerbread Bars ~ ElephantEats.com

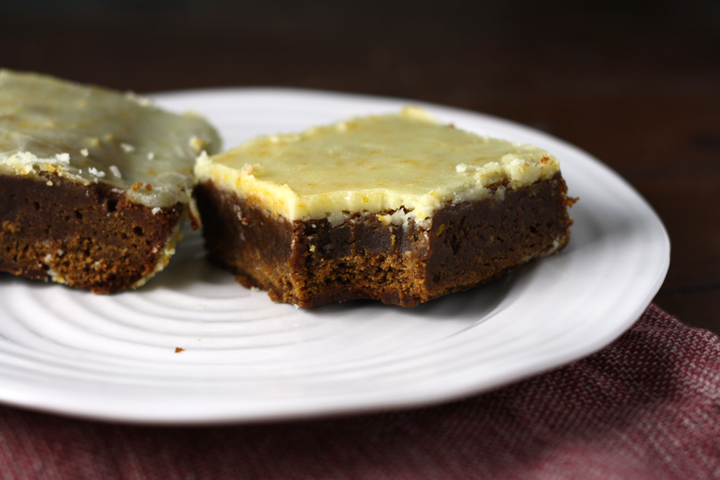
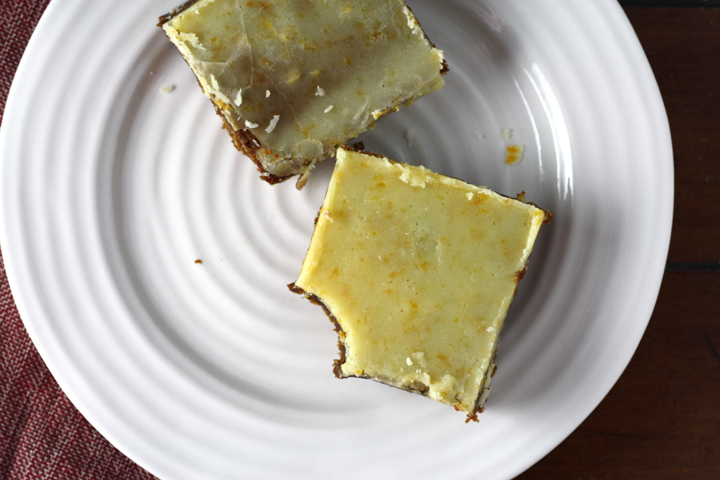
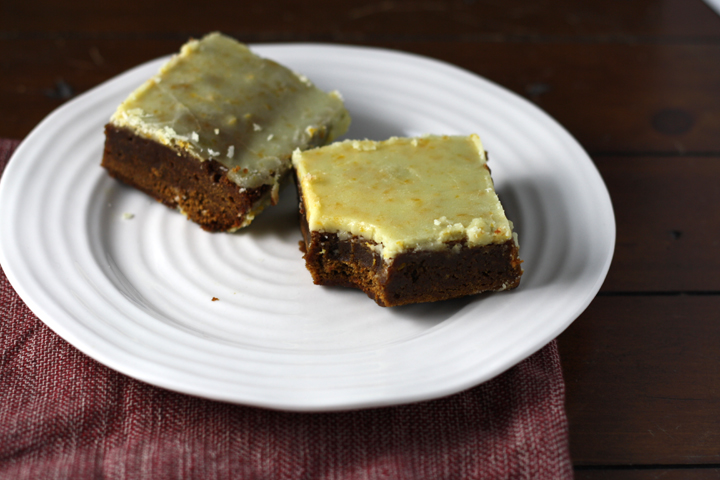
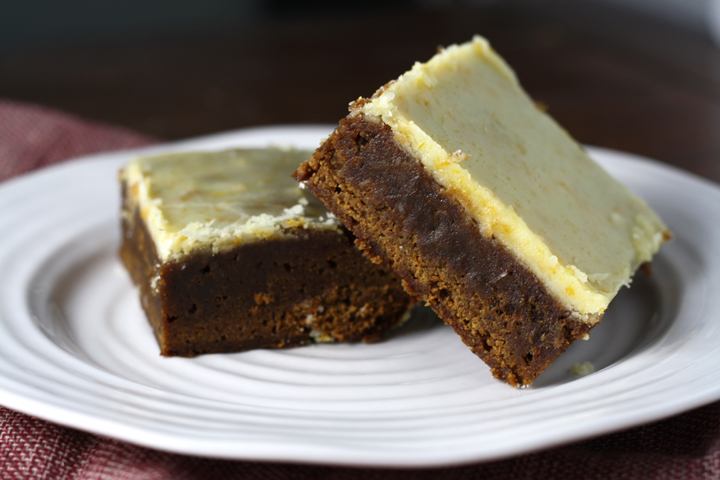
These bars are spicy from the molasses, have tons of flavors from all the spices and have the ooey gooey texture of the perfect brownie. I chose to add some orange juice and zest too, because for some reason i feel like gingerbread goes really well with that citrus flavor.

Basically, you NEED to make these. They taste like the holiday season :)

Orange Iced Gingerbread Bars ~ ElephantEats.com


Orange Iced Gingerbread Bars
Yields 9
A spicy, citrusy, dense and chewy gingerbread bar!
Write a review
Print
Ingredients
  1. 1/2 cup (1 stick) unsalted butter, melted and slightly cooled
  2. 1 large egg
  3. 1 cup light brown sugar, firmly packed
  4. 1/2 cup unsulphered light or medium molasses
  5. zest of 1 orange, divided in 2 (will be about 1 Tbsp total)
  6. juice of 1 orange (will be used in both bars and icing)
  7. 3 teaspoons ground ginger
  8. 2 teaspoons cinnamon
  9. 1 teaspoon ground cloves
  10. 1 teaspoon ground nutmeg
  11. 1 1/4 cups unbleached all-purpose flour
  12. 1 teaspoon unsalted butter, melted
  13. 1 cup powdered sugar
Instructions
  1. Preheat the oven to 350ºF. Coat an 8x8 baking dish with cooking spray and set aside.
  2. In a large bowl, whisk together butter, egg, brown sugar, molasses, half of orange zest (about 1.5 tsp), 1 Tbsp of the fresh orange juice, ginger, cinnamon, cloves, and nutmeg until smooth.
  3. Add the flour and stir until just combined, don't over mix.
  4. Pour the batter into the prepared pan and smooth the top. Bake 32-34 minutes or until a toothpick inserted in the center comes out clean or with moist crumbs clinging. Allow the bars to cool while you prepare the icing.
  5. In a small bowl, combine melted butter, powdered sugar and rest of orange zest. Add orange juice (you will only need about 1 Tbsp plus 1 tsp) a little at a time until it reaches a smooth, pourable consistency. Pour evenly over cooled bars. Cut and serve.
Notes
  1. Best served at room temperature.
Adapted from The Live in Kitchen
https://elephanteats.com/

Peppermint White Chocolate Swirl Cheesecake Bars ~ ElephantEats.com

I hope that everyone who celebrates had a wonderful Thanksgiving! My family had Thanksgiving in Manhattan this year, for the first time ever.

This is the last year that Nate and I will be living in NYC, and the first that we were actually here on Thanksgiving, so my parents, brother, Nate and I decided to go to my office to check out the Macy’s Thanksgiving Day Parade.

Macy's Day Parade 2013 ~ ElephantEats.com

Snoopy!

It was a pretty awesome view since my building is right on the parade route. The only problem was that the balloons were kept low to the ground this year because they were worried about the wind, and the floor we were on was pretty high above them. It was still closer than I’ve ever been to the parade though!

We took a nice family photo on Thanksgiving but I think my mom is using it for her holiday card, so you’ll have to settle for this pic of just me and Nate. I think I dressed for the wrong holiday :)

Thanksgiving 2013 ~ ElephantEats.com

Yes, I’m really that pale…

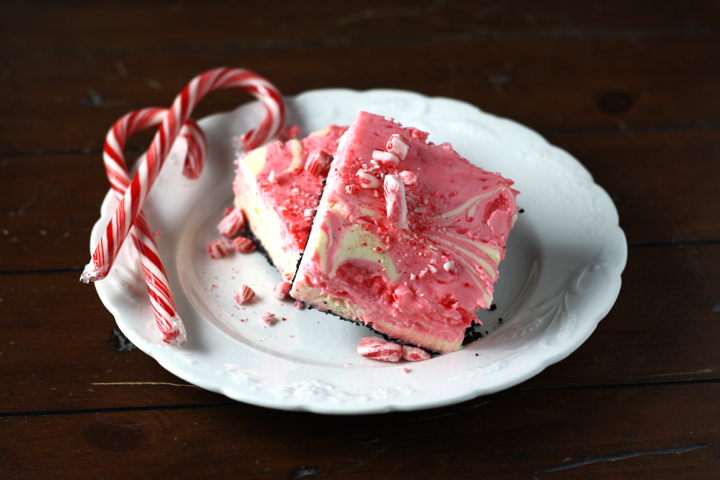
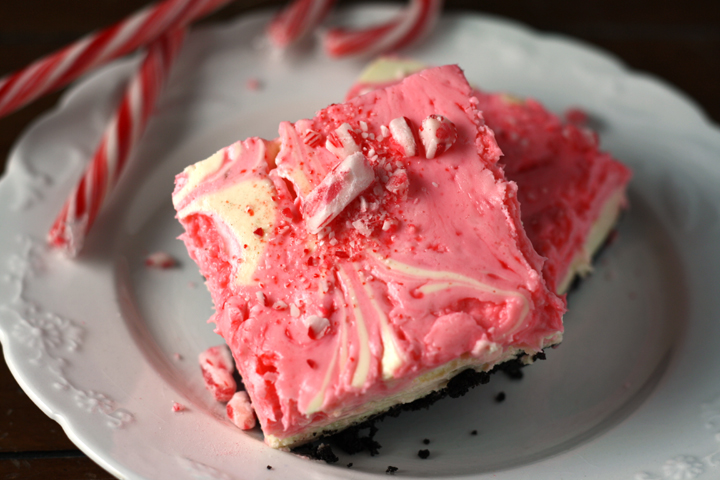
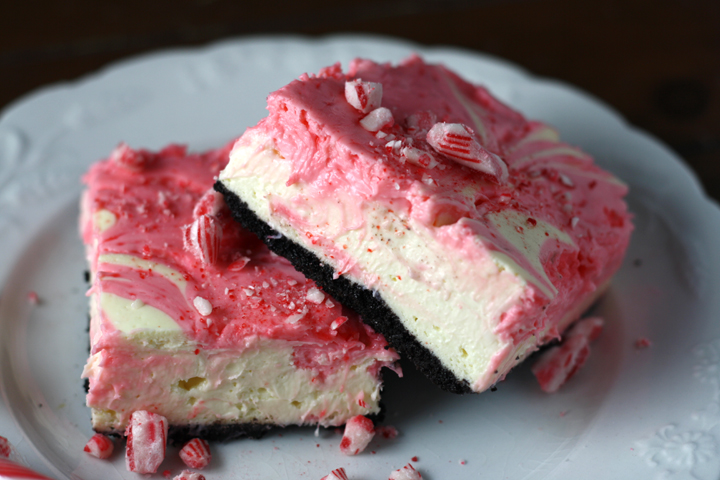
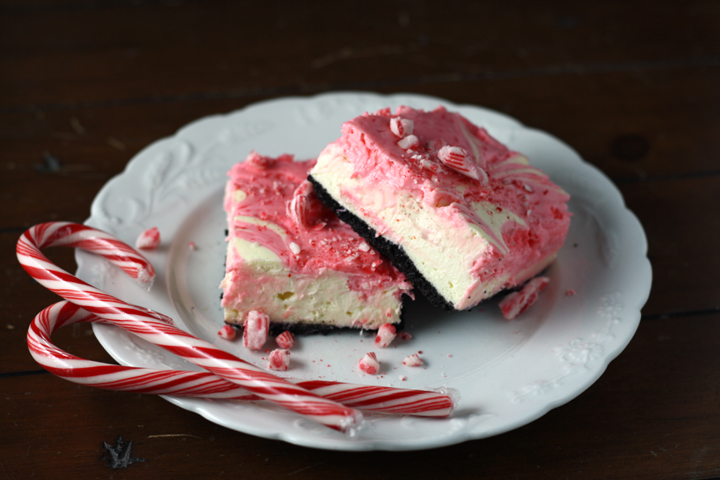
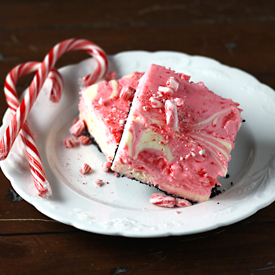
Actually, I think my outfit is kind of appropriate for this post, since it matches this dessert I’m sharing with you. I don’t know why but I just got this idea of peppermint white chocolate cheesecake bars in my head and couldn’t get it out. I had visions of these swirly pink and white bars perfect for a holiday dessert. 

These definitely need to be refrigerated overnight if you like them to firm up a bit, but they’re more on the softer side of cheesecake bars- this is according to Nate who likes cold, dry, hard food. If you leave the candy cane bits out of the batter and just sprinkle them on top, they should firm up a little more, but I thought they were perfect!

Peppermint White Chocolate Swirl Cheesecake Bars ~ ElephantEats.com

Oh, and for another house update, since you guys seem to love that so much :) :

The contractor had told me at the beginning of last week that he was pretty much done with demolition and would start framing by Friday. On Wednesday he texted me, saying his guys had removed the ceiling in the basement and found some asbestos underneath that had been overlooked when they did the asbestos removal back in August…UGH! 

He told me that he called up the company that I had used for the removal before and they said it was ok for him to work, but he thought it would be best to wait til Monday when the asbestos guy would meet him at the house to check it out. Because of Thanksgiving, that only meant one day of work (Friday) would be wasted. 

Peppermint White Chocolate Swirl Cheesecake Bars ~ ElephantEats.com

So Monday, my contractor had a smaller than normal crew there working and the asbestos guy came to assess the situation and gave me a quote for removing it ( $$ :( ), but the good news is that he can do it this Thursday and that the contractor can continue to work in the meantime. 

But the exciting part is that I took my family over to the house on Friday since my brother had never seen it, and when I opened the door, I was SO surprised. There are NO WALLS in my house at all! Like completely gone…all that’s there are the studs. I had NO idea they were going to remove every single wall!! It was so crazy to see the house that way and I’m sorry I don’t have a pic, but it was getting dark out. I should be able to take one before they put up the drywall I think.

Anyway, I’m so psyched :) It totally made this project feel like it’s really happening!

Oh yeah, and on Friday morning my mom came with me and Nate to the bath store and we managed to pick out pretty much all of our faucets, sinks, toilets and a bath vanity. Still a few more things to decide but good progress. Thank you, Mom!!!

Peppermint White Chocolate Swirl Cheesecake Bars ~ ElephantEats.com

Peppermint White Chocolate Swirl Cheesecake Bars
Creamy cheesecake squares with a festive minty swirl!
Write a review
Print
Ingredients
  1. 2 cups finely crushed chocolate wafer cookies (about 35 cookies)
  2. 2 Tbsp sugar
  3. 1/3 cup unsalted butter, melted
  4. 4 8-oz packages cream cheese, softened (I used two light and two regular)
  5. 1 cup sugar
  6. 1 tsp vanilla
  7. 1 cup sour cream
  8. 4 eggs
  9. 6 oz. white chocolate chips
  10. red food coloring (I used 7 drops of red liquid food coloring)
  11. 1/2 tsp peppermint extract
  12. 3/4 cup crushed peppermint candy canes (about 6 oz), divided
Instructions
  1. Preheat oven to 350. Grease bottom of a 9x13 pan.
  2. For crust, mix crushed cookies, 2 Tbsp sugar and the melted butter. Press mixture evenly into bottom of prepared pan. Bake for 10 min then set aside to cool while making batter.
  3. For filling, in a large bowl, beat cream cheese, 1 cup sugar, sour cream and vanilla with electric mixer until smooth. Beat in eggs until blended. Pour 2/3 of batter over the prepared crust, spreading to edges and set the remaining 1/3 of the batter aside.
  4. Put white chocolate chips in a microwaveable container and microwave 1 min at 50% power. Stir well. Continute microwaving in 30 sec increments, stirring well in between until melted. There can still be a couple solid pieces- do not over cook!
  5. Stir white chocolate into the 1/3 of the batter that you set aside. Stir in about 6 drops red food coloring (or enough to give a pink hue), along with peppermint extract and 1/2 cup of the crushed candy canes.
  6. Put the pink batter on top of the white batter in the pan in 5-6 large blobs, making sure to leave white in between. Drag a knife back and forth through the batter to create swirls.
  7. Bake for 35-40 min or until set (a knife pierced 1" from edge comes out almost clean).
  8. Cool in pan for an hour or so, and then cover and chill for 4-24 hours. Cut into bars and sprinkle with remaining peppermint candies as desired.
Notes
  1. For slightly firmer bars, leave the chopped peppermint out of the batter, and only use as a garnish.
  2. Best served after being refrigerated overnight.

Butternut Squash Pesto Grilled Cheese ~ ElephantEats.com

Guys, I’m so far behind! I have so many things I still need to share with you but just haven’t either made the recipes or assembled the posts- the recipes from my cooking class in Italy, and also the finished coffee table ottoman I made!

But in the meantime, you’ll have to settle for this grilled cheese, which is pretty darn delicious. I mentioned this very early on in my blog, but Nate is a creature of habit. He literally eats the same breakfast and lunch EVERY day of the week. So occassionally, on the weekend, he’ll request grilled cheese instead of his daily turkey sandwich. 

Butternut Squash Pesto Grilled Cheese ~ ElephantEats.com

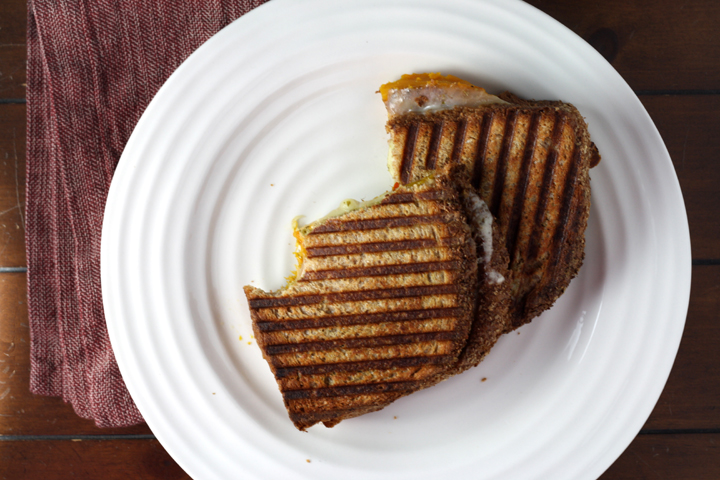
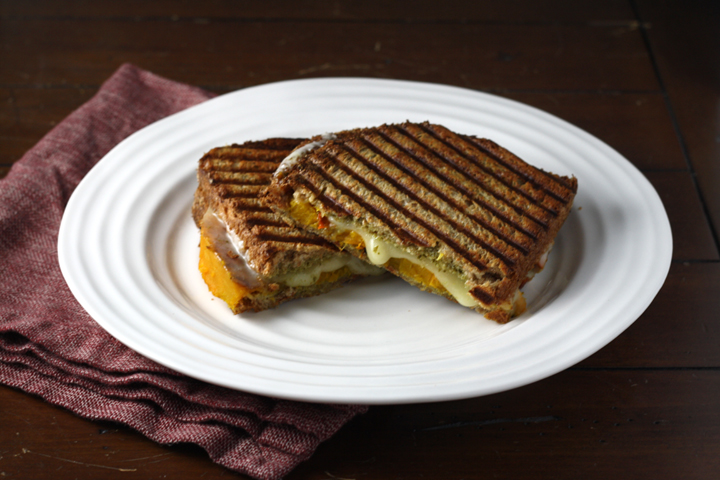
I usually just use up whatever is in the fridge on these days, sometimes coming up with really good combos. That’s how this sandwich came about. I do often add pesto to his grilled cheese, but on this particular occassion there was some leftover roasted butternut squash.

The combo of the squash, the pesto and the melty cheese was just too good not to share. I think you could also use some thanksgiving leftovers for a very tasty grilled cheese combo- maybe with some sweet potatoes? some cranberry sauce? Oh man, the combinations are endless!

Butternut Squash Pesto Grilled Cheese ~ ElephantEats.com

On other fronts, I’m scrambling to make decisions on my house because it’s going much faster than I thought. The demo is complete and framing will apparently be pretty much done by the end of next week. Because of this, my contractor informed me that I need to pick out my roof color by this Friday (!). And then I need to pick out all my bathroom fixtures and cabinetry by the end of next week so that the plumber will know where to put the plumbing. I didn’t realize that the cabinet itself made a difference, but they need to know how high any shelves inside it are, etc, that would obstruct the pipes so they can plan accordingly.

Needless to say, for a decision-making-a-phobe like me, I’m getting quite stressed out :( I really thought I’d have more than 2 wks to decide everything!

Butternut Squash Pesto Grilled Cheese ~ ElephantEats.com

Also, this weekend we went down to Nate’s moms and I had him videotape me preparing a dish so I could enter The Great American Cookbook Competition. It’s some contest Rachel Ray is having that my aunt told me about. I highly doubt I’ll win, but I figured it couldn’t hurt to try :) Hopefully Nate can make me look better on the video through editing than I actually came across on tape, because I most certainly could never be an actress. 

I hope that you all have a very Happy Thanksgiving, and Happy Chanukkah to those that celebrate!!!

Butternut Squash Pesto Grilled Cheese ~ ElephantEats.com

Butternut Squash Pesto Grilled Cheese
This isn't really much of a recipe, but more of an idea
Write a review
Print
Ingredients
  1. Bread slices
  2. Cheese slices
  3. Leftover roasted butternut squash, cut into slices
  4. Pesto
  5. Butter
Instructions
  1. Spread the insides of the bread slices with pesto. Top with a couple slices of cheese and then then enough squash to cover. Using a knife, spread/flatten the squash as much as possible.
  2. Close sandwich and spread butter over the outsides of the bread. Cook in a pan or in a panini press (my favorite way to make grilled cheese) until cheese is melted.
  3. Enjoy!
Notes
  1. The possibilities of fillings inside grilled cheese are endless!
https://elephanteats.com/
15. November 2013 · 106 comments · Categories: house, life · Tags:

For those of you who like to know about how the house is going, here we go!

For those that don’t care, feel free to skip this post as there’s no recipe. But next week I’ll have a Thanksgivukkah recipe coming your way! :)

So today (Friday), I’m going out to NJ because I’ve officially chosen a contractor (!) and he’s going to do a walk-thru of the house with me so I can point out everything I want to save. I want to preserve as much of the original house as I can, both because it will hopefully save money and because the house is 85 years old and I want to be sensitive to its history.

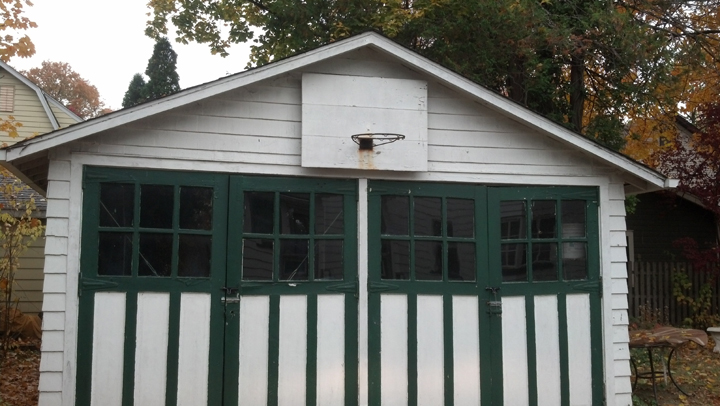
We’ve already begun work on the detached garage. We removed the very cracked and old concrete floor and poured a new reinforced slab. We also had to reframe the door opening because it had two old doors on hinges, with each opening from the middle. Here’s the “before” garage pic- sorry for the cut-off pic, but the contractor took it:

Garage Before Photo

Anyway, as much as I would love to keep these awesome doors, we really don’t want to have to get out of the car and open them every time we want to pull inside- there is currently no electricity out to the garage. Can you believe the little 96 yr old lady who sold us this house used to get out and open those doors??

Since we’re installing an electric door, we decided it made more sense to have one big door instead of two small ones. If we had kept the two small ones, they’d be really really narrow. But because there were two doors there was a column between them holding up the front of the garage. In order to get rid of that structural column, we had to put a big header over the door.

That has now been completed and we’re just waiting for the door to be delivered so we can install it! I’ll add a pic when it comes in. I tried to pick a door that looked very similar to the original doors. Here’s a pic of the style I chose. They look like they open on hinges like the original doors, but they really go up like a typical electric door:

Ours will be all one piece tho, not two separate doors. I may paint the trim like the existing doors, though not green…i’m thinking black perhaps, or gray. I dunno. The “hardware” isn’t included (like the handles, and fake hinges if we want them), but the door company charges an arm and a leg for them. You can get cheap ones at Home Depot which is what I think I’ll do and just install them myself. 

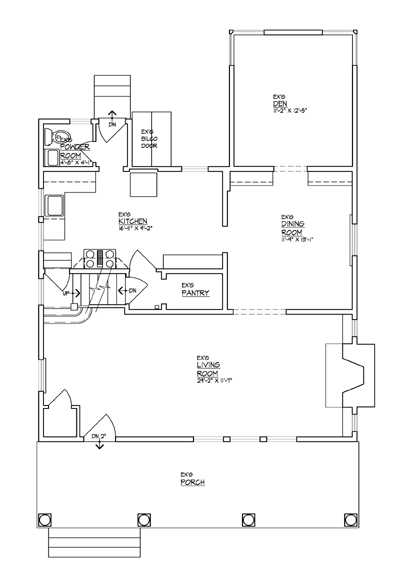
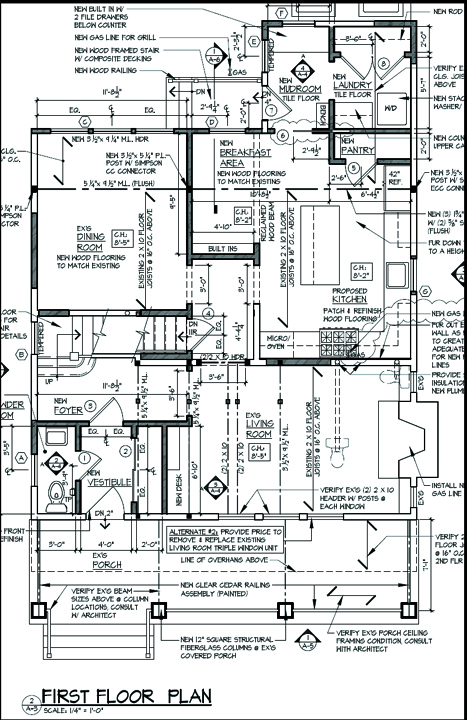
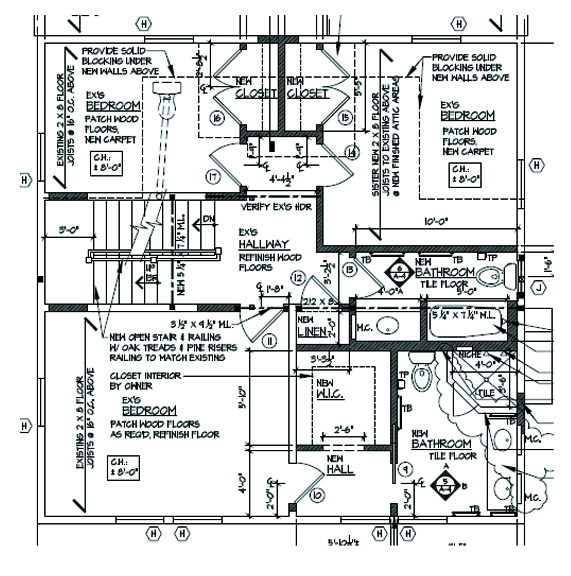
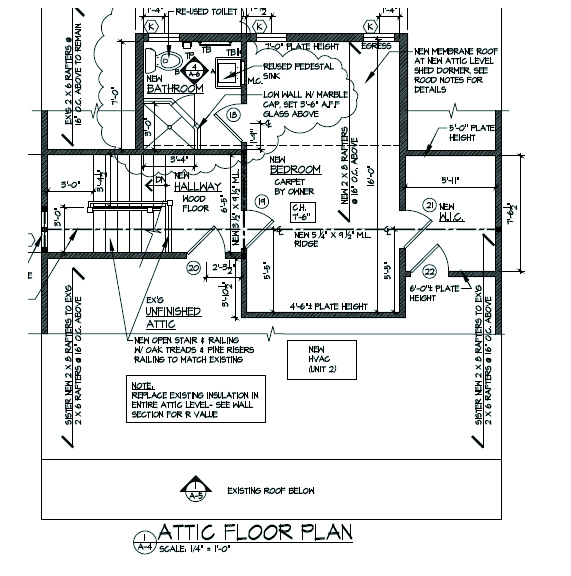
As for the house, the architect finished up the floorplans and here they are!!! I’m so so excited. Sorry they’re kinda blurry. I couldn’t figure out how to get them the right size.

I’ve included the current floorplan so you could see the difference. I already gave you a tour of the inside of the house’s first and second floors, but go check that out if you haven’t seen it. Pardon all the call-outs and measurements that gunk up the new floorplan drawing. Hopefully you can read around them. 

FirstFloorplanBefore

First Floor Plan “Before”

First Floor Plan "After"

First Floor Plan “After”

Did you SEE MY NEW KITCHEN?! How glorious is it? :) Oh my gosh, guys, I’m going to cook you so much yummy food in that kitchen!

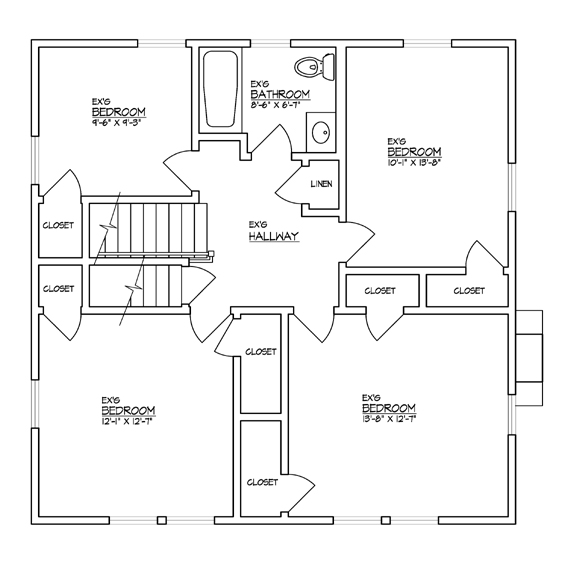
Here’s the second floor:

SecondFloorplanBefore

Second Floor Plan “Before”

Second Floor Plan "After"

Second Floor Plan “After”

That whole front part of the house is the Master Bedroom suite!

And here’s the third floor where there is currently only an unfinished attic:

Third Floor Plan "After"

Last weekend my mom came into town and we went tile shopping. What I learned is that all pretty tiles are really expensive :(

I ended up making most of my decisions for the bathrooms though, so that’s good. If you know me at all, you know that I’m extremely indecisive, so this was a big step. Thank goodness I had my Interior Designer mama there helping me out or it would have been futile. 

I think maybe in these coming months I’ll post moodboards every so often for the various rooms, showing the color/decor that I’m thinking. Would you guys like to see that?

Sorry for the photo-less and recipe-less post. I hope to have more updates soon. The house is supposed to be done in 4 months! I can’t believe it :)