23. August 2013 · 36 comments · Categories: house, life · Tags:

Before I get to the house, I must wish a very

Happy Birthday to my wonderful husband, Nate!!

We’re having some friends over tonight and I’m going to cook him up quite the birthday dinner feast, complete with a butterscotch cake. So, I will have recipes for you soon, assuming I don’t forget to take pics :)

Alright, so I left off last time after giving you a tour of the first floor of our house. Today, I’m moving onto the second floor!

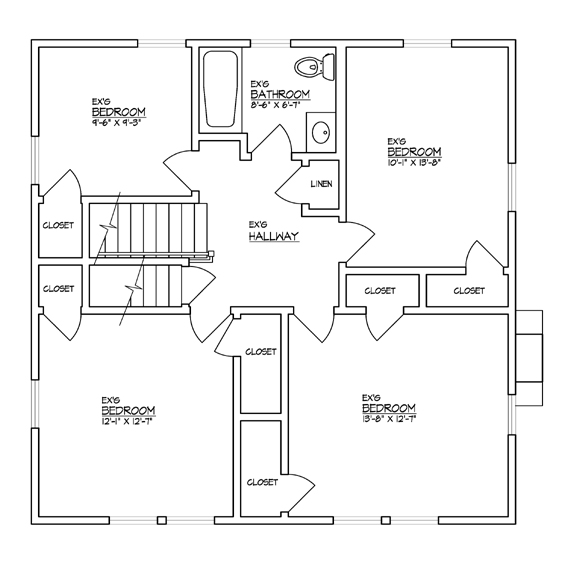
Again, here’s a friendly floorplan to help you ground yourself while I’m giving my tour:

SecondFloorplanBefore

Right now the second floor has 4 bdrooms (one is miniscule- the top left) and one bathroom. We’re going to turn it into three bedrooms and 2 full baths, and then put another bed/bath on the third floor (currently a walk-up unfinished attic). One of the bed/baths will be a master suite with a walk-in closet!

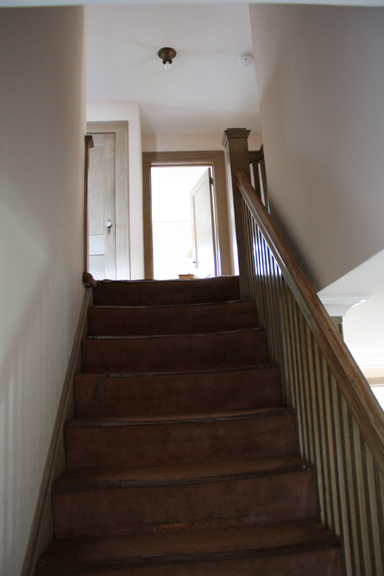
 Ok, so remember those stairs that you could go up and down to the kitchen? Well if you were to turn right on the landing, you’d head up to the second floor. Here we go.

Stairs1

Gotta love that carpet. Again, hardwood floors are underneath it throughout the house! 

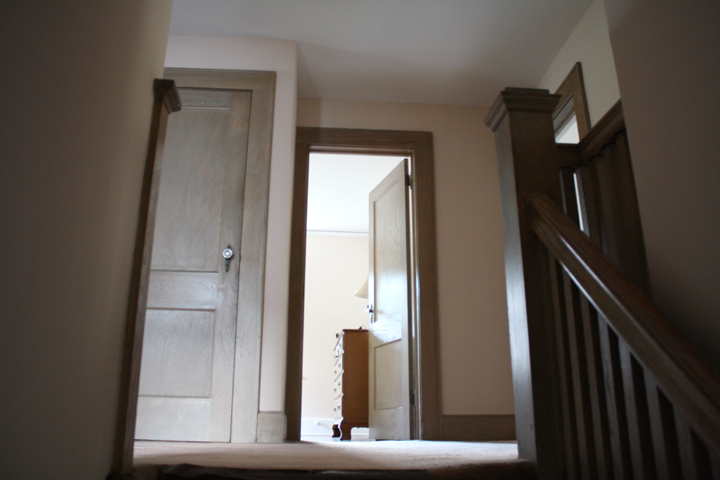
StairsTop

Here you are at the top of the stairs. Directly ahead of you is the bedroom that’s in the top right of the floorplan. Unfortunately, I completely forgot to take a pic of that room…and in my opinion it’s the nicest room. Oh well.

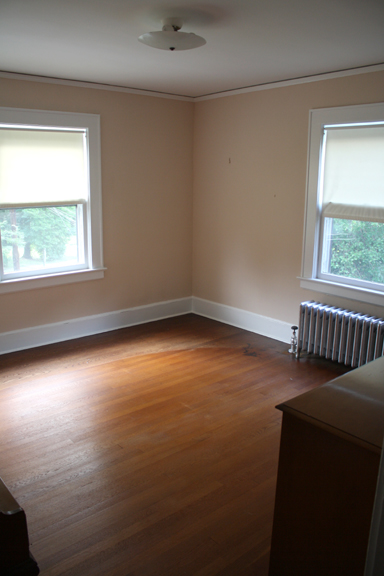
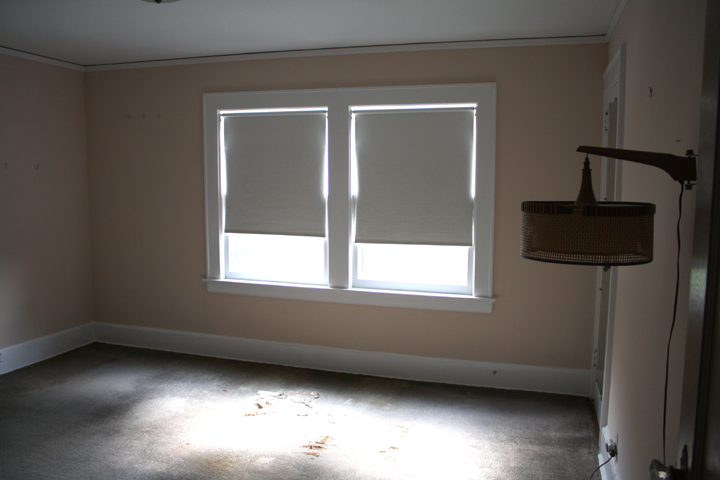
If you turn to the right, you’re facing the bedroom in the bottom left of the floorplan. Here it is:

BottomLeftBedroom


It’s a decent sized room but I just couldn’t capture it well. It’s going to be combined with the room next to it to turn into a giant master suite.

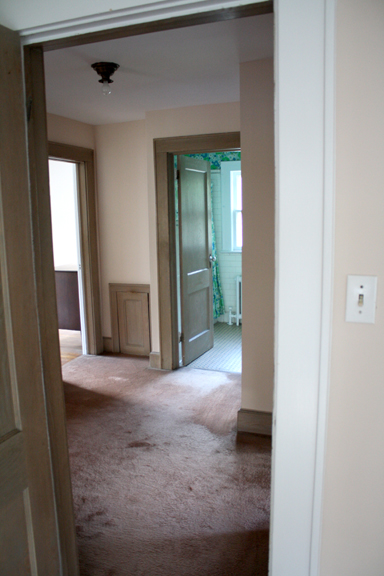
If you come back out of that room and look across the hall you can see the bathroom and the corner of the bedroom I didn’t get a pic of:

ViewFromBottomLeftBedroom

If you come out of the room and turn right, you see what was being used as the master bedroom. It will become the hall bath combined with the master suite:

Master

Ironically, the master bedroom is the only bedroom that has carpet over the hardwood, but after we renovate it will be the only bedroom with hardwood…I think. I feel like kids’ rooms are better with carpet but look prettier with hardwood.

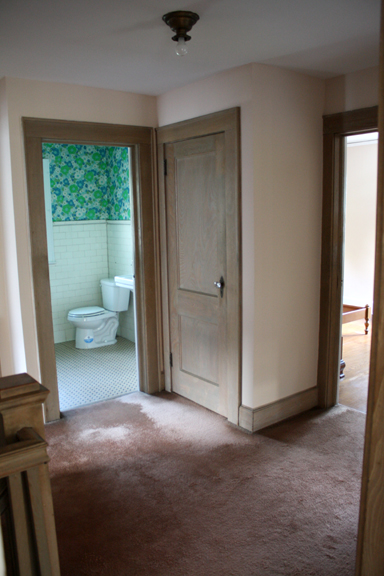
If you come out of the master bedroom and look across the hall, this is your view. It’s the best view to kind of get a feel for the size of the hallway upstairs:

ViewFromMaster

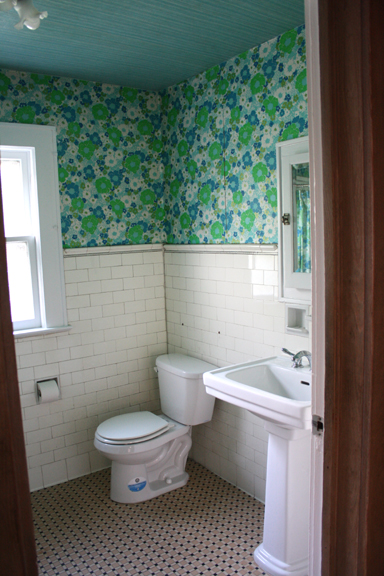
Come walk across the hall and check out the existing bathroom. Please try not to be jealous of the wallpaper ;) The sink is actually in really good shape so I’m thinking maybe I can reuse it in the guest bath upstairs:

Bathroom


The two bedrooms that border the bathroom are actually going to expand into where the bathroom is, and the bathroom will no longer be there. The two new bathrooms will be on the bottom right part of the house.

I’ll share the new floorplan when it’s final.

And finally, let’s head up to the attic:

AtticStair

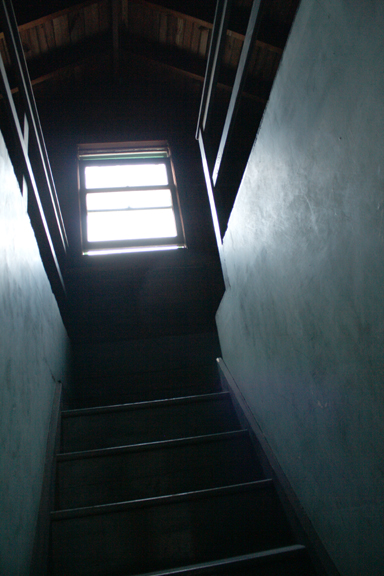
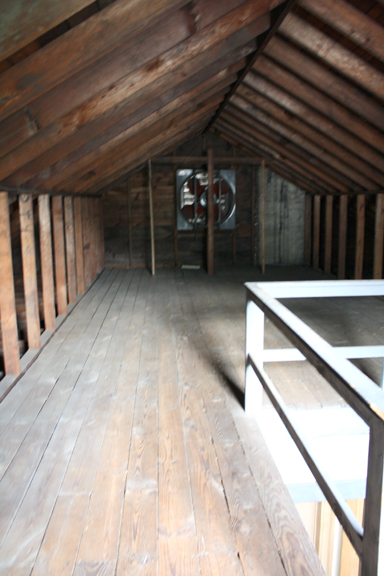
You walk up some stairs to a landing, turn right and continue going up the stairs. Here’s your view at the top:
AtticStair2

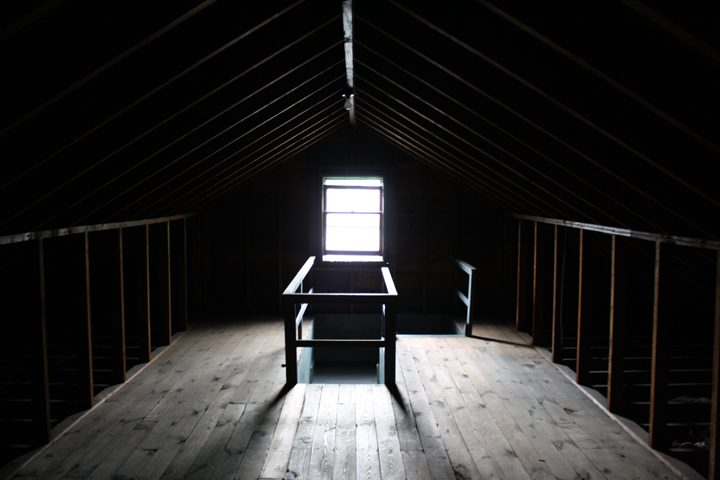
As I said, we’re going to finish part of it and put a bed and bath up there. There’s going to be a huge dormer put into the back (left of the pic) with several windows.

If you go to the other side of the attic where the fan is and turn around, this is your view…and Nate’s favorite pic of all the photos I took of the house:


Attic

That concludes my house tour. I hope you enjoyed it!

I’ll update you with the floorplans when the architect is done…and I’ll show you a pic of the backyard when I take it, because it’s super cute :)



I interrupt this week’s food post for some house photos :) I’ll try to get back to food posting soon, I’ve just been so busy!

Since so many of you requested “before” house pics, your wish has been granted. Honestly there’s not much to see here and the changes will be so huge that it will be hard to compare after. But I’ll give you a little tour…

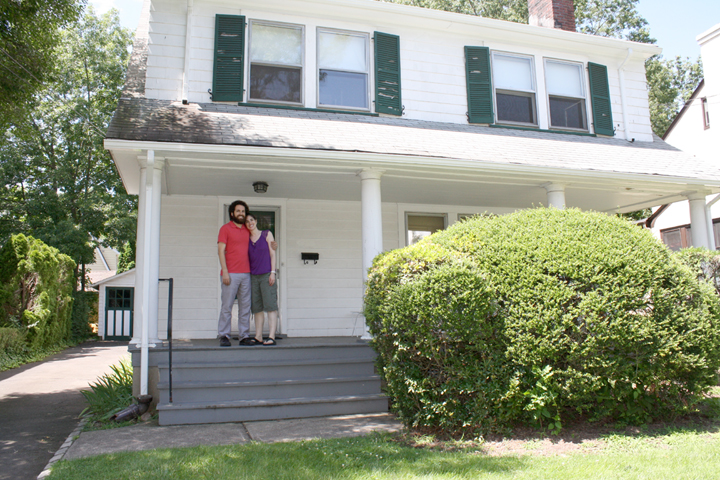
Welcome to our house, come on in!

First Time Homeowners!

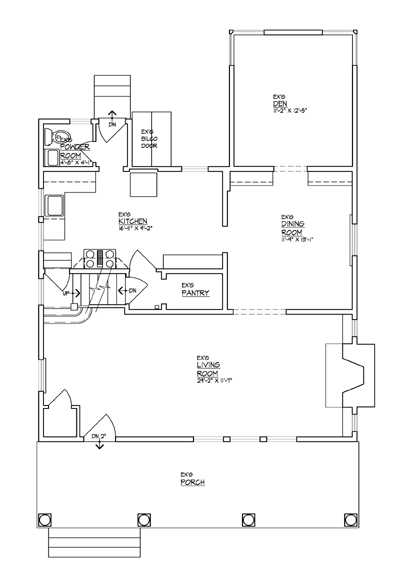
For those of you that are really interested, here’s the first floor plan. You’ll be able to understand my tour a little better this way:

FirstFloorplanBefore

Here’s what you see when you walk in the front door:

FrontDoortoKitchen

First of all, there’s hardwood floors under all that gross carpet, which we will obviously remove. Second, how gorgous is that woodwork? It’s going to look amazing stained a dark color to go along with the floors. Or Maybe painted white? I dunno yet!

To the your left is a coat closet and to the right is the living room:

Living Room

Pardon they photo quality. I’m not sure how to take photos when the windows are all blown out.

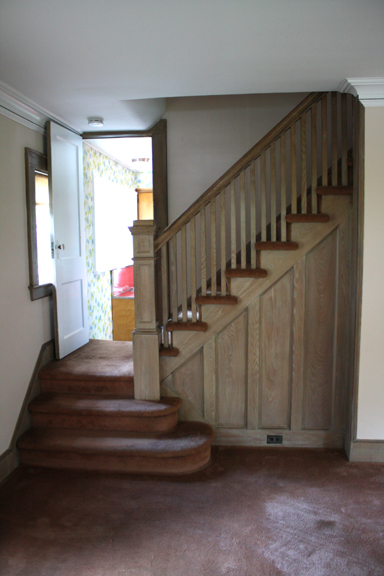
Ok back to the stairs. There’s a weird thing where you go up a couple stairs to a landing and then you can either go upstairs to the second floor or back down two more stairs to the kitchen. If you go to the kitchen that way, this is what you’ll see:

KitchenFromStair


The door through there goes to the back door and a powder room.

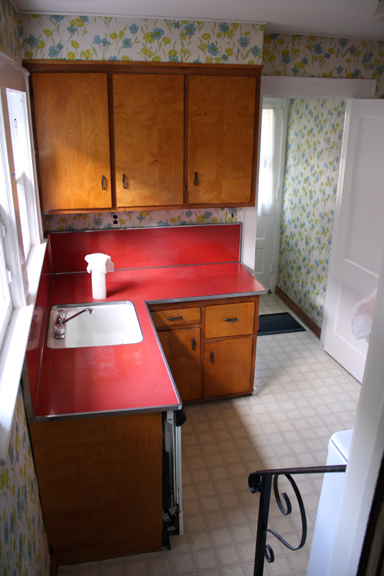
If you walk down the steps and into the kitchen and turn to the right, this is the view through the kitchen, with the dining room behind it:

Kitchen

That door that’s open on the right goes to the basement.

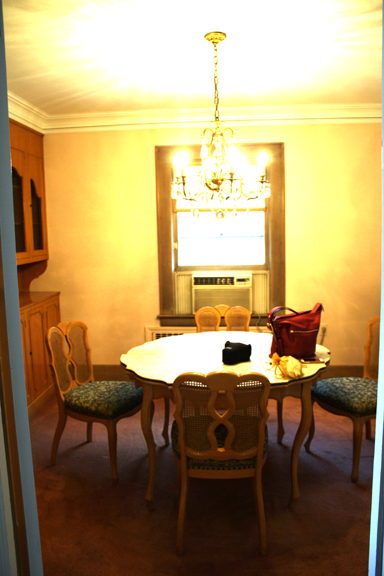
If you walk through the kitchen, this is the dining room:

DiningRoom

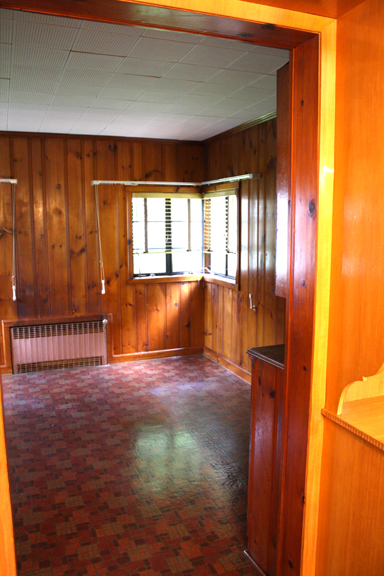
If you turn to the left, you see the den, which was an addition to the house:

Den

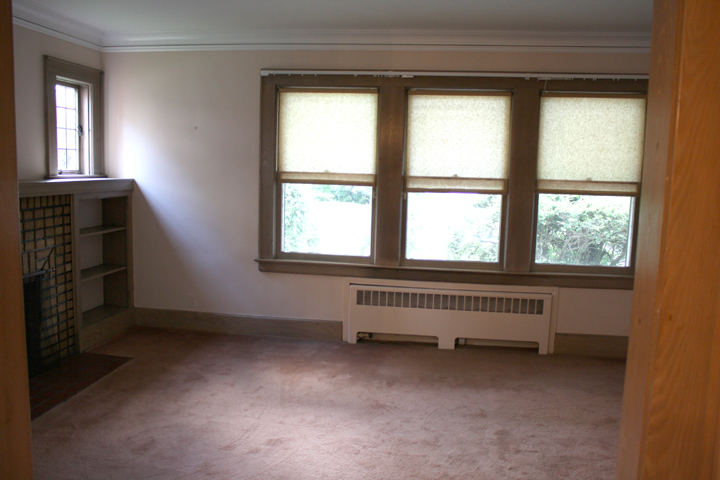
And if you had turned to the right you get back to the living room, facing the front of the house:

LivingRoomfromDining

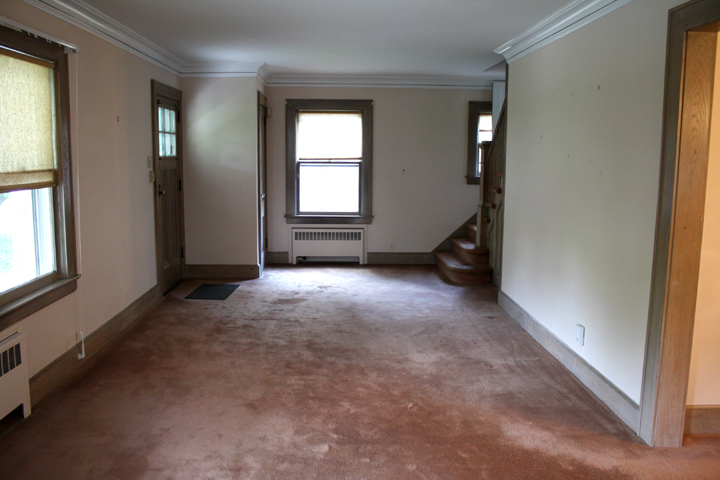
If you then walk into the living room and turn right, you face back towards the front door and staircase:

LivingRoom2

Ok, well my computer’s about to die…so I’ll share the second floor with you soon. 

I hope you enjoyed the tour :) I can’t wait to show you the “after” photos. And I especially can’t wait for construction to begin!!!

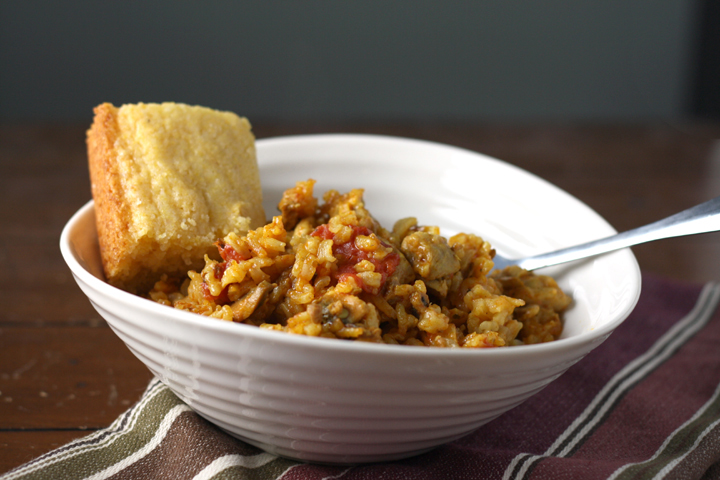
 Chicken and Chorizo "Paella" ~ www.ElephantEats.com

We headed down to my Nate’s mom’s house this past weekend. We had a relaxing couple days, and I started a new craft project

I’m going to make my mother-in-law a cushioned ottoman/coffee table. I bought a coffee table at a thrift store and we went out and got some fabric that will cover the foam I’m putting on top. I’m so excited to finish making it. I’ll show you guys when it’s done :) We picked out a beautiful purple tweed that matches her couches and I’m going to sew piping onto it- it will be the first time I’ve attempted that, so fingers crossed.
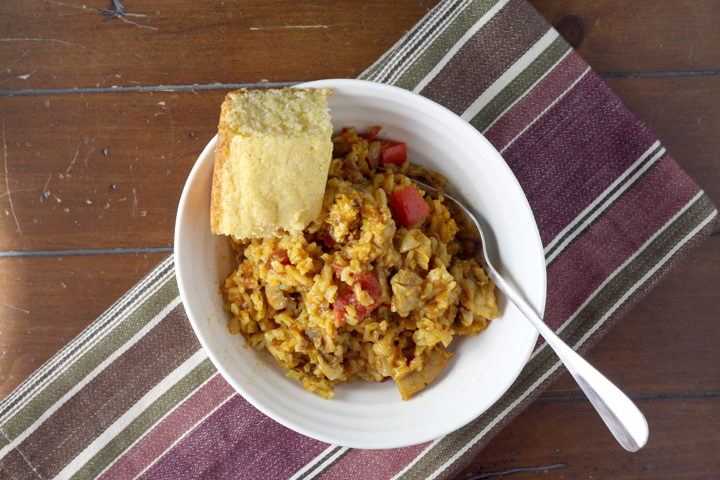
Chicken and Chorizo "Paella" ~ www.ElephantEats.com

Oh, I also fixed a drawer while I was down there that she was going to have a handyman come fix. I was pretty impressed with myself. I went to Lowes and got what I needed and fixed it! Girl power!!

It’s so rewarding to make or repurpose/create/fix something! I think that’s why I like cooking so much. It’s like creating one thing out of something entirely different- putting all these pieces together to make a new whole. And on top of it, you really get to enjoy the fruits of your labor :)
I’ve been so busy lately with house stuff, so I was on the lookout for a quick, simple dinner. It’s not completely authentic paella but it’s very similar. This dish hit the spot and was really really delicious and filling

Chicken and Chorizo "Paella" ~ www.ElephantEats.com

Chicken and Chorizo "Paella" with Mushrooms
Serves 6
A quick, simple and veggie-packed take on the traditional Paella
Write a review
Print
Ingredients
  1. 1.5 lbs boneless, skinless chicken thighs , cubed
  2. 4 ounces Mexican chorizo (i used a veggie version)
  3. 1 large white onion, chopped
  4. 1 red bell pepper, chopped
  5. 16 oz mushrooms, sliced
  6. 2 Tbsp olive oil
  7. 1 tsp paprika
  8. 1 tsp oregano
  9. 1 tsp turmeric
  10. 1 tsp salt
  11. 1/2 tsp black pepper
  12. 1/2 tsp red pepper flakes
  13. 1-1/2 cups long grain white rice
  14. 3 cups water
  15. 1 14oz can diced or stewed tomatoes
Instructions
  1. Heat the olive oil in a large Dutch oven over medium heat. Add the chorizo and onion, stir to combine and let it sit and caramelize/soften for about 5-7 minutes.
  2. Add the cubed chicken, and stir to combine, letting it cook for about a couple minutes.
  3. Add the chopped red bell pepper, mushrooms, and cook several minutes. Add paprika, oregano, turmeric, salt, black pepper, red pepper flakes and rice. Stir everything to combine, and then add the water and tomatoes.
  4. Bring to a boil and then reduce the heat, cover, and allow to cook for about 30 minutes until the rice is tender.
  5. Serve hot!
Adapted from Heather's Dish
https://elephanteats.com/

Fresh Corn Polenta with Eggplant Sauce ~ ElephantEats.com

Before I get to the recipe, I just wanted to share some news. As of today, we are officially homeowners! I know I mentioned the house in a past post, but our closing was today. Also, this weekend we did the walk-through and Nate FINALLY saw the house for the first time. Ridiculous, I know. He says he just really doesn’t care what our house looks like. I’d like to think it’s that, plus that fact that he trusts my judgement.

 First Time Homeowners!

Anyway, I’m happy to report that he really liked the house, especially the front porch. We’re going to be doing major renovations and I’ll try to share some pics along the way. I don’t want to show you guys the “before” pics til we have “after” pics because it really doesn’t look like much. Also, the layout is going to completely change.

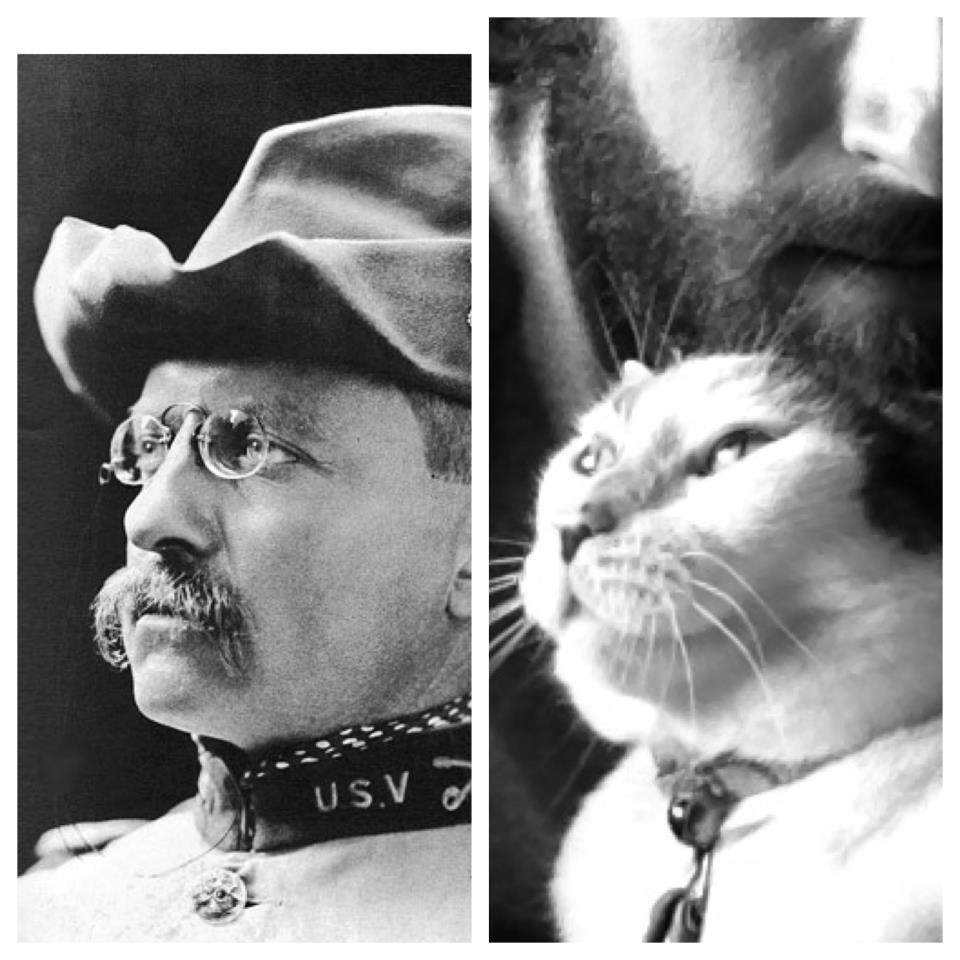
Also, I don’t share many pictures of my adorable kitty L.C. on the blog (there was her hatred of halloween costumes, and her attempt to photobomb my food pic, and her wearing her christmas best), mainly because I feel like once I get started it would be hard not to share a ton- she is by far the most photographed subject in our apartment. Anyway, I thought this picture was just too funny not to show you. 

So a while back, I took this picture of L.C. while Nate was squishing her head with his chin, and when I showed it to him he said she looked like Teddy Roosevelt. I could not imagine what on earth he was talking about until I searched pics of Roosevelt and found this one. There is an uncanny resemblance! Right?!

 Teddy Roosevelt Cat

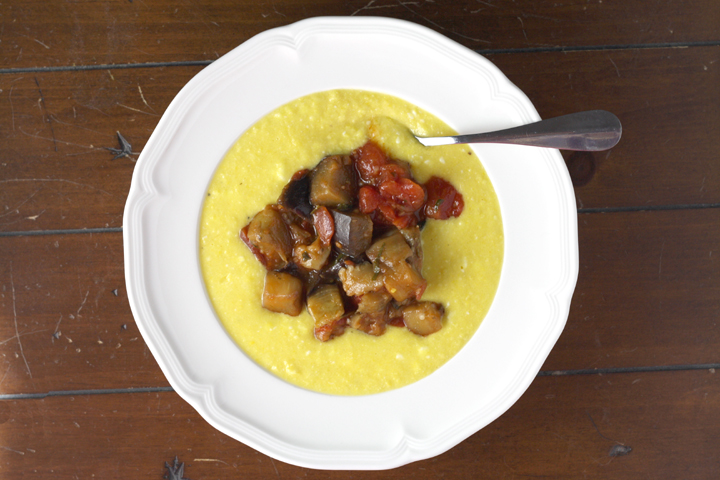
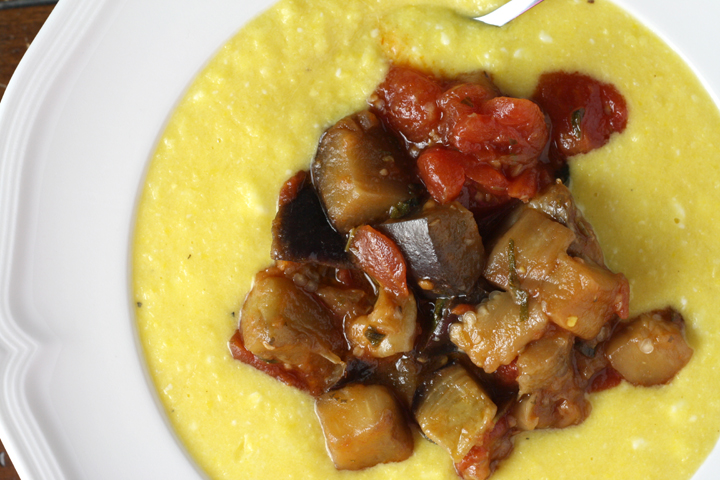
Ok, so moving along. I wanted to share this recipe with you guys before summer, and the season’s yummy corn, is no longer around. I pinned this last summer because I thought the idea of making a polenta out of fresh corn instead of cornmeal just sounded really intriguing. I would never have thought of it. 

Fresh Corn Polenta with Eggplant Sauce ~ ElephantEats.com

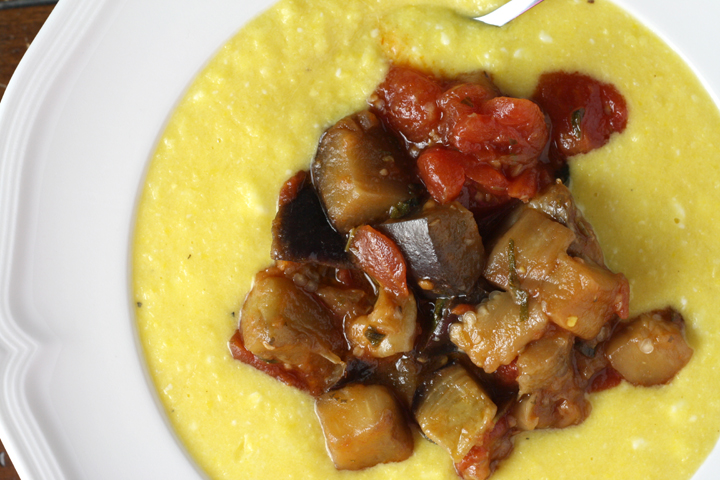
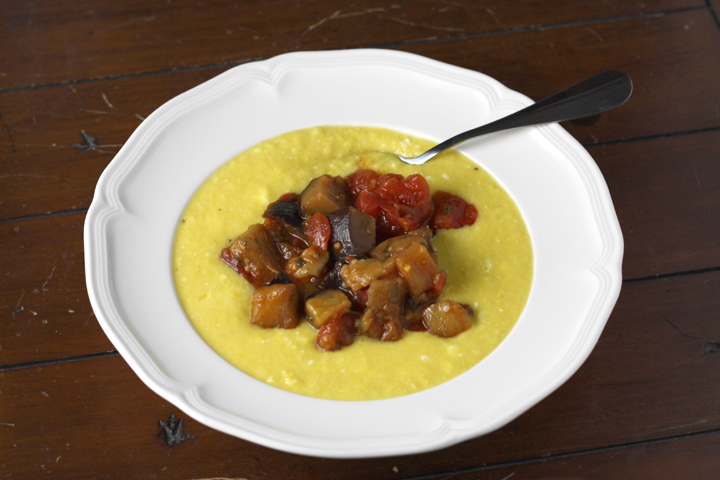
Anyway I finally got around to making it. I invited my friend Erica over and she seemed to really like it, although she did put a lot of hot sauce on it. I think I just undersalted it a bit. Anyway, it was delicious and rich, but not exactly what I was imagining. I totally think you should give it a try though. The combo of the creamy polenta and chunky eggplant topping was really good.

I slightly altered the amounts in the recipe. My main adjustment was to cut back on the water added before cooking it down. As you can see from my pics, I couldn’t get it to thicken up to the consistency it should have been because I didn’t have the patience to sit and stir it for another hour. In my directions below I say not to add any liquid back, in order to fix this problem. Definitely give it a try before summer’s over!

Fresh Corn Polenta with Eggplant Sauce ~ ElephantEats.com

Sweet Corn Polenta with Eggplant Sauce
Serves 4
A creamy polenta made from fresh corn instead of dried goods!
Write a review
Print
Eggplant Sauce
  1. 1/3 cups vegetable oil
  2. 1 medium eggplant, cut into 3/4-inch dice
  3. 2 teaspoons tomato paste
  4. 1/4 cup dry white wine
  5. 1 cup chopped peeled tomatoes (fresh or canned) (I used canned)
  6. 6 1/2 tablespoons water
  7. 1/4 teaspoon salt
  8. 1/4 teaspoon sugar
  9. 1 tablespoon chopped oregano
Polenta
  1. 6 ears of corn
  2. Water
  3. 3 tablespoons butter, diced
  4. 7 ounces feta, crumbled
  5. 1/4 teaspoon salt
  6. Black pepper
Eggplant Sauce
  1. Heat up the oil in a large saucepan and fry the eggplant on medium heat for about 15 minutes, or until nicely brown. Drain off as much oil as you can and discard it -- the safest way to do this is to scoop out the eggplant to a plate using a slotted spoon, then pour off the oil into a bowl before added the eggplant back in. You can save the oil for another use.
  2. Add the tomato paste to the pan and stir with the eggplant. Cook for 2 minutes, then add the wine and cook for 1 minute. Add the chopped tomatoes, water, salt, sugar and oregano and cook for a further 5 minutes to get a deep-flavored sauce. Set aside; warm it up when needed.
Polenta
  1. Remove the leaves and "silk" from each ear of corn, then chop off the pointed top and stalk. Use a sharp knife or corn stripping tool to shave off the kernels -- either stand each ear upright on its base and shave downward, or lay each ear on its side on a cutting board to slice off the kernels. You want to have 1 1/4 pounds kernels.
  2. Place the kernels in a medium saucepan and barely cover them with the water. Cook for 12 minutes on a low simmer. Use a slotted spoon to lift the kernels from the water and into a food processor; reserve the cooking liquid. Process them for quite a few minutes, to break as much of the kernel case as possible. Add some of the cooking liquid if the mixture becomes too dry to process. Now return the corn paste to the pan and cook, while stirring, on low heat for 10 to 15 minutes, or until the mixture thickens to mashed potato consistency, adding more cooking liquid if you like a thinner polenta. (If you have a lot of liquid left in the pan, it can take a while to cook down the polenta, and it will sputter.
  3. Fold in the butter, the feta, salt and some pepper and optionally cook for a further 2 minutes. Taste and add more salt if needed.
Adapted from (slightly) Yotam Ottolenghi @ Food 52
https://elephanteats.com/

Farro Salad ~ ElephantEats.com

Sorry I haven’t posted a recipe in a while. We’ve been quite busy around these parts.

First, Nate’s mom came to visit, then my parents flew in for the wknd, then it was the 4th, then my bday and then I came down with a nasty stomach bug. But I’m back now, so I’ve got some lovely photos for you all, and a tasty recipe!

When Nate’s mom came to town, we went to this cool exhibit at the Museum of Modern Art called the Rain Room. It’s basically a dark room with just one light shining, and inside it’s raining…but wherever you walk the rain stops. They only let 10 or so people in at a time.

Here’s Nate and his mom- in the rain, but dry as can be.

Moma Rain Room ~ ElephantEats.com

Because it was a dark room with a huge light beam shining right on us, there were some crazy shadows while we were waiting in line.

No one else in line seemed to notice, as they were too mesmerized by the actual exhibit, but Nate and I managed to get quite a silhouette of us!

Moma Rain Room Silhouette ~ ElephantEats.com

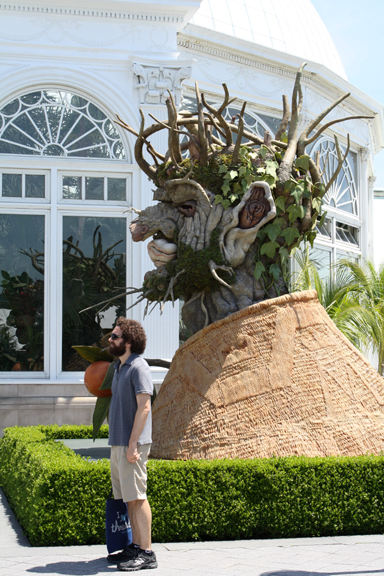
Then, we headed to the Botanical Gardens in the Bronx. We’ve been there a bunch of times, but this time we went specifically because they had this awesome outdoor temporary exhibit called The Four Seasons.

From their site, “Four Seasons is an installation of four sculptures—each standing more than 15 feet high—by contemporary American artist Philip Haas. Encompassing Spring, Summer, Autumn, and Winter, the works are inspired by the 16th-century creations of Italian Renaissance painter Giuseppe Arcimboldo.”

They were SOOOO cool. Clockwise from top left: Winter, Spring, Summer, Autumn.

NY Botanical Gardens Seasons

Here’s a photo to show how large they are in comparison to a person. Quite a resemblance, isn’t it?

Nate Old Man Winter ~ ElephantEats.com

Which one is the real Beardo?

I don’t have any great pics from when my parents visited because it was too hot to do anything, much less take out the camera. We did do some fun stuff though- walked over the Brooklyn Bridge, ate some yummy food, saw a cool Lego exhibit at the Discovery Center, and ate more yummy food :)
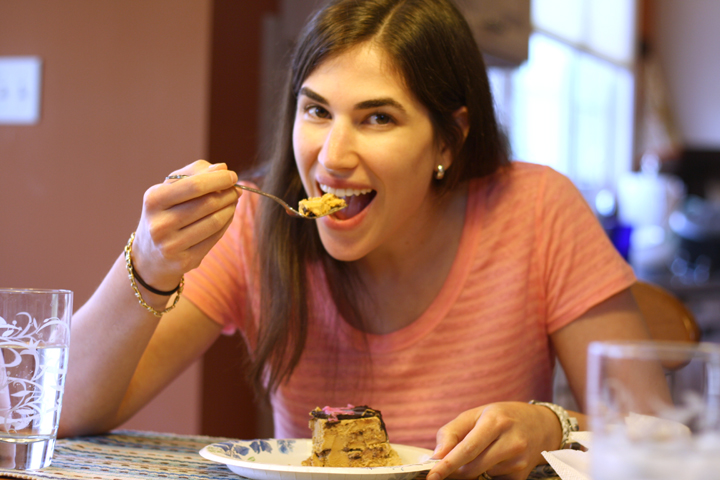
Finally, here’s me, enjoying my delicious Reese’s PB cup ice cream cake, a mere 12 hours before the stomach virus incapacitated me. At least I got to enjoy my bday!

Amy bday 2013

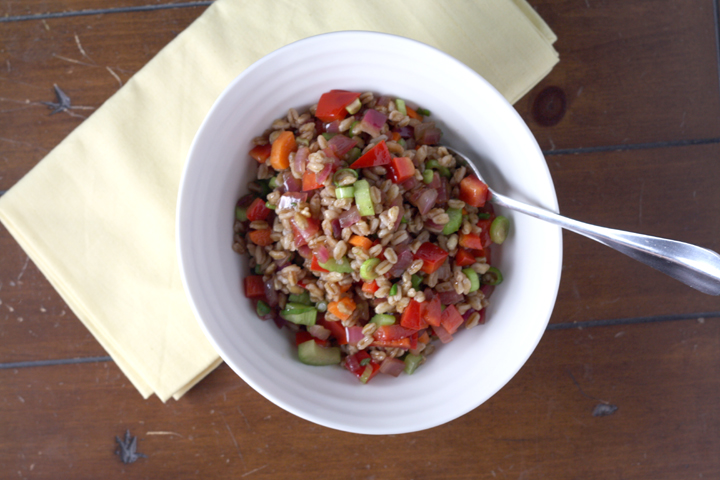
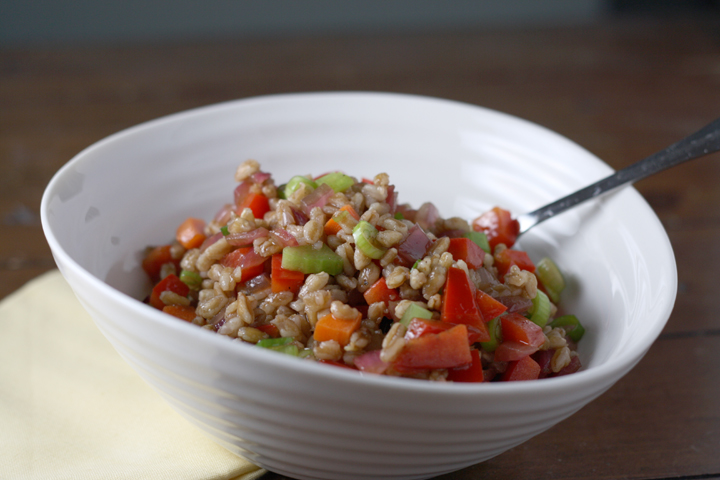
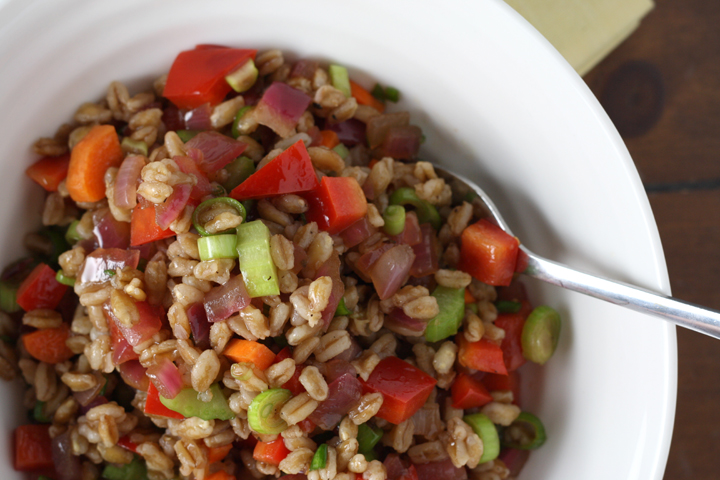
But the real star of this post is the Farro Salad I made to bring to my friend Barrie’s annual 4th of July party. I saw it on one of my fave sites, Shutterbean, and I chose it because it has nothing in it that can spoil if it’s left out in the hot temperatures for an afternoon (i.e. perfect picnic food!). And it’s a good thing I chose something like that since it was in the 90s all day on the 4th.

Farro Salad ~ ElephantEats.com

It was TOTALLY delicious and I couldn’t stop eating it before I packaged it up for the party.

I’m pretty sure I didn’t change a thing from the recipe on Shutterbean’s site, so you can head on over there for the recipe! The only caveat I’d make is that I doubled the recipe and it still didn’t seem like all that much. I guess it depends if you’re serving it as a main dish or side dish.

Farro Salad ~ ElephantEats.com

I hope you all had a great 4th! I can’t believe we’re already into July. How is this year going by so quickly!

Get the recipe on Shutterbean’s site!