Red Wine Chocolate Cake ~ ElephantEats.com

More WINE!!!

Haha, hopefully you’re not sick of red wine recipes yet, because I have one more for you.

As you know I had a bottle of red wine I opened for a recipe that seems to have lasted forever, since i’m not a drinker. I knew at some point I’d make a red wine chocolate cake, but the recipes online weren’t anything special.

Red Wine Chocolate Cake ~ ElephantEats.com


Then, I was scrolling through Shutterbean’s recipes and came across this amazing-looking chocolate bundt cake. It happened to call for a liquid, water, which I figured I could easily substitute for some wine! I also replaced some of the heavy cream in the glaze with wine…and greek yogurt for the sour cream because that’s all I had. Sometimes you just have to work with what you have!

So the moral of this story is, always use wine when a recipe calls for water ;) Jk. Although its really not a bad rule to follow.

Red Wine Chocolate Cake ~ ElephantEats.com

I was anxious to take a pic and eat this, so I didn’t give the glaze a chance to thicken to a good consistency. If you want to have it oozing down the sides of the cake, you should put it in the fridge for at least 30 minutes. I didn’t have time for that so I cut a slice and just poured the thinner version of the sauce over it…equally tasty but not as pretty.

Red Wine Chocolate Cake ~ ElephantEats.com

Note that this cake definitely has a distinct wine taste, but I think that’s what makes it so unique and tasty. The cake itself is moist but still a little crumbly and the glaze…well I ate that by the spoonful ;) The alcohol content in the cake bakes off, and the glaze only has 1/4 cup so I’m pretty sure it’s fine to serve this to kids.

Whether you have some red wine sitting around, or you just want an excuse to open the bottle so you can drink the rest yourself, this recipe is for you!

IMG_7339

Red Wine Chocolate Cake

adapted from Bi Rite Market’s Eat Good Food Cookbook via Shutterbean

Print this recipe!

Makes 1 bundt cake- serves 10

For the cake
1 cup (2 sticks) unsalted butter, plus more for the pan
1/3 cup cocoa powder
1 teaspoon salt
1 cup red wine
2 cups all-purpose flour, plus more for the pan
1 3/4 cups sugar
1 1/2 teaspoons baking soda
2 large eggs
1/2 cup greek yogurt (or sour cream)
1 teaspoon pure vanilla extract

For the glaze:
4 ounces semi-sweet chocolate, finely chopped
1 1/2 tablespoons corn syrup
1/4 cup red wine
1/4 cup heavy cream
1 1/2 tablespoons sugar

Make the cake:

Position a rack in the center of the oven and heat to 350 degrees. Butter and flour a 10- or 12-cup Bundt pan and set aside.

In a small saucepan, combine the butter, cocoa powder, salt, and wine and put over medium heat. Cook, stirring, just until melted and combined. Remove from the heat and set aside.

Put the flour, sugar, and baking soda in a large bowl and whisk to blend. Add half of the melted-butter mixture and whisk until completely blended (it will be very thick). Add the remaining butter mixture and whisk. Add the eggs one at a time, whisking each to blend completely before adding the next. Whisk in the yogurt and vanilla until smooth.

Pour the mixture into the prepared pan and bake until a toothpick inserted into the center of the cake comes out clean, 40 to 45 minutes.

Let the cake cool in the pan for 15 minutes and then invert onto a rack. Let cool completely before making the glaze.

Make the glaze:

Put the chopped chocolate and corn syrup in a medium bowl and set aside.

Combine the heavy cream, wine and sugar in a small saucepan and put over medium heat. Stir constantly until hot and the sugar is dissolved. Pour the hot cream over the chocolate and whisk until melted and smooth. Refrigerate for 30 min or until the glaze is thick enough to ooze down sides of the cake.

Chocolate Brownie Cookie

I teased you on Sunday with promises of another Valentine’s Day treat. This one, lucky for you, is of the chocolate variety!

Sometimes you just decide that you need freshly baked cookies NOW. Don’t tell me you never had thoughts like that. It’s happened to me on several occasions, but unfortunately most cookie recipes call for room temperature butter, which foils all hope for spontaneity.

These Chocolate Brownie Cookies though, like brownies, use melted butter! So you have no excuse not to make them this very second, no advanced preparation needed…except maybe making sure you have enough room in your tummy to eat a few fresh out of the oven.

Chocolate Brownie Cookie

I actually made these cookies months ago for Nate’s friend’s birthday. I have a million yummy chocolate cookie recipes (and I’m sure you do too), but this one was pretty darn tasty and you should consider adding it to your repertoire.

They call for nuts, but Nate thinks that nuts ruin all baked goods, and so I left them out. Personally, I think they’d add a nice crunch.

IMG_6286

The key is to take these out of the oven when they seem too soft to be done. If you cook them too long, they will be dry. Trust me on this one :(

If you do happen to overcook them slightly, make sure you serve them warm-15 seconds in the microwave will moisten them right up. In fact, they’re always best served warm regardless.

Chocolate Brownie Cookie


And in case you need some other Valentine’s Day inspiration, here are a few of my faves:


IMG_0058edit

Red Velvet Cake with Raspberry Mousse and Fluffy Cream Cheese Frosting– I made this for my first Valentine’s Day with Nate!

IMG_2939edit

Chocolate Fudge Cheesecake

IMG_5449

Rich and Thick Hot Chocolate

IMG_5662

Chocolate Fudge Cheesecake

IMG_5506

Dark Chocolate-Cherry Ganache Bars

IMG_4227

Cider Poached Pears– a delicious, lighter dessert

IMG_4403

Chocolate-peanut butter pb cup cookies

Food 061

Butterscotch Rum Banana Spiced Blondies

IMG_5034

Chocolate Pecan-Pie Bars

Brownie Cookies

From Oxmoor House

Print this recipe

makes 2.5 dozen

1/2 cup butter
4 (1-oz.) unsweetened chocolate baking squares, chopped
3 cups semisweet chocolate morsels, divided
1 1/2 cups all-purpose flour
1/2 teaspoon baking powder
1/2 teaspoon salt
4 large eggs
1 1/2 cups sugar
2 teaspoons vanilla extract
2 cups chopped pecans, toasted (optional)

Combine butter, unsweetened chocolate, and 1 1/2 cups chocolate morsels in a large heavy saucepan. Cook over low heat, stirring constantly, until butter and chocolate melt; cool.

Combine flour, baking powder, and salt; set aside.

Beat eggs, sugar, and vanilla at medium speed with an electric mixer. Gradually add flour mixture to egg mixture, beating well. Add chocolate mixture; beat well. Stir in remaining 1 1/2 cups chocolate morsels and pecans (if using).

Drop dough by 2 tablespoonfuls 1 inch apart onto parchment paper-lined baking sheets.

Bake at 350° for 10 minutes- they will look slightly underdone, do NOT over bake!

Cool slightly on baking sheets; remove to wire racks to cool completely.

Valentine Sugar Cookie Heart

Before I get into my Valentine’s Day treats, I wanted to share a couple things with you. If you’ve been following me since the beginning, you know that a couple years ago, I catered lunch for Nate and his little film crew while he filmed a short film he wrote, directed, and acted in. It took a long time to finish editing, but I can finally share it with you. It’s equal parts suspenseful and amusing, and I hope you enjoy it :)

Lost Keys from Nathaniel Carota on Vimeo.

(You can also see the video he made for our wedding here.)

The second thing I want to share with you is another doggy painting I completed. I’m really trying to build up a pet portrait side business (see the “Pet Portrait” tab on my page menu). I really want to expand to animals other than dogs, but so far that’s all I’ve done. This one was done in memory of Charlie, who passed away recently from cancer :(

Custom Pet Portrait Yellow Lab

Custom Pet Portrait Yellow Lab

Now onto the recipe…

I know a lot of people aren’t fans of Valentine’s Day. While it’s true that it’s not as exciting of a holiday if you’re unattached, it’s a perfect excuse to eat chocolate no matter what your relationship status :)

There are a couple cookie recipes I’ve been meaning to share. I’ll share one today and one in a few days. The first is a semi-homemade cookie that I found years ago and often use it for beautiful Christmas Cookies. It’s a cut-out sugar cookie, but because it’s an upgrade to a powdered mix, you can spend more time decorating and less time measuring out ingredients! Also, the texture is such that you don’t even need to refrigerate before rolling out.

Valentine Sugar Cookie Heart

I usually use it with regular royal icing and decorate pretty snowflakes and santas for Christmas. This time, however, I used a super easy marbling technique I found on this site. It’s so easy and sooo impressive looking!

Since I won’t get to be with Nate this Valentine’s Day, I sent him these in a little care package with some toffee blondies. The blondies were a recipe I made for the first time and they were SO good, but I didn’t photograph them, so I’ll have to make them again sometime soon for you.

Make these cookies for someone you love today!

Semi-Homemade Roll Out Sugar Cookies

From Sandra Lee

Print this recipe

makes 4 dozen small cookies or 2 dozen larger

17.5-ounce package dry sugar cookie mix
4 ounces cream cheese, softened
2 eggs
1 teaspoon vanilla extract or other flavoring
1 cup all-purpose flour

royal icing (recipe below)

Preheat oven to 350 degrees F.

Combine the cookie mix with the cream cheese until crumbly. Mix in the eggs and flavoring until well combined. Add enough flour to make a firm dough that can be rolled out. Refrigerate briefly if too sticky.

Roll dough out on lightly floured board to 1/4-inch thickness. Cut out hearts or other desired shapes.

Place on ungreased baking sheet and bake for about 8-10 minutes.

Make royal icing. When cookies are cool, ice cookies by following marble technique found here and here.

Royal Icing

from Annie’s Eats

this might yield slightly more than you need, but it’s better to have too much so you don’t have to match the color when you make more.

Ingredients:
4 cups powdered sugar, sifted
2 tbsp. meringue powder
5 tbsp. water

Combine all ingredients in a bowl. Whisk until the sheen has disappeared and the icing has a matte appearance (or use a stand mixer.

Transfer the contents of the mixing bowl to an air-tight container. This will be the stiffest consistency of the icing, and at this point it is still too stiff to use for decorating.  Add water a very small amount at a time and stir by hand until fully incorporated.  Continue until the icing has reached a consistency appropriate for piping.  (Remember, if you are having any difficulty piping, it is still too thick.  Add a little more liquid and try again.)

Using a pastry bag, pipe around the edges of each cookie.  Let stand so the icing will set.  Make sure to keep the leftover icing covered at all times when not in use so that it does not begin to harden.

Once all the cookies have been edged, transfer some of the remaining icing to a separate air-tight container.  Thin out by incorporating a small amount of water at a time, until the icing drips off the spoon easily when lifted and then smooths in with that still in the bowl.  If you go too far and the icing is too thin, add more sifted powdered sugar to thicken it again.  Once the icing has reached the desired consistency, transfer it to a squeeze bottle (or a plastic bag with a hole in one corner), and flood the area surrounded by the piping on each cookie.  If it does not completely spread to the edges, use a toothpick to help it along.  Pipe on dots in a contrasting color and use a toothpick to drag into hearts. Allow to set.

Cookies and Cream Bars

I know I shouldn’t be tempting you guys more dessert posts after that last doozy. But since my blogging is falling by the wayside, it’s been a week since then…and if you’re living in my household, that cake is long gone!

Cookies and Cream Bars

I also know I shouldn’t be making these desserts when I have 6 weeks left to look lovely in my wedding dress. And now that I’ve had my first fitting I’d really not like to gain any weight!

But I’m sorry I just had to share these. I saw them online thinking they reminded me of “cookies ‘n cream” (even though they were called Oreo Cheesecake Bars), but figuring they wouldn’t really taste like it….but they did!

Cookies and Cream Bars

You can’t taste the cheesecake tang in these as much as just a creamy vanilla filling and they’re CHOCK FULL of oreos- like almost-two-entire-packages-full. And worth every little calorie.

Cookies and Cream Bars

I was afraid to figure out how many calories are actually in these, so I didn’t. Instead I cut myself off a half of a piece each night and savored it…and then sometimes went back for the other half. Oops.

This week i’m only eating salad…let’s hope I fit in my dress!

Luckily LC doesn’t have to fit in a dress for the wedding, because she’s one lazy cat…

Cookies and Cream Bars

From Blissfully Delicious (following her doubling directions) via Annie’s Eats

Print this recipe!

makes 24 bars

For the crust
46 Oreo cookies (almost 2 entire packages including the ones in the cheescake layer)
4 Tbsp unsalted butter, melted

For the cheesecake:
24 oz. cream cheese, at room temperature
3/4 cup sugar
3/4  cup. sour cream, at room temperature
1 tsp. vanilla extract
1/2 tsp. salt
2 large egg plus 2 egg yolk
24 Oreo cookies, roughly chopped

Preheat the oven to 325˚ F. Line a 9×13 pan with aluminum foil or parchment paper.

Make the crust: place cookies in the bowl of a food processor. Process, pulsing, until the cookies are finely ground. Add in the melted butter and pulse until the cookie crumbs are moistened. Transfer the mixture to the prepared baking pan. Press the crumbs into an even layer over the bottom of the pan. Bake the crust for 10 minutes, then set aside and prepare the filling while maintaining the oven temperature.

Make the filling: add the cream cheese to the bowl of an electric mixer fitted with the paddle attachment. Beat on medium-high speed until light and smooth, about 2 minutes. Mix in the sugar until well combined. Blend in the sour cream, vanilla and salt. Beat in the eggs and egg yolks on medium-high speed until incorporated, scraping down the bowl as needed. Stir in the chopped cookies with a rubber spatula.

Pour the cheesecake batter over the prepared crust, smoothing the top with a spatula. Bake for about 45 minutes, until the cheesecake is set around the edges but slightly wobbly in the center. Transfer the pan to a wire rack and let cool about an hour to room temperature. Cover the pan and refrigerate until well chilled, about 3 hours or overnight.

To cut the bars, pull the cake from the pan by lifting the foil up out of the pan. Place on a cutting board, peel away the foil, and slice into bars. Clean the knife blade between each slice to keep the edges neat. Keep refrigerated until ready to serve.

Chocolate Peanut Butter Cake

As you all know, this past Thursday was Nate’s birthday….or as Nate likes to call it, the day he’s “on vacation.” By this he means that I’m not allowed to make him run any errands.

Nate’s currently home during the day while I’m at work, and as most of us working folk know, most stores that you need to run errands at are only open during the hours we’re at work. So annoying, right?! I’ve been having Nate run some errands for me and he’s been none too pleased.

Chocolate Peanut Butter Cake

I did really want to give him “the day off” on his birthday, but my library books were about to expire so I asked him to do me a favor and return my books to the library across the street from our apartment. I don’t even want to tell you how much he complained….but then I reminded him about this wonderful cake that I’d be serving him that evening. I didn’t hear another word. At least for a day.

Nate is a man of simple tastes, so when it came time to figure out what to bake up for his bday, I only had to think of his few favorite combos: chocolate-mint, red velvet/carrot cake + cream cheese frosting, and of course, chocolate peanut-butter.

Chocolate Peanut Butter Cake

It seems that Deb’s ( from Smitten Kitchen) husband is a choco peanut butter fan too, and so when I saw this recipe on her site, I knew I had to make it. I’ve had good luck with the recipes on her site because they’re well-tested, so I was pretty sure this one would be a winner.

I have to say that as I added the 1.5 cups of water the recipe calls for and stirred it up, I was slightly skeptical. The batter before the water was added had normal cake consistency but after it was incredibly watery. I checked the site and no one had said anything in the comments about a typo, so I forged ahead.
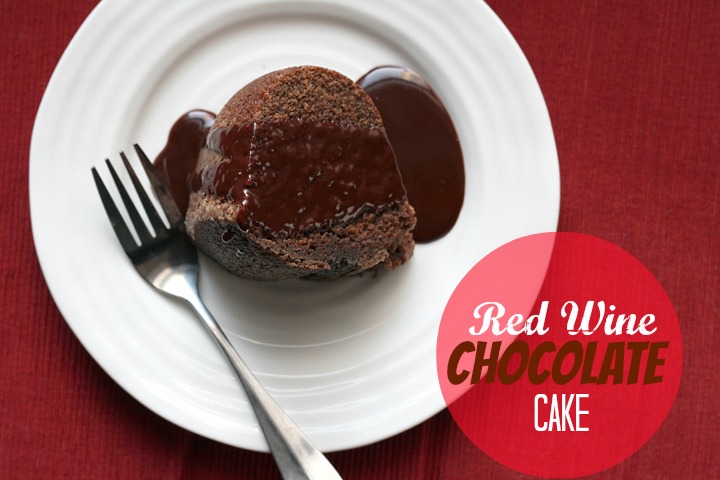
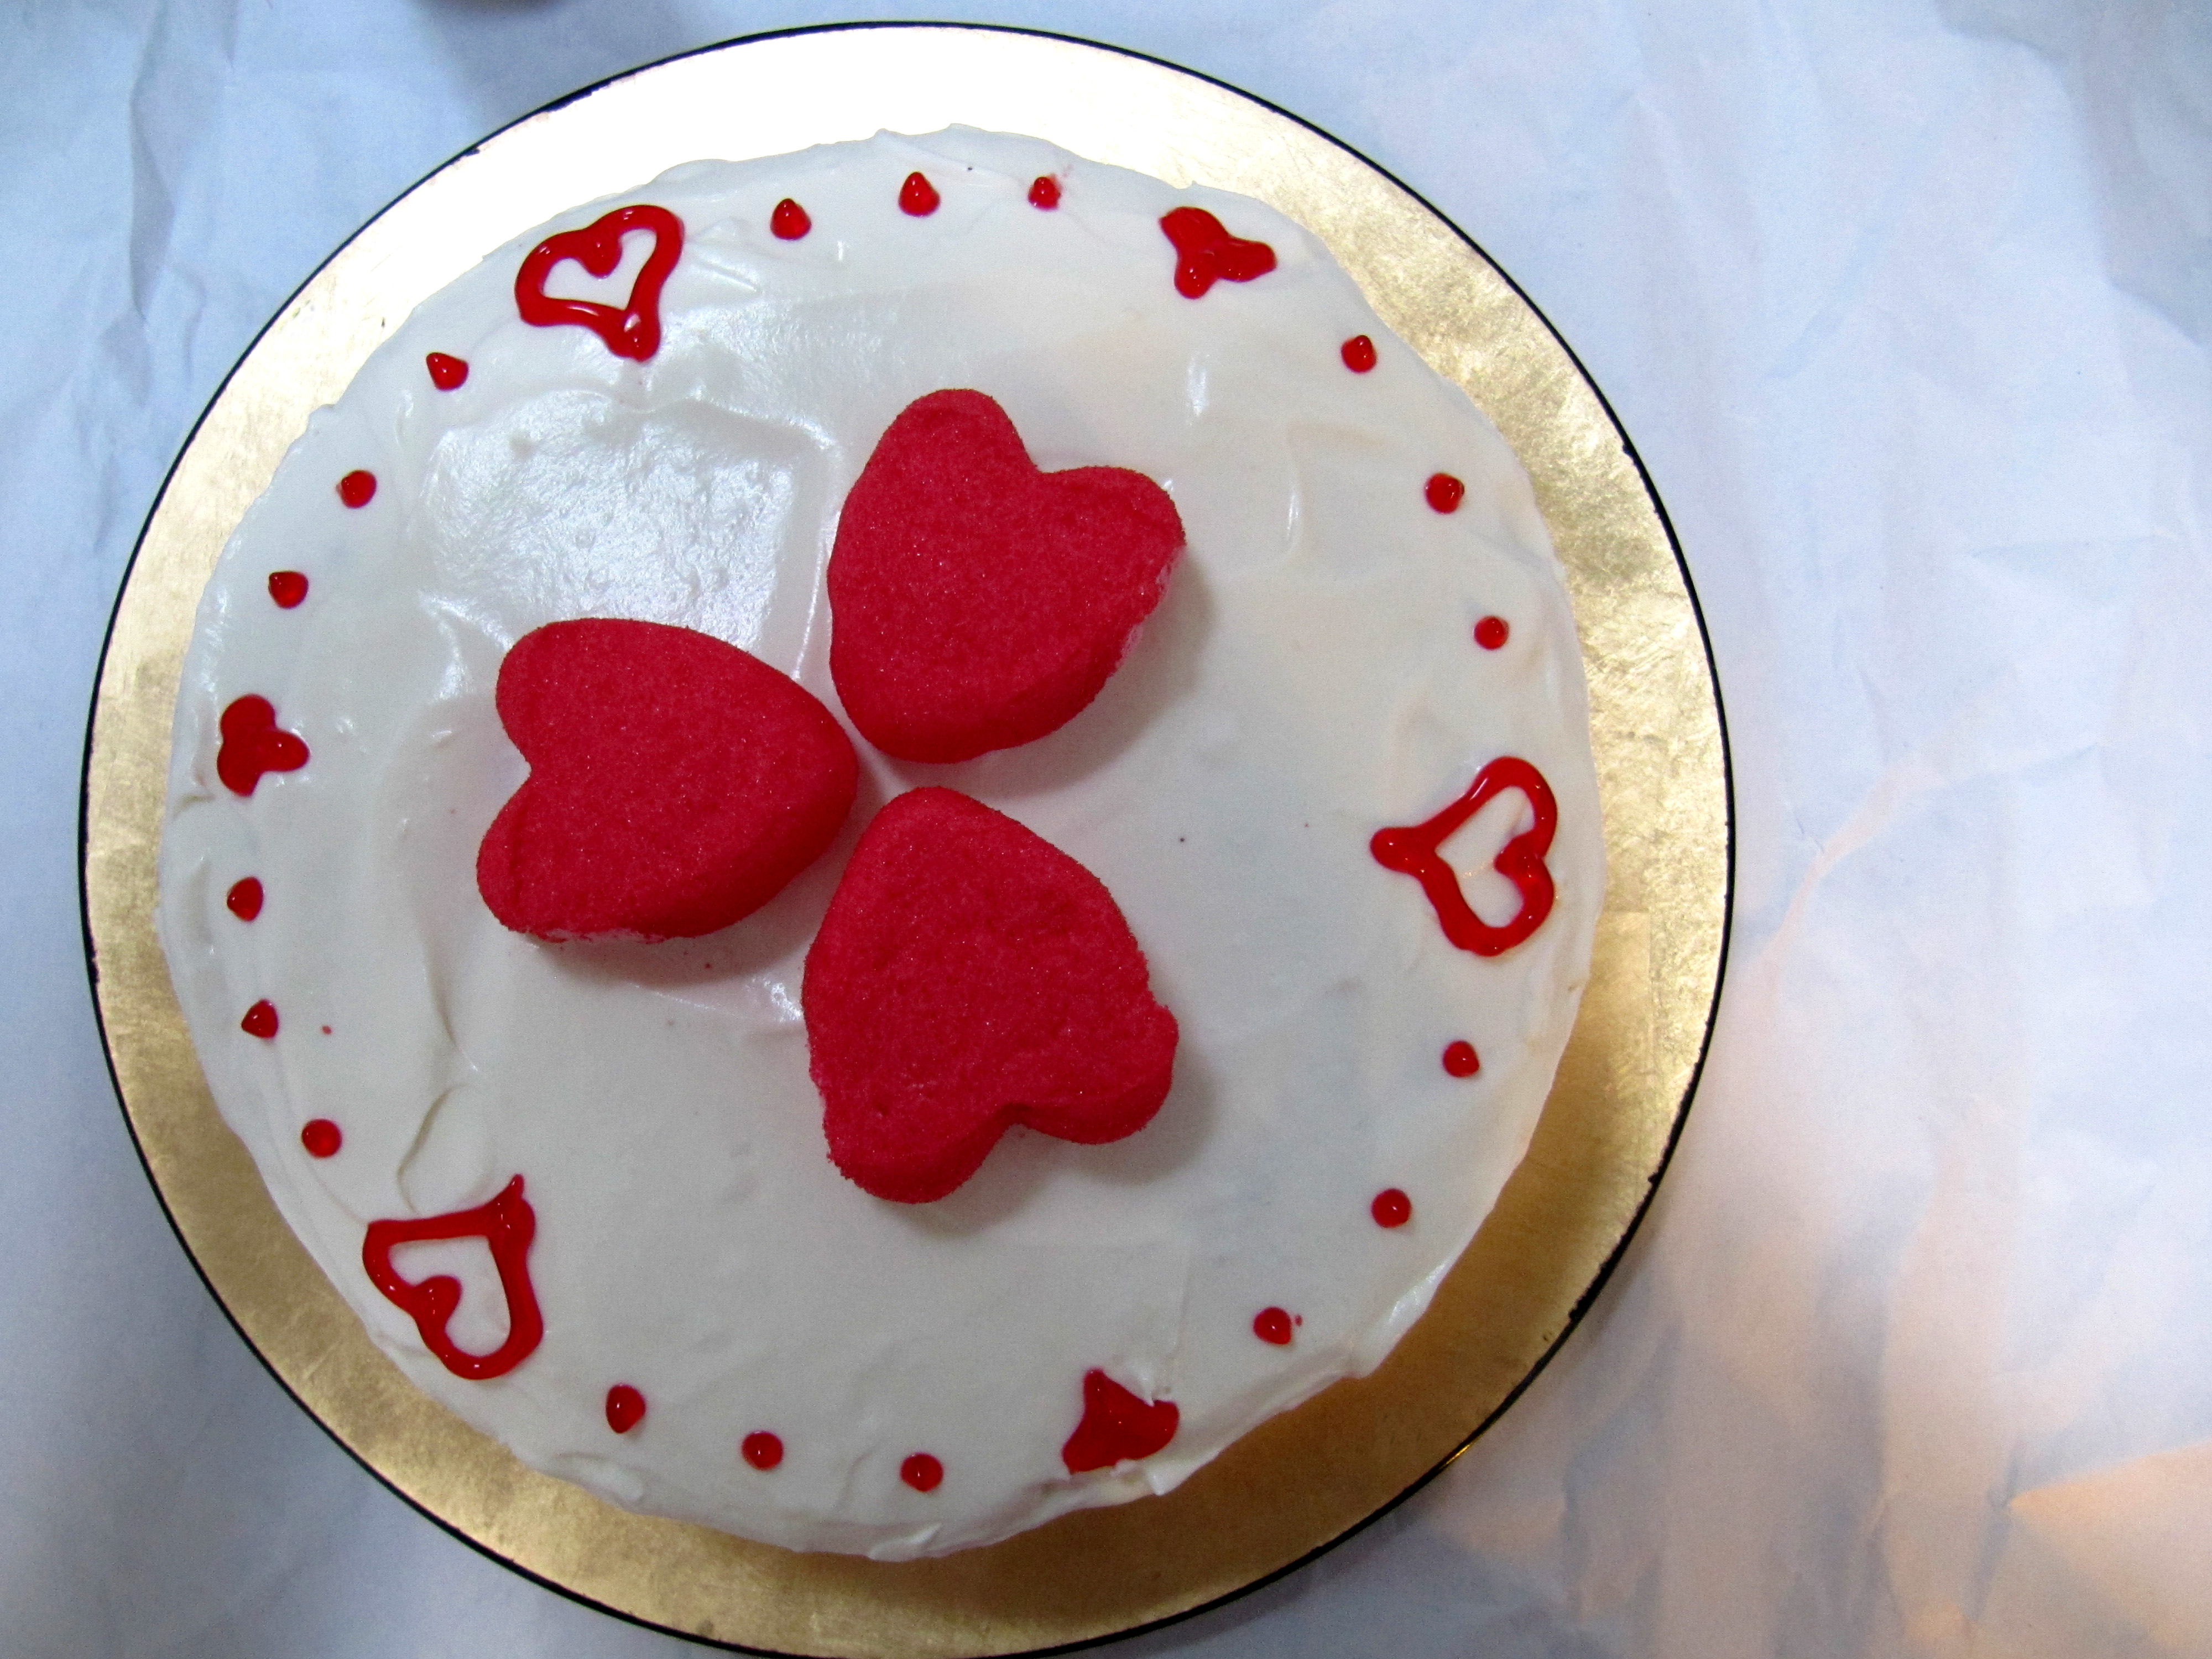
please ignore the giant glob of glaze puddled on that side…

35ish minutes later I had the most fluffy looking cake I’d ever seen. After cooling the cakes in the pans for 20 minutes, I following Deb’s advice and shoved them in the freezer for about 30 minutes, which seems to have been a good choice given how delicate these cakes were.

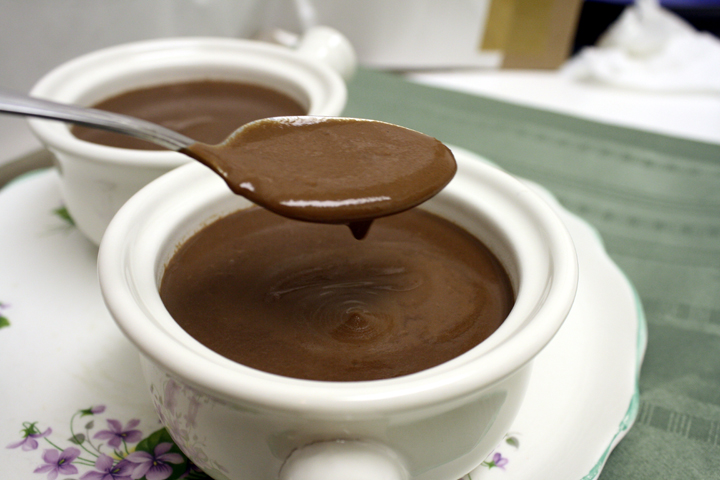
My only other comment is that the glaze seems kind of clumpy when you melt the chocolate, pb, etc in the pan, but after adding the half and half and vigorously mixing, it smooths out nicely….so fear not!

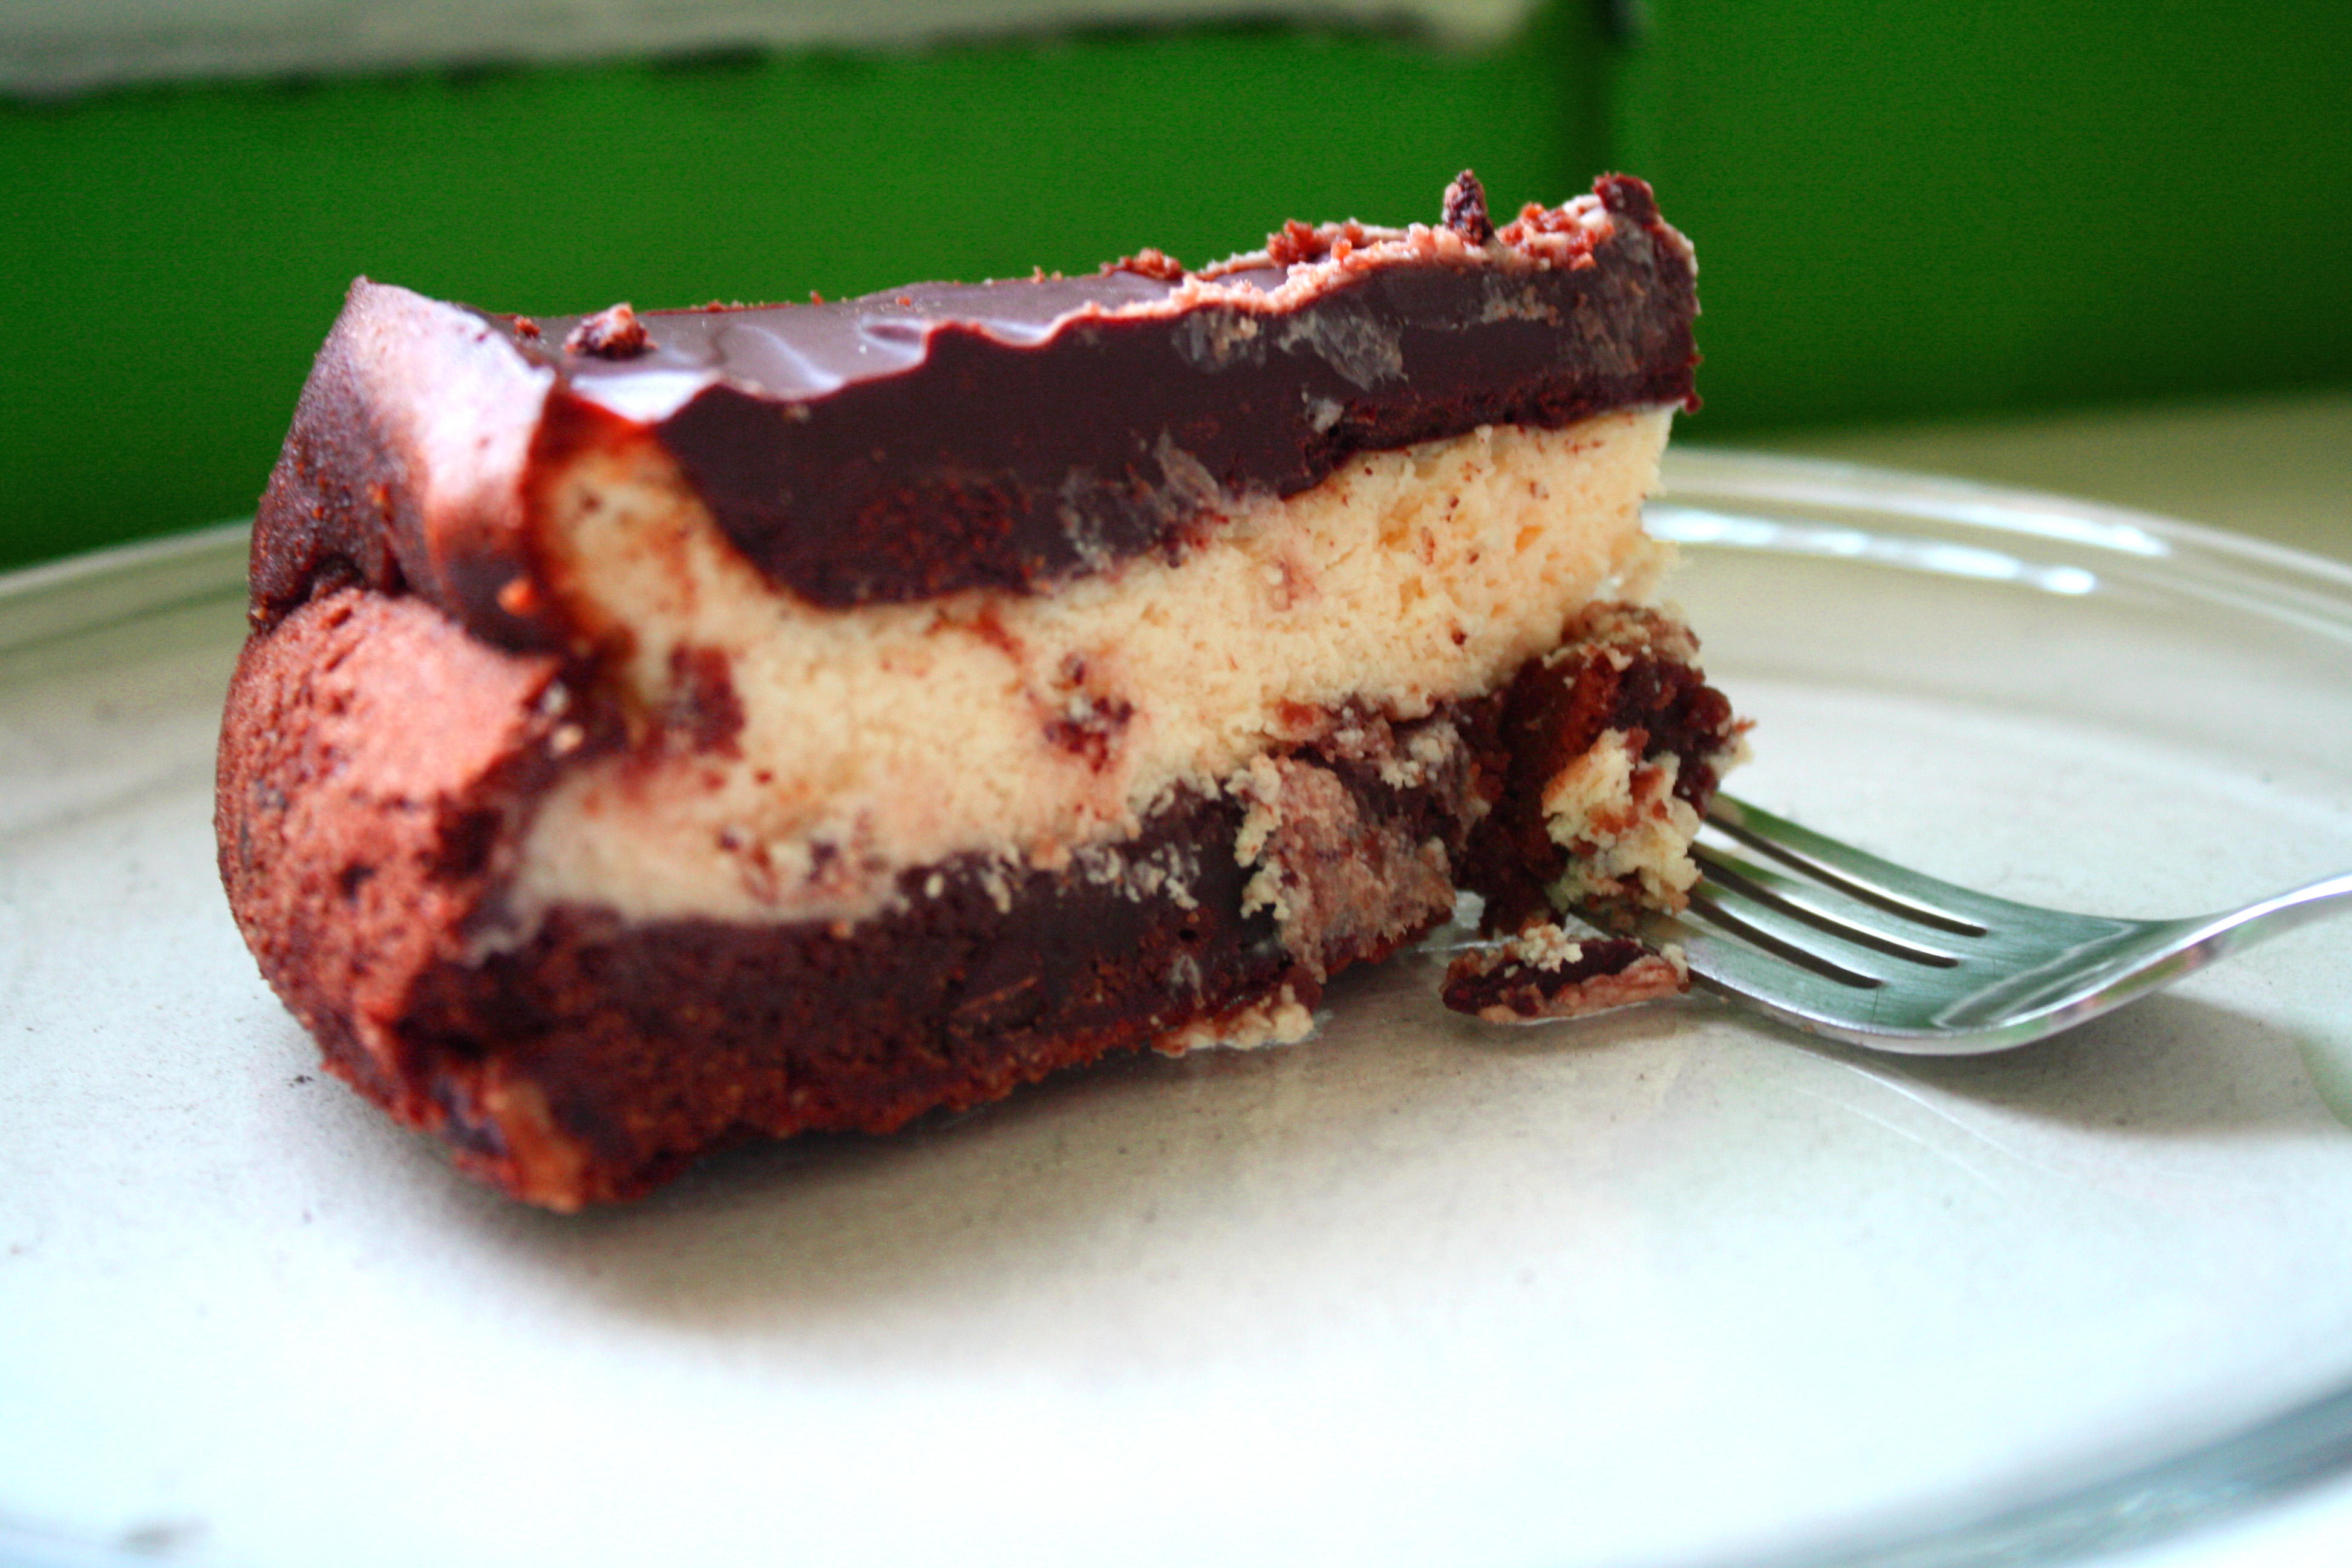
Anyway, I know this is a bold statement, but I think it may be the most delicious cake I’ve ever made or eaten. Ever. 

Chocolate Peanut Butter Cake

And I wasn’t the only one who thought that. Nate and I had 3 friends over to dinner and the only sounds coming from them after biting into the cake were ooohs and aaaahs…and a few “this is amazing”s.

I know it may look complicated, but following Deb’s tips regarding the cooling times, it was surprisingly easy. I made the cake and pb frosting and frosted it all within 3 hours or so after I got home from work. After sticking it in the fridge overnight, I made the chocolate glaze the next evening, poured it onto the cold cake, stuck it back in the fridge to firm up while we started eating dinner. I then took the cake out about 30 min to an hour before we were ready for it so it could soften up.

YOU NEED TO MAKE THIS. Seriously, you don’t know what you’re missing.

Sour Cream-Chocolate Cake with Peanut Butter Frosting and Chocolate-Peanut Butter Glaze

From Smitten Kitchen via Sky High: Irresistable Triple-Layer Cakes

Print this recipe!

makes one 8 inch 3 layer cake

2 cups all-purpose flour
2 1/2 cups sugar
3/4 cup unsweetened cocoa powder, preferably Dutch process
2 teaspoons baking soda
1 teaspoon salt
1 cup neutral vegetable oil, such as canola, soybean or vegetable blend
1 cup sour cream
1 1/2 cups water
2 tablespoons distilled white vinegar
1 teaspoon vanilla extract
2 eggs

1. Preheat the oven to 350 degrees F. Butter the bottoms and sides of three 8-inch round cakepans. Line the bottom of each pan with a round of parchment or waxed paper and butter the paper.

2. Sift the flour, sugar, cocoa powder, baking soda, and salt into a large bowl. Whisk to combine them well. Add the oil and sour cream and whisk to blend. Gradually beat in the water. Blend in the vinegar and vanilla. Whisk in the eggs and beat until well blended. Scrape down the sides of the bowl and be sure the batter is well mixed. Divide among the 3 prepared cake pans. **Note batter will be incredibly watery

3. Bake for 30 to 35 minutes, or until a cake tester or wooden toothpick inserted in the center comes out almost clean. Let cool in the pans for about 20 minutes. Invert onto wire racks, carefully peel off the paper liners, and let cool completely. (Deb’s note: These cakes are very, very soft. I found them a lot easier to work with after firming them up in the freezer for 30 minutes. They’ll defrost quickly once assembled. You’ll be glad you did this, trust me.)

4. To frost the cake, place one layer, flat side up, on a cake stand or large serving plate. Spread 2/3 cup cup of the Peanut Butter Frosting evenly over the top. Repeat with the next layer. Place the last layer on top and frost the top and sides of the cake with the remaining frosting. (Deb note 1: Making a crumb coat of frosting–a thin layer that binds the dark crumbs to the cake so they don’t show up in the final outer frosting layer–is a great idea for this cake, or any with a dark cake and lighter-colored frosting. Once you “mask” your cake, let it chill for 15 to 30 minutes until firm, then use the remainder of the frosting to create a smooth final coating. Deb note 2: Once the cake is fully frosted, it helps to chill it again and let it firm up. The cooler and more set the peanut butter frosting is, the better drip effect you’ll get from the Chocolate-Peanut Butter Glaze.)

5. To decorate with the Chocolate–Peanut Butter Glaze, put the cake plate on a large baking sheet to catch any drips. Simply pour the glaze over the top of the cake, and using an offset spatula, spread it evenly over the top just to the edges so that it runs down the sides of the cake in long drips. Refrigerate, uncovered, for at least 30 minutes to allow the glaze and frosting to set completely. Remove about 1 hour before serving. Decorate the top with chopped peanut brittle.

Peanut Butter Frosting
Makes about 5 cups

10 ounces cream cheese, at room temperature
1 stick (4 ounces) unsalted butter, at room temperature
5 cups confectioners’ sugar, sifted
2/3 cup smooth peanut butter, preferably a commercial brand (because oil doesn’t separate out)

1. In a large bowl with an electric mixer, beat the cream cheese and butter until light and fluffy. Gradually add the confectioners’ sugar 1 cup at a time, mixing thoroughly after each addition and scraping down the sides of the bowl often. Continue to beat on medium speed until light and fluffy, 3 to 4 minutes.

2. Add the peanut butter and beat until thoroughly blended.

Chocolate-Peanut Butter Glaze
Makes about 1 1/2 cups

8 ounces semisweet chocolate, coarsely chopped
3 tablespoons smooth peanut butter
2 tablespoons light corn syrup
1/2 cup half-and-half

1. In the top of a double boiler or in a bowl set over simmering water, combine the chocolate, peanut butter, and corn syrup. Cook, whisking often, until the chocolate is melted and the mixture is smooth. **Note the consistency will be incredibly thick and slightly grainy but this is normal.

2. Remove from the heat and whisk in the half-and-half, beating until smooth. **It will separate before it combines and smooths out. Use while still warm.