Blackberry Clafoutis ~ ElephantEats.com

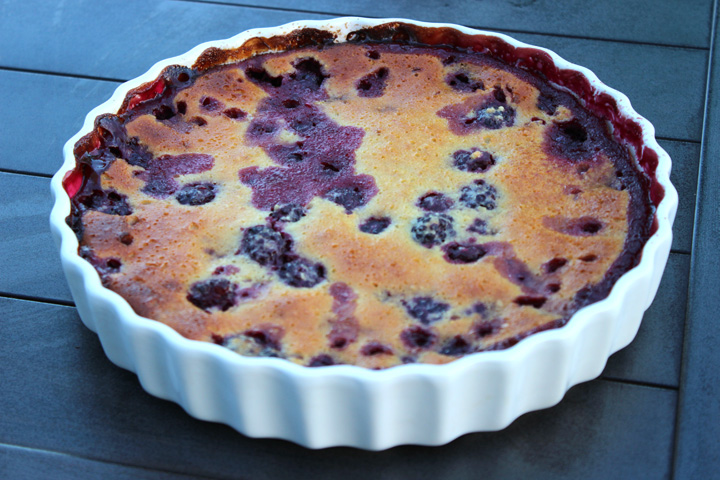
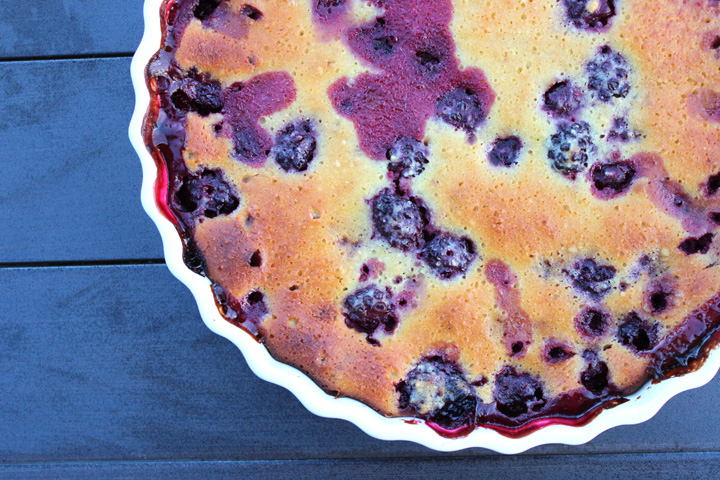
While down at Nate’s mom’s for Memorial Day, I managed to find the energy to make us a dessert in addition to that yummy pasta salad. Nate has been sending me a lot of NYTimes recipes and this one for a berry clafoutis sounded pretty tasty.  

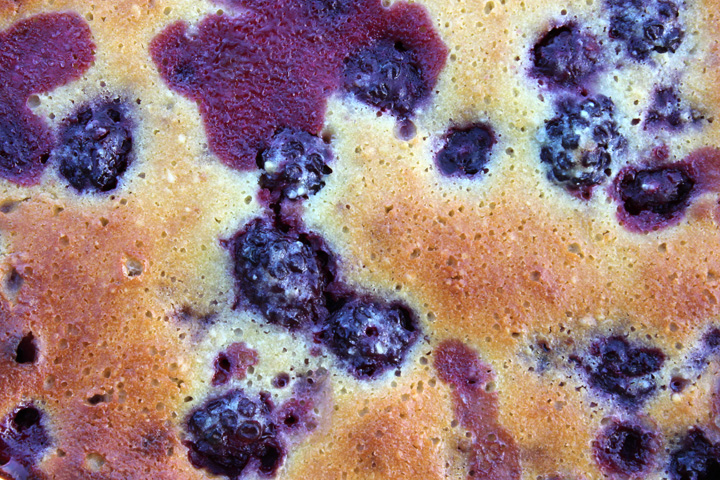
It ended up being really easy and delicious. It was low on the sweetness scale, making the leftovers perfect for breakfast. I’d definitely make it again and maybe try switching up the type of fruit inside. I also think it could have been tasty with some vanilla ice cream on top…but then what isn’t? ;)

Blackberry Clafoutis ~ ElephantEats.com

I’ve been doing some cooking in our new kitchen. Our house is now preeeeetty much done (pics to come when we finish unpacking boxes). The kitchen island has been installed, finally, which gives me another cooking surface (and another area to make a mess on). LC has decided that this is her newest lookout point. I think she’s the kitchen supervisor. 

Blackberry Clafoutis ~ ElephantEats.com

For a Pregnancy Update:

I’m now 26 1/2 weeks. Baby boy is kicking a ton! It’s the weirdest feeling when you feel him actually kick your hand while it’s on your stomach. Sometime I feel his foot (or maybe his fist) swirl around. It’s so surreal and it makes me smile every time :)

26 weeks ~ ElephantEats.com

I had Nate put his hand on my belly to feel the kicking a few times. Now when I ask him to feel it, he says that if he’s felt it a few times, he’s felt it enough. Can you believe him?! I guess it’s different when you’re not the one with a living thing inside your abdomen. 

26 week collage ~ ElephantEats.com

I haven’t been great about keeping up with the weekly photos, mainly because they’d been sanding and then painting the outside of the house and had all our windows covered with a plastic film. Not great for photo lighting, as you might imagine. But painting is almost done and I’ve decided the new belly photo location is the nursery! So you get to see a green background now since the walls in there are a light sage green. 

When I find time in the next month or so, I’m going to be painting some birch trees on the wall, as I want a Woodland nursery theme. 

And just for fun, here’s a couple pics Nate took over the last couple weeks.

Memorial Day Belly ~ ElephantEats.com

 Walk in the Park 26 wks ~ ElephantEats.com 

Blackberry Clafoutis
Serves 8
A not-too-sweet treat, perfect for dessert or brunch!
Write a review
Print
Ingredients
  1. 3 cups blackberries, rinsed and drained on paper towels
  2. 2 tablespoons kirsch, eau de vie de myrtille, or crème de cassis (optional)
  3. 7 Tbsp sugar
  4. 1/3 cup unbleached all-purpose flour
  5. 1/3 cup almond flour
  6. 3 eggs
  7. 1 teaspoon vanilla extract
  8. Pinch of salt
  9. 2/3 cup low-fat plain yogurt (not greek style)
Instructions
  1. Toss berries in a medium bowl with the kirsch, eau de vie or crème de cassis and 2 tablespoons of the sugar, and let sit for 30 minutes. Meanwhile, mix together all-purpose flour and almond flour.
  2. Preheat oven to 375 degrees. Butter a 9- or 10-inch ceramic tart pan or clafoutis dish.
  3. In a medium bowl, beat eggs with remaining sugar, vanilla, and salt. Place a strainer over the bowl and drain berries, allowing the liquid from the berries to run into the egg and sugar mixture. Whisk to combine. Arrange drained berries in the buttered baking dish.
  4. Beat the flours into the egg mixture and whisk until smooth. Add yogurt and combine well. Pour over fruit, scraping out all of the batter with a rubber spatula.
  5. Bake in the preheated oven for 35 minutes, or until the top is browned and the clafoutis is firm and puffed. Press gently on the top in the middle to see if it’s firm. If it isn’t, return to the oven for 5 minutes. Remove from the oven and cool on a rack. Serve warm or at room temperature.
Adapted from NY Times
https://elephanteats.com/

Chocolate Almond Waffles ~ ElephantEats.com

I’m not always the easiest person to live with.

I know you all probably find that very hard to believe ;)

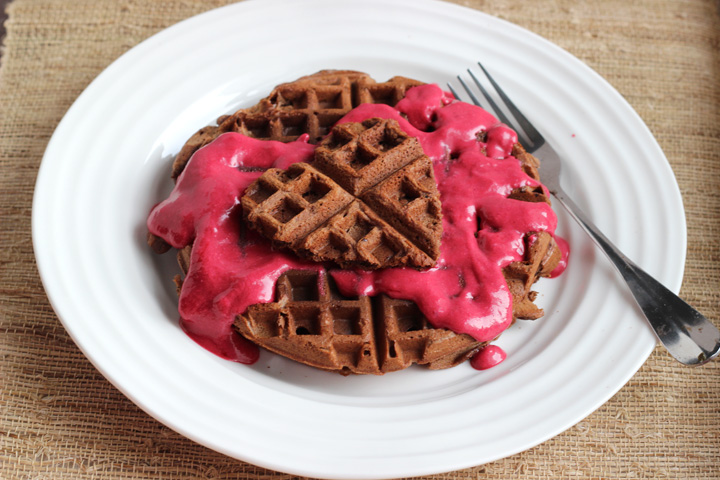
Chocolate Almond Waffles ~ ElephantEats.com

Although Nate often purposefully annoys me (though he’ll deny it), he also does a lot of sweet things on a regular basis. He’s extremely thoughtful and emotionally expressive. He will randomly buy me little “tasty treats” if he sees a dessert or something that he thinks I might like. He definitely knows the way to my heart!

While I do cook dinner for Nate weekly, I think that it’s not so special anymore since I do it all the time. To mix things up and show him that I appreciate him, I decided to make him a special breakfast. 

Chocolate Almond Waffles ~ ElephantEats.com

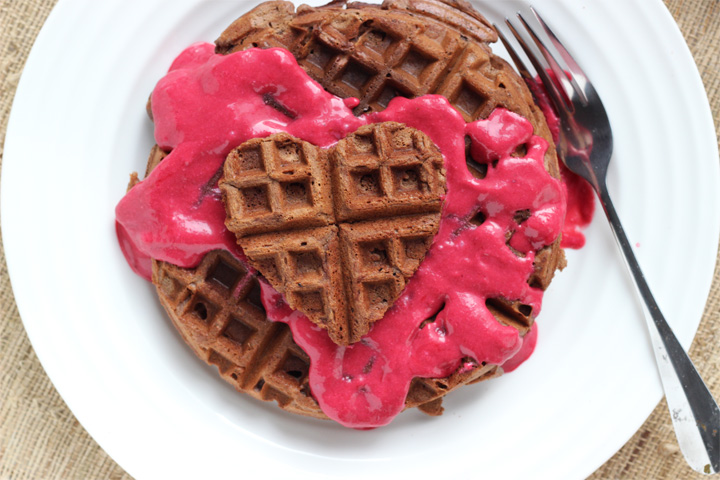
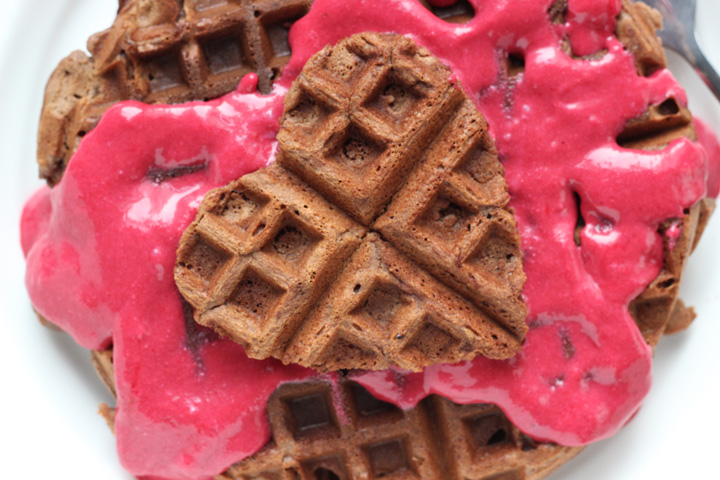
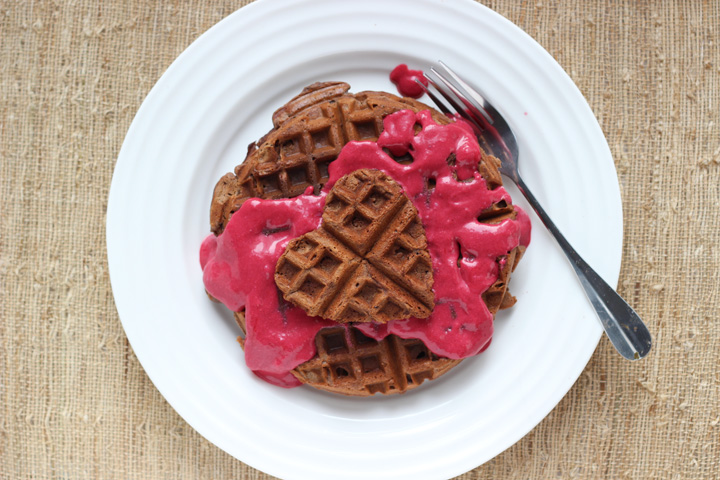
These waffles are chocolatey, but they’re not overly sweet. They’re totally appropriate for breakfast as opposed to dessert. The tart and sweet raspberry sauce is the perfect accompaniment and both have a subtle hint of almond flavor. 

This is the perfect breakfast to surprise your special someone with on Valentine’s Day!

Chocolate Almond Waffles ~ ElephantEats.com

In other news, LC and my painting of her made it onto a buzzfeed list (she’s #10)! That sadly is probably the coolest thing that has ever happened, and probably every will happen, to me (and her). 

Buzzfeed 21 Signs You’re A Cat Lady In Training ~ ElephantEats.com


Chocolate Almond Waffles with Raspberry Sauce
A not too sweet chocolate waffle with a sweet and tart raspberry sauce that's perfect for a special breakfast!
Write a review
Print
Waffles
  1. 1 cup all purpose flour
  2. 1/4 cup unsweetened cocoa powder
  3. 1 1/4 teaspoons baking powder
  4. 1/4 teaspoon baking soda
  5. 1/8 teaspoon salt
  6. 1/4 cup sugar
  7. 1/4 cup almond paste
  8. 2 1/4 ounces semisweet chocolate chips
  9. 3 tablespoons butter
  10. 2 large eggs
  11. 1 cup 2% milk
  12. 1/2 teaspoon almond extract
Raspberry Sauce
  1. 2 cups frozen raspberries, thawed
  2. 2 Tbsp almond paste
  3. 2-3 Tbsp water.
Waffles
  1. Preheat oven to 300.
  2. Mix first 5 ingredients into large bowl.
  3. In a small food processor or blender, blend sugar and almond paste. Add to flour mixture.
  4. Heat chocolate and butter in a small microwave-safe dish in the microwave at 30 second intervals, stirring in between, until completely melted.
  5. Pour chocolate into medium bowl. Whisk in eggs, then milk, and almond extract. Gradually whisk milk mixture into dry ingredients.
  6. Following manufacturer's instructions, make waffles with batter (waffles will be somewhat soft when removed from pan).
  7. Place finished waffles on baking sheet in oven as you make the rest to keep them hot and crispy.
Raspberry Sauce
  1. Blend raspberries and 1 Tbsp water in a food processor. Strain raspberry mixture through a fine sieve into a bowl, running a spoon back and forth over inside of sieve until all that's left in the sieve is seeds. Frequently scrape bottom of sieve, where strained pulp is coming out, into the bowl. Discard seeds.
  2. Add raspberry puree back into food processor. Add almond paste and 1-2 Tbsp water and blend until sauce is to your liking. Serve over waffles.
Adapted from Bon Appetit
https://elephanteats.com/

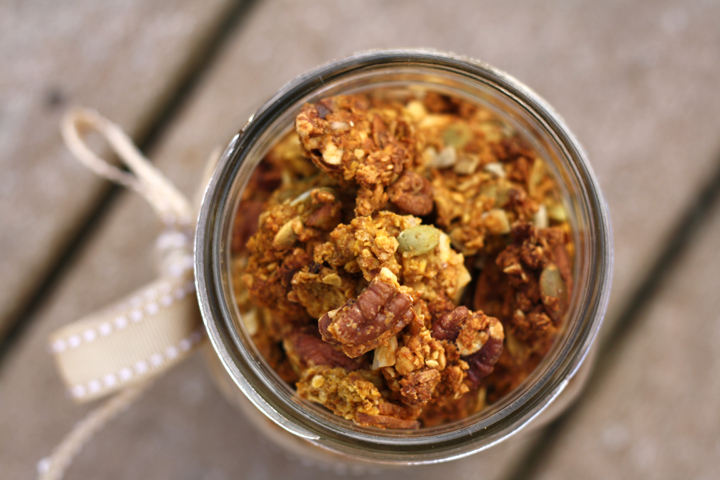
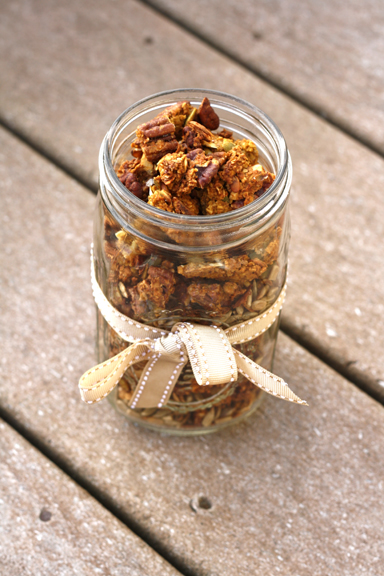
Chunky Pumpkin Spice Granola ~ ElephantEats.com

I had a wonderful couple weeks off of work. I still haven’t caught up on my blog reading and at this point it seems seriously overwhelming….I think I may follow a few too many blogs on feedly but it’s just so hard to eliminate some when there are so many good ones!

For Christmas we went down to Nate’s moms, as I told you guys last week, and I got some great Christmas presents that can be used in the kitchen! I got a scone pan (I’ll let you know how it works), a donut pan (expect a recipe using this when I break it in!), an Alice Waters cookbook and the Flavor Bible. The Flavor Bible is something I read about on another blog and it tells you all kinds of awesome flavor combos to help develop recipes. I can’t wait to get into it. 

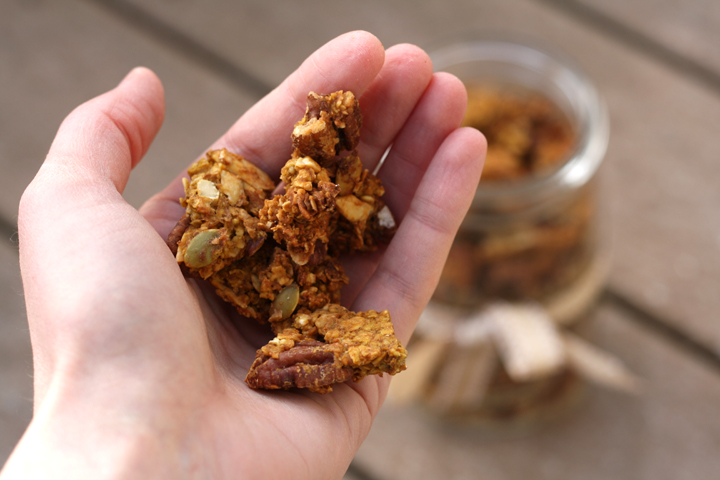
Chunky Pumpkin Spice Granola ~ ElephantEats.com

Nice big chunks!

A present that I gave rather than received, however, is this Pumpkin Spice Granola. My mother-in-law eats granola for breakfast every single day (you can see where Nate gets his routine eating habits from) and she told me that she specifically likes nuts and seeds in her granola but no dried fruit, and that she likes the kind that has big clumps. According to her, this combo is quite hard to find, so I thought making her some would be the perfect Christmas present. 

I also gave her one of the awesome paperweights we made when we went glass-blowing for Nate’s bday present. I forgot to tell  you guys about that! 

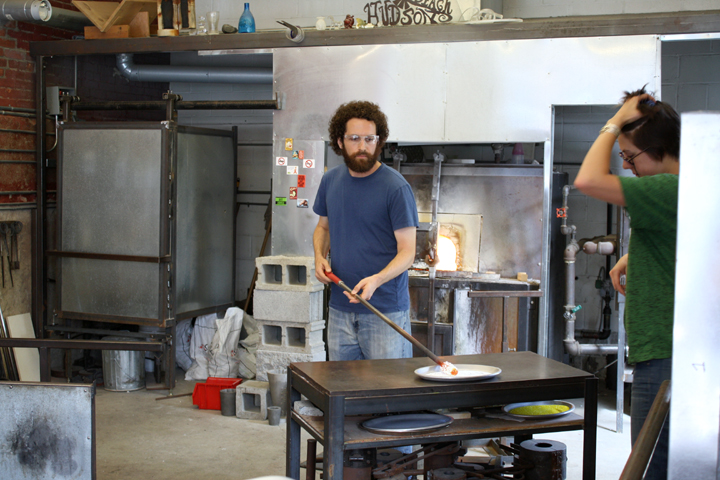
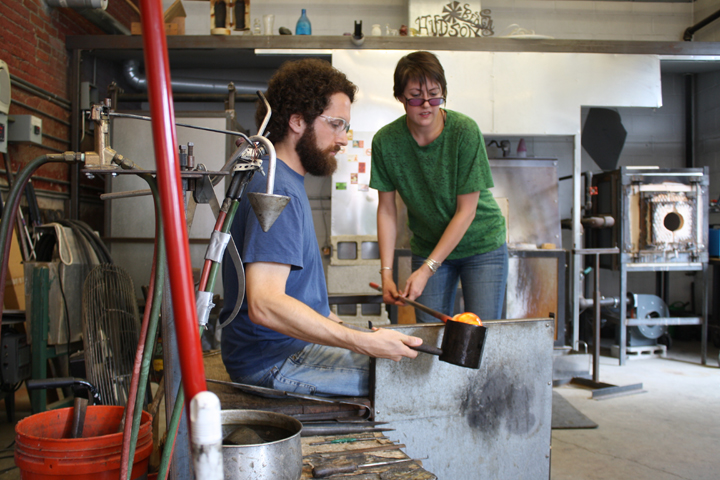
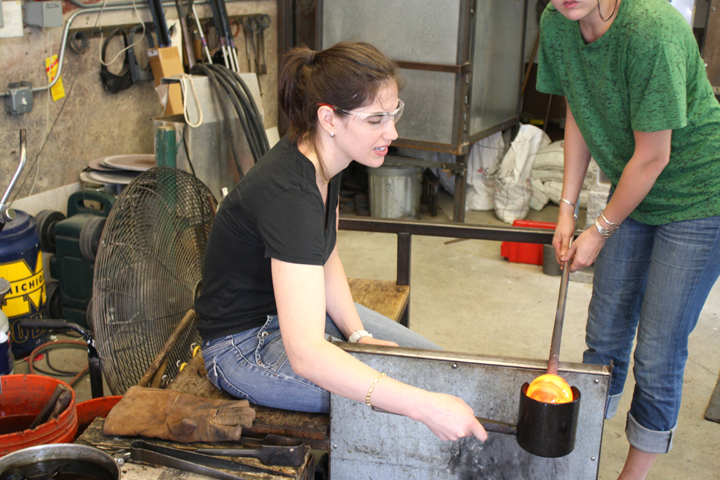
We went up to Beacon, NY to this awesome little shop call Hudson Beach Glass. For Nate’s bday I got us a lesson to do together, which really involved each of us separately making a paperweight while the other person watched.

Hudson Beach Glass glassblowing lesson ~ ElephantEats.com

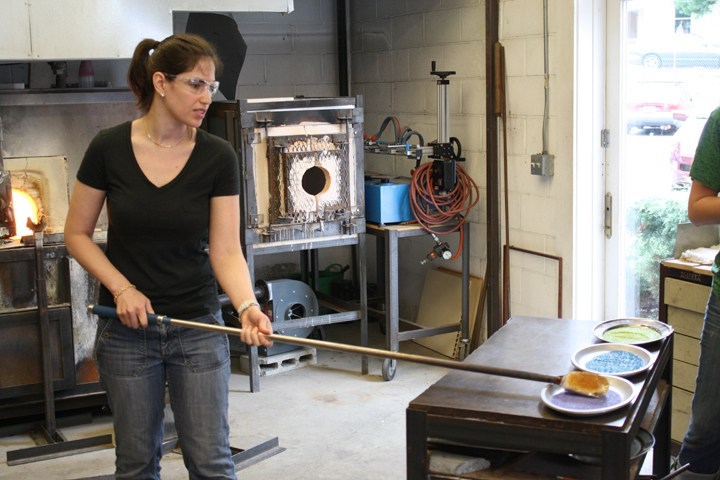
Nate went first. We were allowed to chose the style of paperweight we wanted, and we both chose the kind that has that swirl inside.We got to choose 2-3 colors to swirl. Nate chose red and gold, while i chose purple, blue and green. The pic of him above is putting the first color on his glass. Because he only chose two colors, he had to put a white background color so those colors would stand out better.

And here’s me with my three colors.

Hudson Beach Glass glassblowing lesson ~ ElephantEats.com

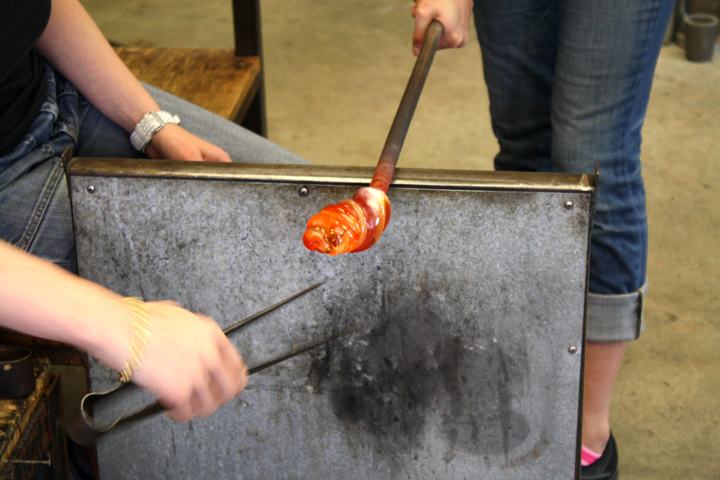
After the colors go on and you melt them in the hot furnace, you twist them together:

Hudson Beach Glass glassblowing lesson ~ ElephantEats.com

After twisting the colors together, you smooth the glass out using this wooden cup so it ends up round.

Hudson Beach Glass glassblowing lesson ~ ElephantEats.com


Hudson Beach Glass glassblowing lesson ~ ElephantEats.com

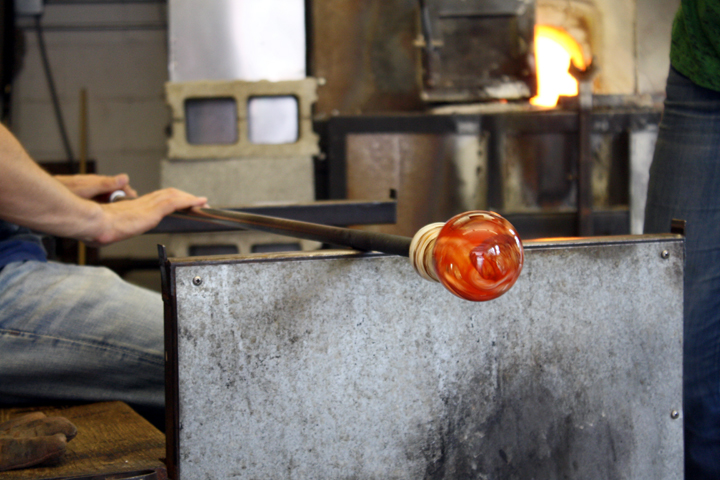
And here’s Nate’s finished piece right before it went in the oven to slowly “cool” from the super hot temp it was to, eventually, room temp. You can’t see the true colors until it has cooled. The red you see now is mainly the hot glass that would eventually become clear.
Hudson Beach Glass glassblowing lesson ~ ElephantEats.com

So pretty, right?!

It was super fun and our teacher, Kathleen, was so knowledgeable and cool. I highly recommend it! Sorry I didn’t take a pic of the finished paperweights but they looked kind of like this but multicolored in the colors we chose.

But back to my granola! I read that the trick for clumpy granola is to add an egg white before baking and not to stir it! Halfway through I gave the giant clumps a flip and then just left it alone. Obviously you can alter the ingredients you put in this (dried fruit, more or less sugar, etc). 

Chunky Pumpkin Spice Granola ~ ElephantEats.com

 It’s great served with yogurt or milk! 

Chunky Pumpkin Spice Granola
Yields 6
A chunky seed and nut granola with spiced pumpkin flavor!
Write a review
Print
Ingredients
  1. 3 cups quick oats
  2. 2 tsp pumpkin pie spice
  3. 3/4 tsp salt
  4. 3/4 cup brown sugar
  5. 3/4-1 cup pumpkin
  6. 2 Tbsp oil
  7. 1/2 cup maple syrup
  8. 1 tsp vanilla extract
  9. 3/4 cup chopped pecans (not toasted)
  10. 2/3 cup sliced almonds
  11. 1 egg white, lightly whisked
  12. 3/4 cup sunflower seeds, roasted (if you can find unroasted then add them along with the nuts)
Instructions
  1. Preheat oven to 325 and line a large baking sheet with parchment paper.
  2. In a large bowl combine everything except nuts, egg white and seeds.
  3. When thoroughly mixed, add in nuts and egg white and mix well. You can add the seeds now too if you managed to find raw/unroasted seeds.
  4. Spread everything out onto the prepared baking skeet in an even layer.
  5. Bake for 30 minutes then flip the granola over, taking care not to break it into pieces more than necessary.
  6. Sprinkle seeds onto granola and bake an additional 20-25 min or until crisp and golden. Remove the outer crispy pieces as necessary to prevent them from burning. The largest pieces may still seem slightly chewy inside but they will crisp up when they dry.
  7. Remove pieces to a wire rack over a baking pan to catch the smaller pieces. Once cooled, break granola up as desired into smaller pieces. Store in an airtight container.
Notes
  1. Great topped with yogurt or milk!
https://elephanteats.com/

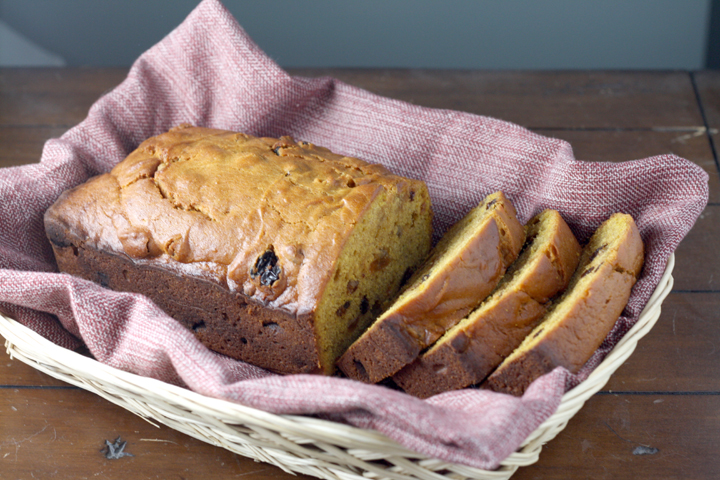
 Pumpkin Spice Bread ~ ElephantEats.com

Well, I’m back from my Italian vacation. I’ll have to tell you more about it in another post, but the highlight was definitely a private cooking class my parents and I had in Chianti with this awesome chef. He was a chemist before becoming a chef and he explained cooking very scientifically (Shannon, you would have loved it ;) ).

I ended up learning a ton! We cooked up grilled fresh porcini mushrooms on toast with truffles and truffle oil, homemade gnocci with an amazing bolognese sauce that didn’t have to simmer for hours, white beans with fresh sausage, and the creamiest tiramisu for dessert. 

But anyway, I’m SO excited it’s October!!! Autumn is my absolute favorite season (I can’t belive I got married last October!). Unfortunately it’s still a bit warm here in NYC, but hopefully soon the weather will cool down enough for me to pull out my sweaters and curl up with some tea. I just love when the air is crisp and it smells like dry leaves outside. Not to mention, autumn has my two most favorite holidays- Halloween and Thanksgiving. I can’t wait! :)

Storm King Sculpture Park ~ ElephantEats.com

Storm King Sculpture Park- not sure what I’m doing…

Nate and I headed upstate this weekend for a day of fun. First we went to Storm King, a really cool, huge sculpture park. The leaves are starting to change up there and they were so pretty :) The weather was overcast and sprinkly but we made the best of it.

Storm King Sculpture Park 2 ~ ElephantEats.com

Nate, finally doing some heavy lifting

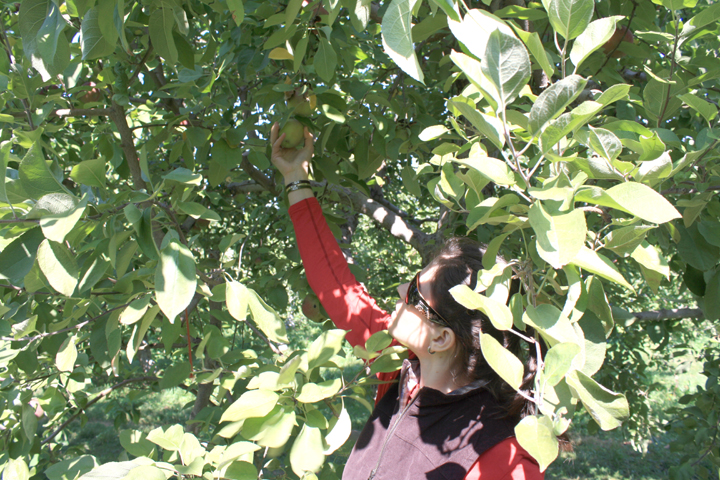
Next we went to Fishkill Farms for some apple picking! Hopefully I’ll make an apple recipe soon that I can post.

Fishkill Farms Apple Picking ~ ElephantEats.com

I love apple picking but it was super crowded at this place and I’m not a fan of crowds. We still managed to take home a good haul, in addition to getting to enjoy some cider donuts and apple cider.

Fishkill Farms ~ ElephantEats.com

Nate hard at work again! I wish he helped that much at home ;)

After apple-picking we met up with our friends who live nearby for dinner, and then finally we headed over to The Blaze, which was the reason for our whole trip upstate. The Blaze is an elaborate walk-through experience of 5,000 individually hand-carved, illuminated jack o’ lanterns.

The Blaze, Hudson Valley ~ ElephantEats.com

My favorite pumpkins- piled into sunflowers!

I had heard great things about it from multiple people, so Nate and I thought we should do it at least once. It was definitely cool to see so many pumpkins lit up, but I wasn’t particularly impressed by any of them.

The Blaze, Hudson Valley ~ ElephantEats.com

I think it was the sheer magnitude of them all together that impressed me the most. We tried to take pictures but most of them came out blurry since it was so dark. 

The Blaze, Hudson Valley ~ ElephantEats.com

But back to the baking… Now that it’s officially October, I can post another pumpkin recipe. This recipe is the one my mom baked for us growing up, but I’m not sure what the original source is. 

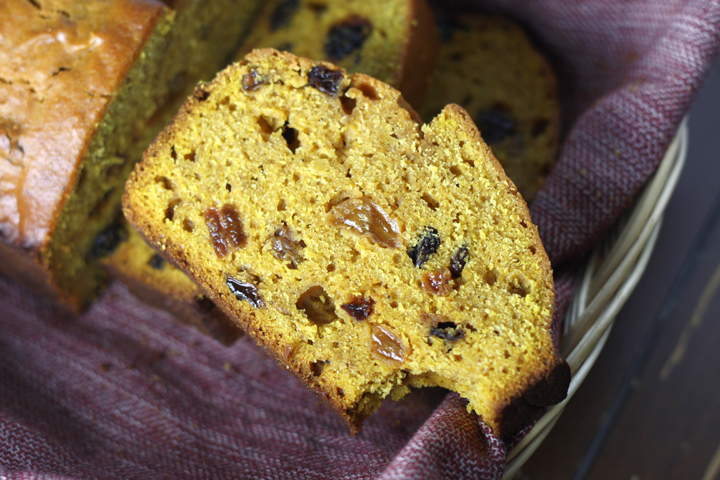
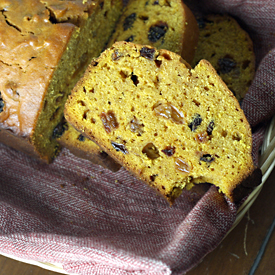
Pumpkin Spice Bread ~ ElephantEats.com

Since I already know I love the recipe, I decided to give it a try subbing in the butter-flavored Olive Oil that I got from Star Fine Foods. I figured a little butter taste certainly wouldn’t hurt! It added an awesome flavor, but obviously you could definitely use regular oil as I’ve always done before now. 

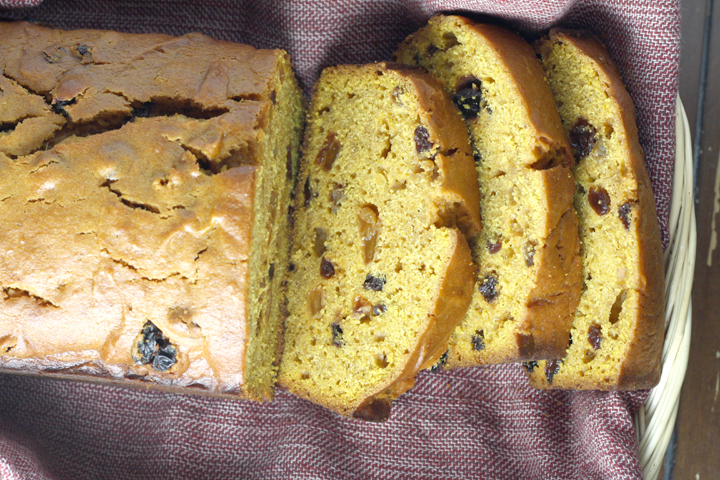
This bread calls for both raisins and pecans, but since Nate is a nuts-in-baked-goods hater, I omitted the pecans. I personally think they add a great crunch. This recipe makes two loaves- one for you and one to give to a friend :)

Pumpkin Spice Bread 3 ~ ElephantEats.com

I’ll be back later in the week with a little feline Halloween fun ;)

Here’s a preview of LC with a cat-proportioned pumpkin we picked up for her at the farm.

LC and a pumpkin ~ ElephantEats.com

If you’re wondering why the pumpkin is shiny, it’s because LC licked it all over.

Spiced Pumpkin Loaves
An autumn spiced pumpkin bread chock full of raisins and nuts!

Yields: 2 loaves
Write a review
Print
Cook Time
1 hr 20 min
Cook Time
1 hr 20 min
Ingredients
  1. 4 cups flour
  2. 2 tsp baking soda
  3. 2 tsp cinnamon
  4. 1 tsp nutmeg
  5. 1 tsp ginger
  6. 1 tsp salt
  7. 2 cups solid packed pumpkin puree (NOT pumpkin pie mix)
  8. 2 cups packed brown sugar
  9. 1 cup white sugar
  10. 1 cup oil
  11. 4 eggs
  12. 2 cups raisins
  13. 1 cup pecans, chopped
Instructions
  1. Preheat oven to 350.
  2. Butter two 9 1/4 x 5 1/4 loaf pans and dust with flour.
  3. Sift first 6 ingredients into a medium bowl.
  4. Using mixer (or whisk), beat pumpkin, sugars, oil and eggs in a large bowl. Beat in the dry ingredients until just blended.
  5. Stir in raisins and nuts.
  6. Bake until test comes out clean or with a few crumbs attached- about 1 hr 20 min.
  7. Cool 15 min in pan, then remove and cool completely on wire rack before wrapping in foil.
Notes
  1. This gets better in time. The cooked loaves can also be frozen and defrosted at a later time. Wrap them well in foil and then put in a ziploc freezer bag.
https://elephanteats.com/

Homemade Bagels ~ ElephantEats.com

My blogger friend Alyssa alerted me to Love and Olive Oil’s bagel challenge and encouraged me to try it along with her, and I’m so glad she did! Bagels were one of the foods on my list of things to attempt in my kitchen at some point in my lifetime (along with pretzels, marshmallows, graham crackers, and a few others).

I followed Peter Reinhart’s recipe from his book Peter Reinhart’s Artisan Breads Every Day. They were so much easier to make than i was expecting. Most yeast recipes I have followed require so much rising, but this one (I’m assuming because of the “instant” yeast used) only had one 1-hr rise and then time overnight spent in the fridge.

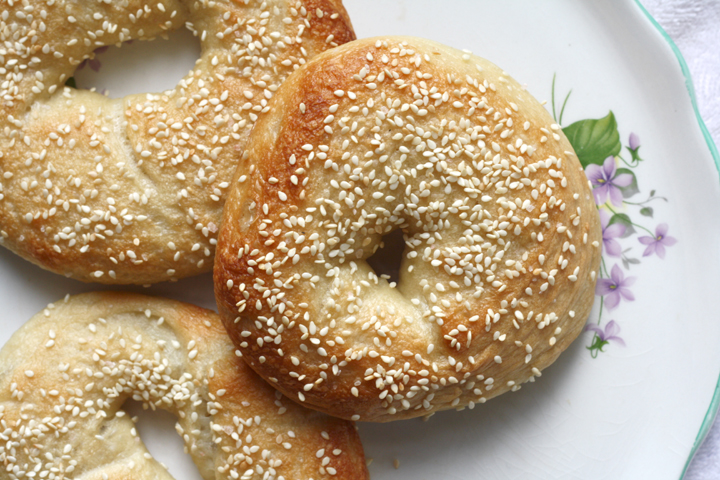
Homemade Bagels ~ ElephantEats.com

I don’t have the dough hook for my Kitchen Aid mixer and it’s the mixer is such a pain to get out anyway that I rarely use it. I made this recipe by stirring with a wooden spoon and then kneading. I must be seriously out of shape because after 3 minutes of kneading, my abs were seriously sore the next day.

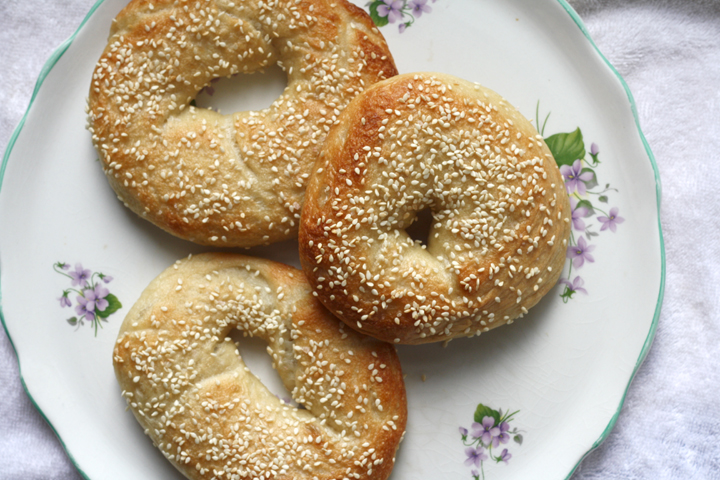
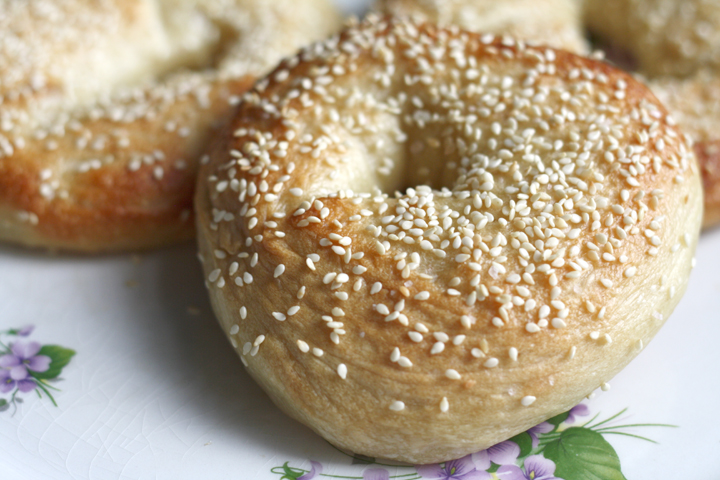
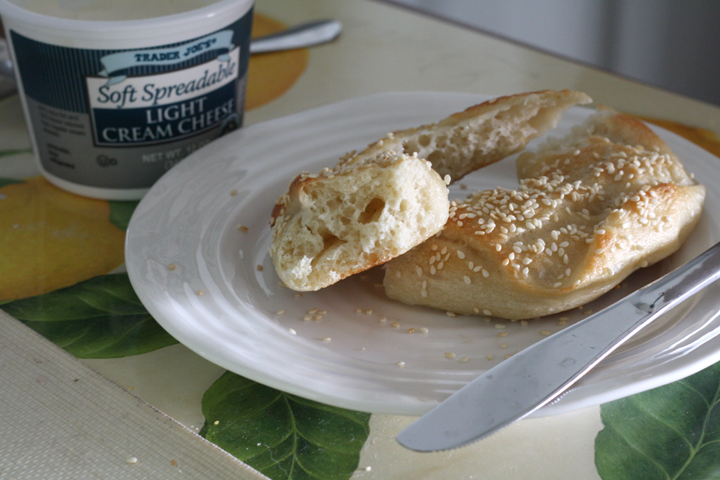
My bagels came out a little flatter than I was expecting but they were still totally delicious. I think it might be because I rolled the dough out into too thin of a “rope.” The recipe says to have a 2.5 inch hole but making it smaller may have kept the bagels puffier.

I also was reading up on flat bagels online and it seems that not refrigerating and simply baking after the first rise might solve the problem, but it could sacrifice the texture.

Homemade Bagels ~ ElephantEats.com

Personally, I was ok with their shape because their texture was SOOO good. They were everything a good bagel is supposed to be- crispy on the outside, airy but chewy on the inside. I don’t know about you, but I’m a bread person and I’m salivating just thinking about it. They smelled amazing too!

Some things I learned that you might find helpful:

  • If you use the second technique in the recipe to form the bagels, do not roll the “ropes” too thin and long.
  • Keep the bagel hole on the small side, especially if you make smaller bagels. If you divide into 8 pieces, keep each hole around 1″ wide
  • If using method two to shape the bagels, don’t overwet the ends or they won’t stick together.
  • Don’t overcrowd your pot when you boil the bagels.
  • If you line your pan with parchment, be sure to snip off any overhang, or it will majorly burn in the very hot 500° oven.
  • The “domed” side of the bagel the recipe is talking about is the side that ends on the bottom.
  • The recipe included here calls for instant yeast, not active dry yeast, but it still needs to be fully dissolved in lukewarm water before being used. If you only have active dry yeast, use 25 percent more (1 1/4 teaspoons instead of 1 teaspoon). Instant yeast is widely available and can also be ordered from King Arthur Flour or Amazon. If frozen, in an airtight container, it will keep up to two years.
  • I saw malt syrup in the market but it was so expensive and only came in a huge bottle so I just used honey in the recipe and it was totally fine.

That’s about it. Other than that, the recipe was super easy to follow. Enjoy!

This post is also being submitted to Yeastspotting!

Homemade Bagels ~ ElephantEats.com

Homemade Bagels

From Peter Reinhart’s Artisan Breads Every Day via Epicurious

Print this recipe!

makes 6-8 bagels

Dough
1 tablespoon (0.75 oz / 21 g) barley malt syrup, honey, or rice syrup, or 1 teaspoon (0.25 oz / 7 g) diastatic malt powder
1 teaspoon (0.11 oz / 3 g) instant yeast
1 1/2 teaspoons (0.37 oz / 10.5 g) salt, or 2 1/2 teaspoons coarse kosher salt
1 cup plus 2 tablespoons (9 oz / 255 g) lukewarm water (about 95°F or 35°C)
3 1/2 cups (16 oz / 454 g) unbleached bread flour

Poaching liquid
2 to 3 quarts (64 to 96 oz / 181 to 272 g) water
1 1/2 tablespoons (1 oz / 28.5 g) barley malt syrup or honey (optional)
1 tablespoon (0.5 oz / 14 g) baking soda
1 teaspoon (0.25 oz / 7 g) salt, or 1 1/2 teaspoons coarse kosher salt
preparation

Do Ahead:
To make the dough, stir the malt syrup, yeast, and salt into the lukewarm water. Place the flour into a mixing bowl and pour in the malt syrup mixture. If using a mixer, use the dough hook and mix on the lowest speed for 3 minutes. If mixing by hand, use a large, sturdy spoon and stir for about 3 minutes, until well blended.

The dough should form a stiff, coarse ball, and the flour should be fully hydrated; if it isn’t, stir in a little more water. I had to add some more water. Let the dough rest for 5 minutes.

Resume mixing with the dough hook on the lowest speed for another 3 minutes or transfer to a very lightly floured work surface and knead by hand for about 3 minutes to smooth out the dough and develop the gluten. The dough should be stiff yet supple, with a satiny, barely tacky feel. If the dough seems too soft or overly tacky, mix or knead in a little more flour.

Place the dough in a clean, lightly oiled bowl, cover the bowl tightly with plastic wrap, and let the dough rise at room temperature for 1 hour.

When you’re ready to shape the bagels, prepare a sheet pan by lining it with parchment paper or a silicone mat, then misting it with spray oil or lightly coating it with oil. Divide the dough into 6 to 8 equal pieces. (A typical bagel is about 4 ounces or 113 grams before baking, but you can make them smaller. If you make more than 6 bagels, you may need to prepare 2 sheet pans.) Form each piece into a loose ball by rolling it on a clean, dry work surface with a cupped hand. (Don’t use any flour on the work surface. If the dough slides around and won’t ball up, wipe the surface with a damp paper towel and try again; the slight bit of moisture will provide enough traction for the dough to form into a ball.)

There are two methods to shape the balls into bagels:

The first method is to poke a hole through the center of the ball to create a donut shape. Holding the dough with both thumbs in the hole, rotate the dough with your hands, gradually stretching it to create a hole about 2 inches in diameter.

The second method, preferred by professional bagel makers, is to use both hands (and a fair amount of pressure) to roll the ball into a rope about 8 inches long on a clean, dry work surface. (Again, wipe the surface with a damp towel, if necessary, to create sufficient friction on the work surface.) Taper the rope slightly at each end and moisten the last inch or so of the ends. Place one end of the dough in the palm of your hand and wrap the rope around your hand to complete the circle, going between your thumb and forefinger and then all the way around. The ends should overlap by about 2 inches. Squeeze the overlapping ends together by closing your hand, then press the seam into the work surface, rolling it back and forth a few times to seal. Remove the dough from your hand, squeezing it to even out the thickness if need be and creating a hole of about 2 inches in diameter. (I think you should make a smaller hole)

Place each shaped bagel on the prepared sheet pan, then mist with spray oil or brush with a light coating of oil. Cover the entire pan with plastic wrap and refrigerate overnight or for up to 2 days. (You can also proof the full piece of dough in the oiled bowl overnight and then shape the bagels on baking day, 60 to 90 minutes before boiling and baking them, or as soon as they pass the float test.)

On baking day:
Remove the bagels from the refrigerator 60 to 90 minutes before you plan to bake them, and if you plan to top them with dried onion or garlic, rehydrate those ingredients (see the variations).

Immediately check whether the bagels are ready for baking using the “float test”: Place one of the bagels in a small bowl of cold water. If it sinks and doesn’t float back to the surface, shake it off, return it to the pan, and wait for another 15 to 20 minutes, then test it again. When one bagel passes the float test, they’re all ready to be boiled.

If they pass the float test before you are ready to boil and bake them, return them to the refrigerator so they don’t overproof. About 30 minutes before baking, preheat the oven to 500°F (260°C) and gather and prepare your garnishes (seeds, onions, garlic, and so on).
To make the poaching liquid, fill a pot with 2 to 3 quarts (64 to 96 oz / 181 to 272 g) of water, making sure the water is at least 4 inches deep. Cover, bring to a boil, then lower the heat to maintain at a simmer. Stir in the malt syrup, baking soda, and salt.

Gently lower each bagel into the simmering poaching liquid, adding as many as will comfortably fit in the pot. They should all float to the surface within 15 seconds. After 1 minute, use a slotted spoon to turn each bagel over. Poach for another 30 to 60 seconds, then use the slotted spoon to transfer it back to the pan, domed side up (the part that’s now on the bottom). (It’s important that the parchment paper be lightly oiled, or the paper will glue itself to the dough as the bagels bake.) Sprinkle on a generous amount of whatever toppings you like as soon as the bagels come out of the water (except cinnamon sugar; see the variation for details).

Transfer the pan of bagels to the oven, then lower the oven heat to 450°F (232°C).
Bake for 8 minutes, then rotate the pan and check the underside of the bagels. If they’re getting too dark, place another pan under the baking sheet. (Doubling the pan will insulate the first baking sheet.) Bake for another 8 to 12 minutes, until the bagels are a golden brown.

Cool on a wire rack for at least 30 minutes before slicing or serving.

Variations
You can replace any amount of the bread flour with an equal amount of whole grain flour (by weight), such as wheat or rye. If you do so, increase the water in the dough by 1 tablespoon (0.5 oz / 14 g) for every 2 ounces (56.5 g) of whole grain flour you substitute.
Top your bagels with any combination of the following garnishes: poppy seeds, sesame seeds, coarse salt, or rehydrated dried onions or garlic. (Soak dried onions or garlic in water to cover for at least 1 hour before applying.) The toppings will stick even better if you first brush the top of each bagel with an egg white wash made by whisking 1 egg white with 1 tablespoon (0.5 oz / 14 g) of water. If using coarse salt as a garnish, remember that a little goes a long way.
For raisin bagels, mix in 1 1/3 cups (8 oz / 227 g) of raisins during the final 2 minutes of mixing and, if you like cinnamon, stir 1/2 teaspoon (0.14 oz / 4 g) of ground cinnamon into the flour before you start mixing. When the bagels come out of the oven, brush the tops with melted butter and dip the top into a bed of cinnamon sugar to give it a very tasty cinnamon crust. You can make cinnamon sugar by whisking 2 tablespoons (1.6 oz / 44 g) of ground cinnamon into 1/2 cup (4 oz / 113 g) of granulated sugar.