Raise your hand if you have subscriptions to Bon Appetit, Food & Wine,  Cooking Light or some other cooking/food magazine.

Raise your hand if you tear out recipes and then hoard them, never actually making them.

Yeah, I’m guilty. I always think the recipes sound so good and then I put the clippings somewhere never to be found again. Or sometimes I get the urge to file them somewhere, where they then sit without being touched.

This mostly happened when I was single because I really don’t enjoy cooking for just myself. Since I’ve started dating Nate, however, I find myself cooking for us most days of the week. This has gotten me on the search for new recipes to try out. That’s when I realized…I could finally put my recipe stash to good use!

I pulled all the recipes out the other day and went searching through them. I’ve put aside a few, but one in particular caught my eye.I had mostly been avoiding it in the past because it looked complicated, but when I took a deeper look it wasn’t really too bad- Eggplant, Tomato, & Smoked Mozarella Tart.

I made a few shortcuts revisions so the recipe wouldn’t take all day. One of these included microwaving the eggplant. This was also because I hate how it soaks up so much oil when you roast it. I basically steamed it instead and then baked it quickly to dry it out so as not to get my dough all soggy.

I was also wary of the “dough” since it contained no yeast. I didn’t want this to be a tart and was hoping for something more like pizza. I happened to have some Sweet Rice Flour leftover, so I combined it with regular flour create a more elastic dough (which can usually only be achieved with yeast) rather than a flaky tart shell.

It definitely wasn’t like a pizza dough, since it didn’t rise, but it was a good substitution if you’re short on time and want the same flavor. I also subbed whole wheat flour for the wheat germ since I really didn’t feel like going out and buying a jar just for this recipe, left the fresh mint out, and replaced dried oregano for the fresh.

Nate and I both agreed that it tasted very fresh and the flavors were yummy. I was in such a rush to get it all cooked that I forgot to parbake the crust. I left it in for an extra 10 min, but I assume that had I made it the way I was supposed to, the crust wouldn’t have been as soggy as it came out for me. Oh well, it was still a quick and delicious addition to dinner! *Note that the recipe below is as the recipe was intended, not with my changes.


Eggplant, Tomato & Smoked Mozzarella Tart

Taken from Cooking Light

Print this recipe!

Serves 4 (2 wedges each)

Crust:
1 cup all-purpose flour
1 tablespoon toasted wheat germ
1 teaspoon baking powder
1/2 teaspoon freshly ground black pepper
1/4 teaspoon salt
1/4 cup water
1 tablespoon olive oil
Cooking spray

Filling:
1 (1-pound) eggplant, cut crosswise into 1/4-inch-thick slices
3/4 teaspoon salt, divided
1/2 teaspoon olive oil
4 garlic cloves, thinly sliced
1 tablespoon chopped fresh basil
1 1/2 teaspoons chopped fresh oregano
1 1/2 teaspoons chopped fresh mint
2 plum tomatoes, thinly sliced (about 6 ounces)
1/2 cup (2 ounces) shredded smoked mozzarella cheese, divided
2 tablespoons grated fresh Parmesan cheese

Preheat oven to 400°.

To prepare crust, lightly spoon flour into a dry measuring cup; level with a knife. Combine flour and next 4 ingredients (flour through 1/4 teaspoon salt) in a large bowl, stirring with a whisk; make a well in center of mixture. Add water and 1 tablespoon oil, stirring to form a soft dough. Turn dough out onto a lightly floured surface; knead lightly 4 times. Gently press dough into a 4-inch circle on plastic wrap; cover and chill 15 minutes.

Slightly overlap 2 sheets of plastic wrap on a slightly damp surface. Unwrap dough, and place chilled dough on plastic wrap. Cover with 2 additional sheets of overlapping plastic wrap. Roll dough, still covered, into an 11-inch circle. Remove top sheets of plastic wrap. Fit dough, plastic-wrap side up, into a 10-inch round removable-bottom tart pan coated with cooking spray. Remove remaining plastic wrap. Press dough against bottom and sides of pan. Pierce bottom and sides of dough with a fork; bake at 400° for 10 minutes. Cool completely on a wire rack.

To prepare filling, arrange eggplant on several layers of heavy-duty paper towels. Sprinkle eggplant with 1/2 teaspoon salt; let stand 15 minutes. Pat dry with paper towels; brush eggplant with 1/2 teaspoon oil. Arrange eggplant in a single layer on a baking sheet coated with cooking spray. Bake at 400° for 20 minutes. Stack eggplant slices on a plate; cover with plastic wrap. Let eggplant stand 7 minutes to steam.

Heat a large nonstick skillet coated with cooking spray over medium heat. Add garlic; cook 1 minute, stirring constantly. Remove from heat; stir in 1/4 teaspoon salt, basil, oregano, mint, and tomatoes.

Sprinkle 2 tablespoons smoked mozzarella on bottom of baked crust. Layer eggplant and tomato mixture in crust; sprinkle with 6 tablespoons smoked mozzarella and Parmesan. Bake at 400° for 10 minutes or until cheese melts. Cut into 8 wedges.

So I know I’m several weeks late for St. Patrick’s Day, but I was already late for Purim, so I was just trying to continue the trend.  Plus, since this recipe is very different from traditional soda bread anyway, it’s really just like a giant cheesy biscuit. The simplest of the simple to accompany any weeknight dinner.
This bread uses one bowl and you don’t even have to dirty your counter or get out your rolling pin!

Traditional soda bread contains sugar and usually raisins, but since I wanted it to go along with a savory dinner I wanted something a little different. I compared a bunch of recipes and kind of combined them all, plus added cheddar because everything’s better with a little cheese.


Cheesy Soda Bread
Recipe by Me

Print this recipe!

serves 4 people (or 1 Nate)

2 cups all-purpose flour
1 tsp salt
3/4 tsp baking soda
3/4 cup milk, or as needed
1 cup shredded cheddar cheese
1 egg

Preheat oven to 375. Line baking sheet with parchment paper.

In a bowl, mix the flour, salt and baking soda until well combined. Add in milk, several tablespoons at a time, until the mixture forms a soft dough (add additional milk if too dry).

The dough will be sticky. Add cheddar cheese and mix until you can handle dough without it sticking too much to your hands. Knead dough in bowl until cheese is fully incorporated.

Roll dough into a ball, flatten slightly. Put on baking sheet and brush with beaten egg. Slice dough in half,  pressing knife at least halfway through the loaf, but not completely severing. Repeat in other direction, forming loaf into 4 equal quarters, still connected on the bottom.

Bake in preheated oven until golden brown, 50 min. or longer if needed.


07. February 2011 · Write a comment · Categories: Baking, Bread · Tags:

Wow, my first real post. I’m not sure where to even begin. Part of me wants to tell you all about me, but I wouldn’t even know what to say. I suppose the real me will come across in my writing/pictures.  I want to start by telling you a few things though:

I’m not a photographer, although I do think I have the potential when I have the right environment. I have a crappy little point-and-shoot camera and there is NO natural light in my apt since the bedroom is the only area with windows. I think I’m going to make a light box soon, and bring it into my bedroom…but I’m hesitant to have food anywhere near my bed since I’m a complete klutz. I’m going to try to improve my photos but these first pictures were taken just for me, before I even had any idea to start a blog. They were mostly taken by my boyfriend who is so impressed by all cooking I do that he feels the need to document it.

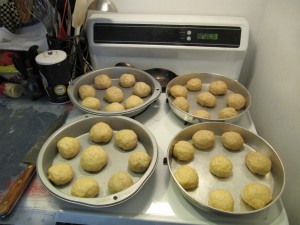
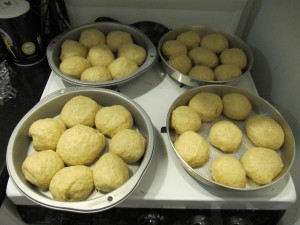
I’m also going to begin by posting things I made in the last few months, to catch you all up to today. I’m going to start with a Honey Wheat Dinner Rolls I made back in the fall.

before rising

I love grocery shopping. I don’t know if it’s just me, or anyone who likes food, but I could spend hours in the store. When I met Nate, I had only been to Trader Joe’s once or twice. I thought it was some high priced grocery store like Whole Foods. It was only after I met him that I realized it’s way cheaper than most markets…especially those in nyc.

After rising

Nate is a creature of habit. Every week he buys the exact same items: whole wheat dinner rolls, turkey, apples, focaccia, peanut butter pretzels, baby carrots, and a couple other things. He would bring the dinner rolls over to my apt when I would make dinner for him. So I thought…maybe I can make him some homemade rolls.

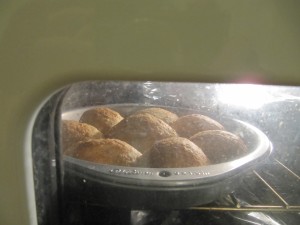
Almost done! (wow, my oven window is diiiirty)

I did some research online and came across a King Arthur Flour recipe with lots of good reviews. I have to say that they came out tasty, and Nate approved, but I think the effort it took wasn’t worth it when the rolls at TJs are suitable. I’d rather be making dessert ;)

Mmmm mmm. Fresh outta the oven rolls :)

Now listen…I know yeast and bread-baking is a complicated thing. I probably shouldn’t have started with a complicated recipe cuz you’ll get the wrong idea about me. I promise the things I usually make are way easier. But think of it this way…if it comes out crappy,  just keep it to yourself and no one has to know. At least you tried :)

King Arthur Flour Honey Wheat Rolls

Ingredients

  • 1 packet “highly active” active dry yeast, or 2 1/4 teaspoons active dry yeast, or 2 1/4 teaspoons instant yeast
  • 1 cup lukewarm water
  • 1/4 cup orange juice
  • 1/4 cup (1/2 stick) unsalted butter, cut into 6 pieces
  • 3 tablespoons honey
  • 1 cup King Arthur Unbleached All-Purpose Flour
  • 2 cups King Arthur Traditional Whole Wheat Flour or King Arthur White Whole Wheat Flour
  • 1 1/4 teaspoons salt
  • 2/3 cup instant mashed potato flakes
  • 1/4 cup nonfat dry milk
  • Directions

    1) If you’re using active dry or “highly active” yeast, dissolve it with a pinch of sugar in 2 tablespoons of the lukewarm water. Let the yeast and water sit at room temperature for 15 minutes, until the mixture has bubbled and expanded. If you’re using instant yeast, you can skip this step.

    2) Combine the dissolved yeast with the remainder of the water and the rest of the ingredients. Mix and knead everything together—by hand, mixer or bread machine set on the dough cycle—till you’ve made a smooth dough. If you’re kneading in a stand mixer, it should take about 5 to 7 minutes at second speed. In a bread machine (or by hand), it should form a smooth ball.

    3) Place the dough in a lightly greased bowl. Cover the bowl, and allow the dough to rise, at room temperature, till it’s quite puffy but not necessarily doubled in bulk, about 90 minutes to 2 hours. Rising may take longer, especially if you’ve kneaded by hand. Give it enough time to become quite puffy.

    4) While the dough is rising, lightly grease a 9″ x 13″ pan, or two 9″ round cake pans.

    5) Gently deflate the dough, and transfer it to a lightly greased work surface. Divide it into 16 pieces.

    6) Shape each piece into a rough ball by pulling the dough into a very small knot at the bottom (think of a balloon with its opening knotted), then rolling it under the palm of your hand into a smooth ball.

    7) Place the rolls in the 9″ x 13″ pan, or put eight rolls in each of the round cake pans, spacing them evenly; they won’t touch one another.

    8 ) Cover the pans with lightly greased plastic wrap, and allow the rolls to rise for 1 1/2 to 2 hours. They’ll become very puffy, and will reach out and touch one another. While the rolls are rising, preheat the oven to 350°F.

    9) Bake the rolls for 15 minutes, and tent them loosely with aluminum foil. Continue to bake until they’re mahogany-brown on top, but lighter colored on the sides, an additional 10 to 13 minutes.

    10) Remove the rolls from the oven, and after 2 or 3 minutes, carefully transfer them to a rack. They’ll be hot and delicate, so be careful. Serve warm, or at room temperature.