Tomato Rosemary Focaccia ~ ElephantEats.com

Nate and I headed down to his mom’s last weekend, as we usually do when we have 3 days off. I decided to undertake a bunch of recipes that take longer than I typically have. I thought it was a perfect time to get into some yeasty things.

I had marked down a couple recipes, one for a cinnamon braid bread that I decided to make for breakfast, and the other was a Tomato Rosemary Focaccia Nate found in the NY Times. Nate loves focaccia so I’ve been wanting to make it for him. This particular recipe was “healthy” because it had mostly whole wheat flour.

Tomato Rosemary Focaccia ~ ElephantEats.com

While I waited for the dough to rise, I headed outside to pet the neighbor’s cat. He really seemed to like me, and after about 5-10 min of petting, I decided to come back inside. It was a little chilly and I was in my p.j.’s Well, the cat decided he wasn’t done being pet, so he followed me. No matter what I did, I couldn’t get him to leave me alone, and I didn’t want him to get near my mother-in-law’s house because she has two dogs inside that don’t like cats.

I finally was able to trick him and quickly ran in the front door and shut it. It seemed like the coast was clear until I saw him poke his head in the window. He was looking for me!

IMG_7716

He stayed on the front porch for about 15 min, meowing and pawing at the window. When I didn’t come back out, he then went to the back door and meowed there too for another 15 min. I felt so bad!

Finally, after about 30 min of this, I went outside and walked him back to the neighbor’s house. They were about to leave and were in the driveway, so they took him and put him inside. Phew. And I thought my cat was needy! Nate threatened to tell L.C. when we got home that I “had an affair with a floozy.”

But back to the food. Nate loves whole wheat breads, but I’m not as much of a fan. I find them a little on the dry side, and this focaccia was no exception. That’s not to say it wasn’t good, but you could definitely tell it was made with whole wheat flour. If I’m going to splurge on bread/pasta, I want it to be white flour all the way!

It sure was pretty, though.

Tomato Rosemary Focaccia ~ ElephantEats.com

We had ourselves a nice outdoor dinner. There are few months of the year when I’m willing to eat outside. Usually it’s too cold, or mosquitoes are everywhere (mosquitoes happen to LOVE me).

IMG_7735

Anyway, we had a perfect, sunny evening with a nice breeze.

IMG_7738

Nate’s mom grilled up some chicken sausage and veggies and we served the focaccia alongside it.

Tomato Rosemary Focaccia ~ ElephantEats.com

I made a chocolate pine nut tart for dessert that was as amazing as it sounds, but the recipe needs a little tweaking before I can share it. I followed the directions but ended up having to split it into two pans because there was too much crust and filling.

We had an awesome Memorial Day. I can’t believe the 4th of July is only a month away! Where has this year gone?

For the focaccia recipe, you can get it from the NY Times site here.

Goat Cheese, Chard and Herb Pie ~ ElephantEats.com

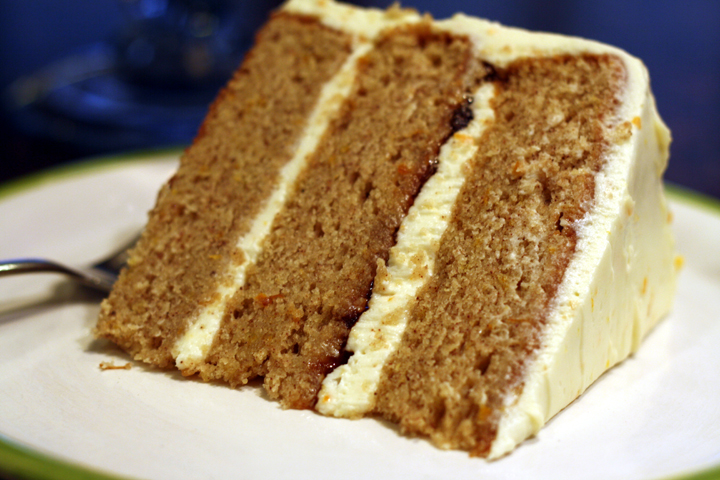
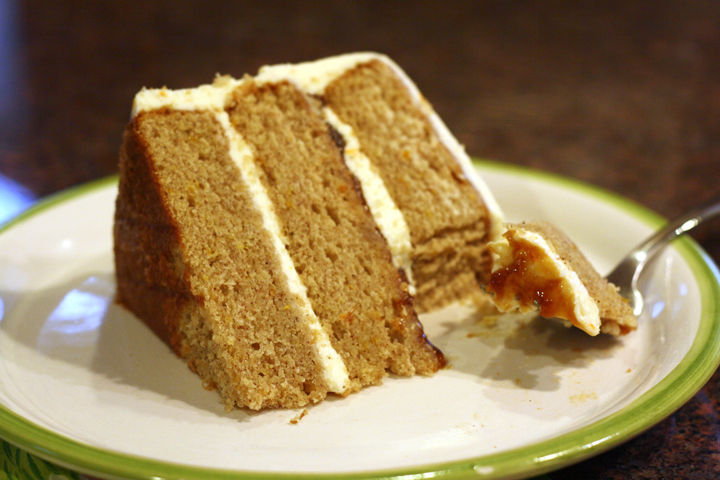
I forgot to tell you guys last week, but Nate actually has never seen the house we bought. It all happened so quickly. After our offer got accepted, I asked him to come to the inspection with me figuring he’d want to see it, but when he found out it would take a couple hours, he said “no, thank you.” Can you believe that!? Such a guy thing to do. He kind of doesn’t want to see it til the renovations are all done, but I don’t think I’m going to allow that.

Goat Cheese, Chard and Herb Pie ~ ElephantEats.com

In the meantime, our inspector never tested for lead, and the more I’m reading up on it, the more freaked out I am. Apparently it’s pretty much ok if you just paint over it and there are no areas of chipping paint. But if you’re planning to do renovations, like we are, the lead dust can get into the air and you have to hire a contractor that’s certified in dealing with that. I’m getting slightly paranoid now so I think I’m going to call in someone to test so we can take any necessary precautions.

I read that most homes built before 1960 are pretty much guaranteed to contain heavily leaded paint. This house was built in 1920 something so I’d say there’s a very good chance it has lead paint. Have any of you ever had to deal with this? What did you do?

Oh, and don’t worry, pics of the house will come soon! I’m going to try to do a drive-by this wknd and snap a pic :)

Goat Cheese, Chard and Herb Pie ~ ElephantEats.com

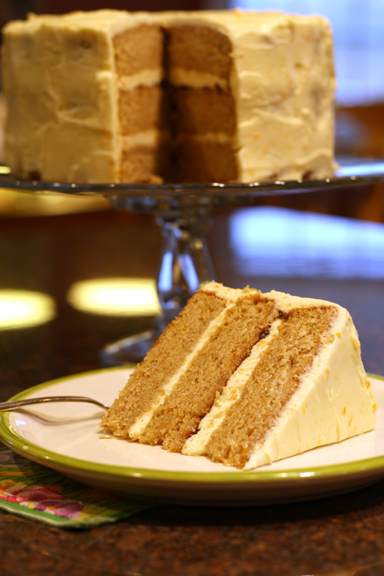
On another note, you know how I said I walk by the Today Show every morning? Well today I was walking by and I saw the tv screens outside showing it live, and you couldTOTALLY see me on the screen! So if you watch the Today Show (Shannon, i’m talking to you!!), watch around 8:10 every morning. I’m usually holding a pink/red bag. You can only see me on days they sit with their backs to the window. Let me know if you see me! (ok ok, i know i’m such a dork)

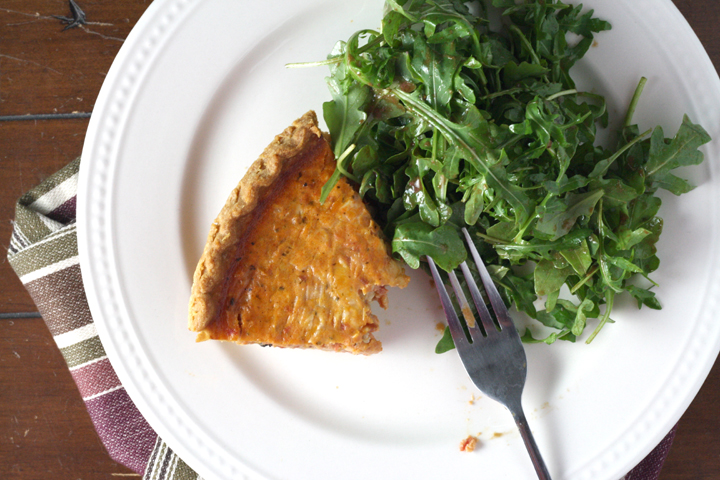
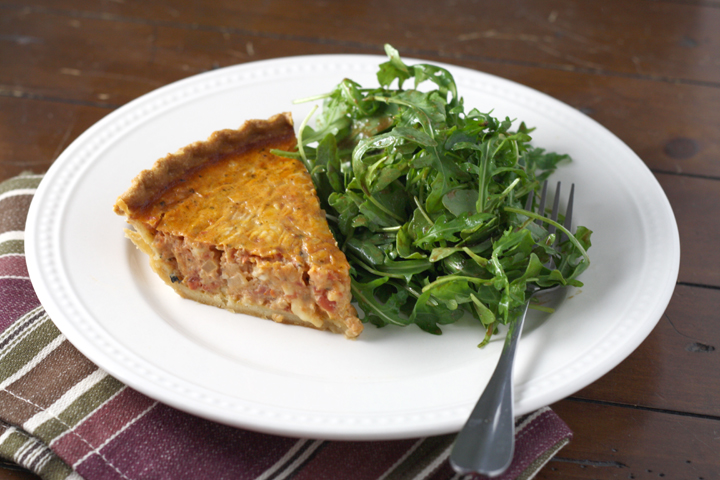
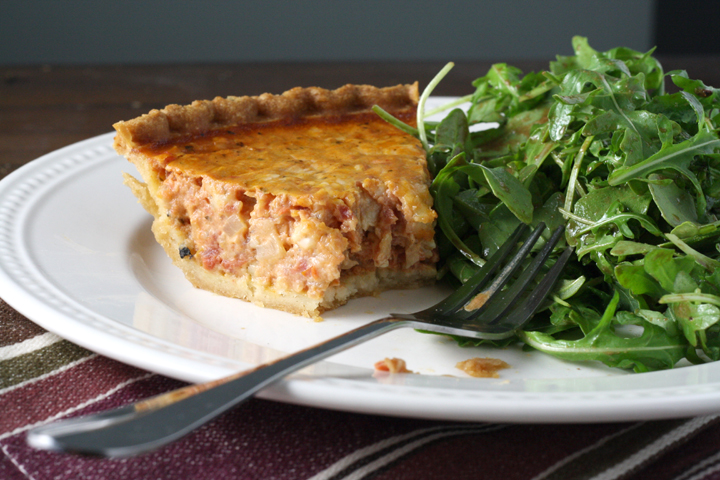
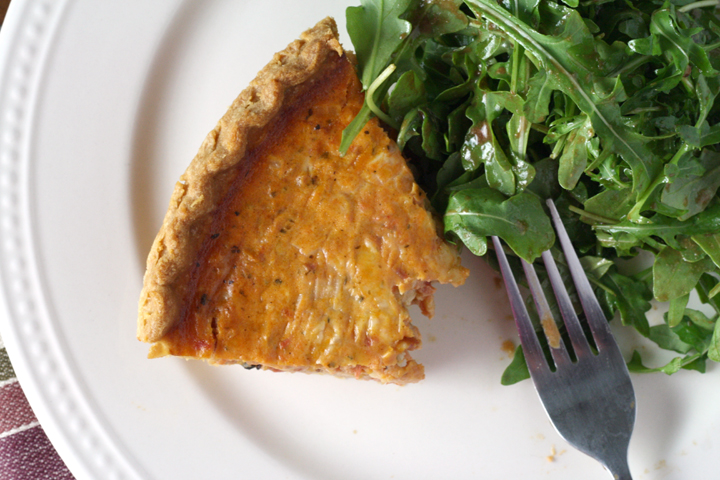
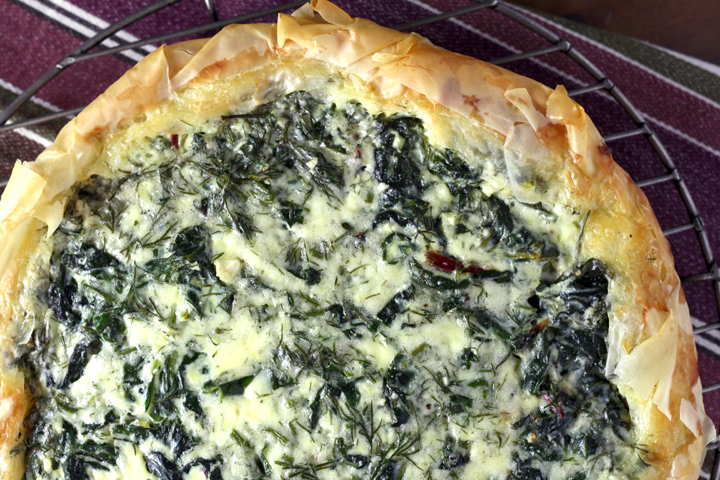
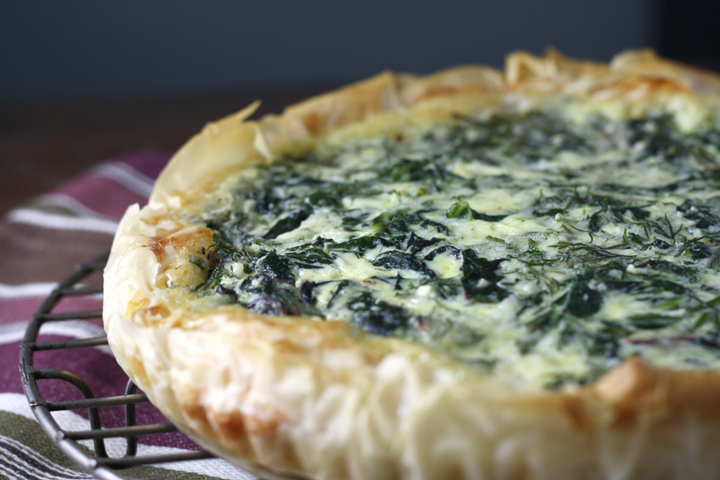
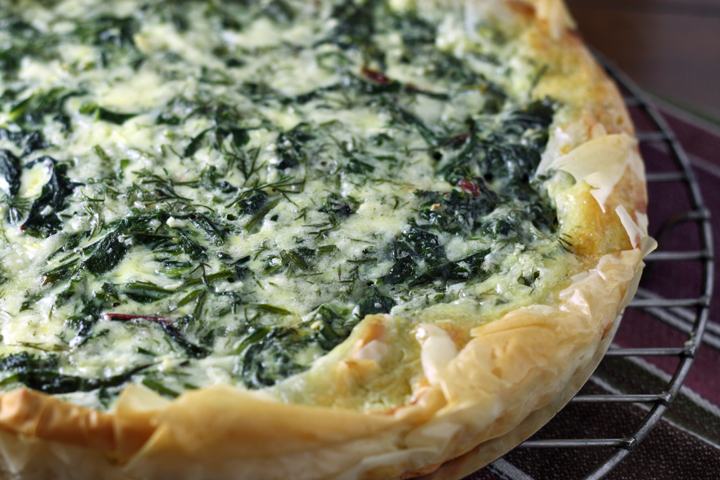
So I made this recipe a few weeks ago. It was really tasty, almost like a Spanakopita but in a pie. You could easily sub some other green (kale, spinach, etc) for the chard. It comes together pretty quickly because you use premade phyllo dough.

I had seen my mom work with phyllo when I was younger, and I remember she always said you had to work quickly because it dries out. She was SO right. It was a pain to work with but luckily this pie is supposed to have a rustic look so it was fine in the end.

I served this as dinner but honestly, it should really be an appetizer or side dish. It wasn’t filling at all. Nate and I ended up eating it in like 2 sittings.

Goat Cheese, Chard and Herb Pie ~ ElephantEats.com


Goat Cheese, Chard and Herb Pie in a Phyllo Crust

From the NY Times

Print this recipe!

Serves 6-8 as a side-dish

1 generous bunch Swiss chard (about 3/4 pound), stemmed and washed
Salt to taste
8 sheets phyllo (4 ounces)
3 eggs
6 ounces goat cheese (I used 4 oz goat cheese and the rest feta because that’s what i had)
3/4 cup low-fat milk
2 garlic cloves, pureed or put through a press
1/2 cup chopped fresh herbs, such as parsley, dill, chives, tarragon, marjoram (I used dill which was great!)
Salt and freshly ground pepper
2 tablespoons extra virgin olive oil, or 1 tablespoon olive oil and 1 tablespoon melted unsalted butter

Bring a large pot of water to a boil while you stem and wash the Swiss chard. If the stems are wide and meaty set them aside for another purpose. If they are thin and sinewy, discard. When the water comes to a boil salt generously and add the chard leaves. Fill a bowl with cold water. Blanch the chard for 1 minute, just until tender, and transfer to the bowl of cold water. Drain, take up the chard by the handful and squeeze out excess water. Chop medium-fine. You should have about 1 cup chopped cooked chard.

Preheat the oven to 350 degrees. Blend together the eggs and goat cheese, either in an electric mixer or in a food processor fitted with the steel blade. Add the milk and the garlic and blend until smooth. If using a processor, scrape into a bowl. Stir in the blanched chopped chard, the herbs, and salt and pepper to taste.

Brush a 9- or 10-inch tart pan or cake pan with olive oil and place on a baking sheet for easier handling. Open up the package of phyllo and unfold the sheets of dough. Remove 8 sheets of phyllo and fold the remaining dough back up. Wrap tightly in plastic, return to the box if you wish and either refrigerate or freeze. Lay a sheet of phyllo in the pan, tucking it into the seam of the pan, with the edges overhanging the rim. Brush it lightly with olive oil (or melted butter and oil) and turn the pan slightly, then place another sheet on top, positioning it so that the edges overlap another section of the pan’s rim. Continue to layer in 6 more sheets of phyllo, brushing each one with oil – both the bottom and the sides and edges that overhang the pan — and staggering them so that the overhang on the rim of the pan is evenly distributed and covers the entire pan.

Pour the goat cheese and chard filling into the phyllo-lined pan, scraping all of it out of the bowl with a rubber spatula. Scrunch the overhanging phyllo in around the edges of the pan to form an attractive lip. Brush the scrunched rim with olive oil. Place in the oven and bake 40 minutes, until the filling is puffed, set and lightly colored on the surface. Remove from the heat (if it puffed up it will settle) and allow to sit for at least 10 minutes before cutting. Serve hot, warm or at room temperature.

Advance preparation: You can keep this in the refrigerator for a day or two but you will have to rewarm in a 300-degree oven to re-crisp the phyllo.

Nutritional information per serving (6 servings): 268 calories; 17 grams fat; 8 grams saturated fat; 1 gram polyunsaturated fat; 7 grams monounsaturated fat; 118 milligrams cholesterol; 17 grams carbohydrates; 1 gram dietary fiber; 396 milligrams sodium (does not include salt to taste); 13 grams protein

Brown Butter Oatmeal Toffee Cookies ~ ElephantEats.com

I haven’t really been cooking anything worth sharing. I’m just trying to get used to my new job and schedule…and the fact that I have to walk further to get to and from work. Sadly, it’s only about 2 or so miles round trip, but when I get home I just want to go sit on the couch. It’s a pretty nice walk though. I work in Rockefeller Center and on my way to work yesterday I walked by a window and saw Matt Lauer filming the Today Show.

Today Show filming

I thought it was pretty cool, but I texted it to Nate who said I was “such a nerd.” I hear that from him a few times a week. I think it’s probably true.

Anyway as I said, I haven’t done much cooking. The other night we had “homemade” pizza using the Pillsbury pizza crust that comes in the can. Has anyone else every used that? It’s seriously just their crescent roll dough that’s made into a big sheet that can fit a 10×15 sheet pan. It’s yummy if you want a crescent roll but it’s kind of a funky/sweet tasting pizza dough. It does get nice and crispy and hold toppings, though.

Usually if I don’t have time to make dough, I’ll either buy it fresh or frozen from the market, or even get some from the pizza parlor across from my apt. You know my beef with nyc supermarkets though…they rarely have what I need. I checked all over for any sort of dough and came up empty. I was pretty upset.

I used some premade pesto and then sauteed some fresh broccoli and garlic to put on top, with some mozzarella cheese. It was pretty tasty for a meal that got thrown together quickly.

Brown Butter Oatmeal Toffee Cookies ~ ElephantEats.com

That being said, it wasn’t much of a recipe so it’s not something worth sharing. All I have for you today are these cookies. I almost didn’t post these either because I kind of feel like most people have plenty of cookie recipes. I added a little something special to these though- brown butter*. It’s what happens to butter when you cook it past melting but before burning. It takes on a nutty, caramelized taste and turns a rich caramel color.

People in the food blogging world have been obsessed with it for quite some time but I never really got into the whole trend. I thought I’d add it to basic oatmeal cookies, though, to give them a little something special. I also threw in some toffee bits, because why not.

These cookies came out a little salty and sweet, with a great crumbly texture. The oatmeal gives them some bite and the browned butter definitely makes the whole thing taste like caramel. If you’re looking for a cookie to liven up your repertoire, give these a try!

I brought our realtor a dozen of these because I felt so bad for her for having to show me sooo many houses. I suppose that is her job, but still. She ate a couple as a pick-me-up after house number 5 or so, and I don’t blame her one bit. Now that I think about it, I wonder if it was the houses or me that was so exhausting ;)

*If you’d like a good tutorial for browning butter, you can find one here on How Sweet It Is.

Brown Butter Oatmeal Toffee Cookies ~ ElephantEats.com

Brown Butter Oatmeal Toffee Cookies

Very slightly adapted from the Food Network

Print this recipe!

makes about 3-4 dozen, depending on size

2 sticks butter
3/4 cup brown sugar
3/4 cup white sugar
1 tsp vanilla
2 eggs
2 1/2 cups flour
3/4 tsp baking soda
1 tsp salt
3/4 cup whole oats (not quick-cooking oats)
1 cup toffee bits (or chocolate covered toffee bits)

Preheat oven to 350.

Melt 2 sticks butter over medium heat until browned (see directions at http://www.howsweeteats.com/2012/10/exactly-how-i-brown-my-butter/), then cool.

Beat the browned butter, brown sugar and white sugar until fluffy. Beat in vanilla and eggs.

Whisk flour, baking soda and salt, then stir into the butter mixture. Add oats and toffee bits and chill 30 minutes.

Drop by tablespoonfuls and bake 12 to 15 minutes at 350 degrees. Transfer to wire racks to cool.

Tomato Quiche~ ElephantEats.com

As I mentioned in my last post, Nate and I have had quite a lot happening around here lately.

Some of you may have already know based on my comments on other blogs, but I officially got a new job offer! I was kind of passively looking because while my current job wasn’t horrible, it also wasn’t ideal. I’m so so excited for this new opportunity! There seems like there will be more room for growth. Althought I’m still working at my “old” job for another couple weeks, I have a new hire appt tomororw and I get my new ID badge and stuff!

Tomato Quiche ~ ElephantEats.com

This new job is the first place I’ll have worked where the people there will only know me by my married name :) At my current job they still refer to me by my old name, and it’s kind of annoying me at this point that they can’t remember. Although maybe I shouldn’t be so harsh because I was initialling a document the other day and used my old initials and totally didn’t even notice…it even took me another minute to realize after Nate said “oh, come on, Amy!”

Tomato Quiche ~ ElephantEats.com

So what does this all have to do with this recipe? Well, just that if you’re busy you shouldn’t assume because a recipe’s title contains the word “quiche” that it will be quick to make. I mistakenly went to prepare this at around 7pm the other night thinking I could whip it right up. It wasn’t until I actually read the recipe (after having already started it) that I realized you have to essentially make a homemade tomato sauce before assembling the quiche. And if I had made a homemade crust it would have been even more effort.

I will say however, that if you take into account the correct amount of time it will take, it’s TOTALLY worth it. Nate and I both thought this was outstanding. The tomato sauce, while incredibly basic, was so delicious. I kind of want to make it again to just put over pasta. What’s great about this quiche is that you can make it in the winter with canned tomatoes or in the summer with fresh and it’s delicious both ways. It’s fancy and tasty enough that you could definitely make it for company. It would be great to serve at brunch as well as dinner!

Tomato Quiche ~ ElephantEats.com

This is one of the recipes Nate sent me in the morning during his breakfast perusal of the New York Times. As I’ve mentioned before, I find their recipes highly reliable.

I thought to make this quiche because I’ve had a premade pie-crust in my freezer forever. I don’t know why I bought it. If I’m going to make a pie, I would totally make the crust from scratch, so I think I actually bought it to make a quiche. With a store-bought crust, a typical quiche is a great weeknight meal. This one requires slightly more effort but please do it!!

P.S. You can make the tomato sauce ahead of time and then it’s really not bad for a weeknight dinner :)

Tomato Quiche ~ ElephantEats.com

Winter Tomato Quiche

From NY Times with some shortcuts by me

Print this recipe!

 Serves 6-8

1 9- or 10-inch whole wheat Mediterranean pie crust, gluten-free whole grain
Mediterranean pie crust, or yeasted whole wheat olive oil pastry (*I used a regular old frozen pie crust in pan)
1 tablespoon extra virgin olive oil
1/2 medium onion, finely chopped
2 to 3 garlic cloves (to taste), minced
1 14.5-ounce can chopped tomatoes in juice, with juice (*I used the ones with rosemary and oregano)
1 tablespoon tomato paste
Pinch of sugar
Salt to taste
1 sprig fresh basil or rosemary
1 teaspoon fresh thyme leaves or 1/2 teaspoon dried thyme
Freshly ground pepper
2 eggs
2 egg yolks
3/4 cup low-fat (1 or 2 percent) milk
2 ounces Gruyère cheese, grated (1/2 cup, tightly packed)
1 ounce Parmesan cheese, grated (1/4 cup, tightly packed)

If making crust, roll out the crust and line a 9- or 10-inch tart pan. Refrigerate uncovered (place in freezer if using the yeasted crust) while you make the filling. If using a premade frozen crust in pan, defrost in fridge and don’t take it out until you’re ready to use it.

Heat the olive oil over medium heat in a wide, heavy saucepan and add the onion. Cook, stirring, until it begins to soften, 2 to 3 minutes. Add a pinch of salt and continue to cook, stirring often, until tender, about 5 minutes. Meanwhile pulse the tomatoes in a food processor fitted with the steel blade or in a mini-processor.

Add the garlic to the onions and cook, stirring, until fragrant, about 30 seconds. Add to the canned tomatoes and turn up the heat slightly. Add the tomato paste, sugar, salt, basil or rosemary spring and thyme and simmer briskly, stirring often, until the tomatoes have cooked down and smell fragrant, about 15 minutes. Taste and adjust salt, and add pepper. Remove from the heat. Remove the basil or rosemary sprig and, if you used rosemary, remove any rosemary needles that may have detached from the sprig. Allow to cool slightly. You should have about 1 cup of the sauce.

Preheat the oven to 350 degrees. Beat the eggs and egg yolks in a large bowl. Brush the bottom of the crust with a small amount of the beaten egg and pre-bake for 10 minutes. Remove from the oven and allow to cool for 5 minutes.

Beat the milk into the eggs. Add 1/2 teaspoon salt, freshly ground pepper to taste and beat together. Stir in the cheeses and the tomato sauce and combine well. Scrape into the crust, using a rubber spatula to scrape out every last bit from the bowl. Place the tart on a sheet pan for easier handling and place in the oven. Bake for 30 to 35 minutes, until set. Remove from the heat and allow to sit for at least 15 minutes before cutting.

Advance preparation: The tomato sauce can be made through Step 3 up to three days ahead and refrigerated uncovered. It can also be frozen. Allow to come to room temperature before making the tart. The tart will keep for a couple of days in the refrigerator. Reheat gently in a low oven or serve at room temperature.

Spice Cake with Orange Cream Cheese Frosting ~ ElephantEats.com

Pardon my lack of posts. There have been so many changes happening in the Elephant Eats household, making me a bit busy and causing me to have insomnia. I’ve been waking up at like 3 or 4 in the morning with my mind racing about various things…hence my finishing up this blog post at 4am. Surprisingly I haven’t been as tired as I would imagine the next day. I guess adrenaline will do that to you!

The house hunting thing is stressing me out a bit. Like how do you know when you like a house enough to want to buy it and that something better won’t come along? I’m obsessively combing the listings on a daily basis.

Spice Cake with Orange Cream Cheese Frosting ~ ElephantEats.com

This past weekend was super busy. It started with a little house hunting Saturday morning with a realtor. It made me realize how expensive things are for how little you get in this area. I’m hoping there will just be something that I fall in love with (that’s in our budget).

Then I rushed off to my friend Emily’s bridal shower and bachelorette! She was one of my maids of honor and I’m one of her bridesmaids. I, along with the other two bridesmaids, planned the whole shower/bachelorette weekend. We put a lot of hard work into it and I think it came out great and went off pretty much without a hitch!

Spice Cake with Orange Cream Cheese Frosting ~ ElephantEats.com

Plus, Emily told us she loved every second of it :) We did any Asian-themed shower because she loves sushi. I got some hanging paper lanterns in her wedding colors to decorate her soon-to-be sister-in-law’s house. They looked great! I unfortunately was too lazy to upload the photos but maybe I’ll add them soon.

The bachelorette went late into that evening and ended with a sleep over. I didn’t get much sleep and was up early to go house hunting some more on Sunday!

Spice Cake with Orange Cream Cheese Frosting ~ ElephantEats.com

Nate told me he doesn’t care at all about the house and that it’s totally up to me. I guess he trusts my judgement.

It was so fun to go in all the houses, and driving around the suburbs on a gorgeous spring day made me dread going back to the city.

This is all completely unrelated to this recipe. I made it when we were down in PA two weekends ago, and it was a perfect way to end to our Easter dinner! (pardon the photos, as they were taken after daylight and I didn’t have my trusty food photography lights!)


Spiced Layer Cake with Orange Cream Cheese Frosting

very slightly adapted from Bon Appetit (11/09)

Print this recipe!

Makes one 3-layer cake

1 teaspoon baking soda
1 teaspoon baking powder
1 teaspoon ground ginger
1 teaspoon ground cardamom
1 teaspoon ground cinnamon
1 teaspoon ground nutmeg
1/2 teaspoon salt
2 cups sugar
1 cup (2 sticks) unsalted butter, room temperature
1 tablespoon grated orange peel
4 large eggs
1 cup sour cream
1/2 cup whole milk
1/2 cup orange, peach or apricot jam
Orange Cream Cheese Frosting (recipe below)*

Preheat oven to 350°F. Butter three 9-inch-diameter cake pans. Line bottom of pans with waxed paper. Butter and flour pans; tap out excess flour. Sift first 8 ingredients into medium bowl. Using electric mixer, beat sugar, butter and orange peel in large bowl until fluffy.

Beat in eggs 1 at a time. Stir flour mixture into butter mixture alternately with sour cream and milk. Divide batter among prepared pans.

Bake cakes until tester inserted into center comes out clean, about 25 minutes. Transfer pans to racks and cool 10 minutes. Turn cakes out onto racks and cool completely. (Can be made 1 day ahead. Store airtight at room temperature.)

Place 1 cake layer on platter. Spread 1/4 cup jam and then 2/3 cup frosting over. Top with second cake layer. Spread rest of jame and then 2/3 cup frosting over. Top with third cake layer. Cover top and sides of cake with remaining frosting. (Can be made 1 day ahead. Cover with cake dome and store at room temperature.)

Orange Cream Cheese Frosting
2 8-ounce packages chilled cream cheese
8 tablespoons unsalted butter, room temperature
2 cups powdered sugar
2 teaspoons grated orange peel
1 teaspoon vanilla extract
1/3 cup chilled sour cream

Using electric mixer, beat cream cheese and butter in large bowl until well blended. Beat in sugar, then orange peel and vanilla. Beat in sour cream. Cover and refrigerate until frosting is firm enough to spread, about 30 minutes.

*note that I found the frosting barely covered the cake. In making this again I might 1 1/2 the recipe.