Ok, well maybe I can’t tell you how to win his heart. I mean, I won the heart of my boyfriend, Nate,  but I’m pretty sure every guy is different. But you know what all men have in common?…their stomachs. Any man can be won over with a cake.

I’ve been in several relationships, but no one has been as appreciative of what I cook as Nate. It’s really nice to have someone enjoy every single thing that comes out of your kitchen, even when you know it wasn’t your best work. Maybe Nate’s easy to please, but I like to think I’m just that good ;)


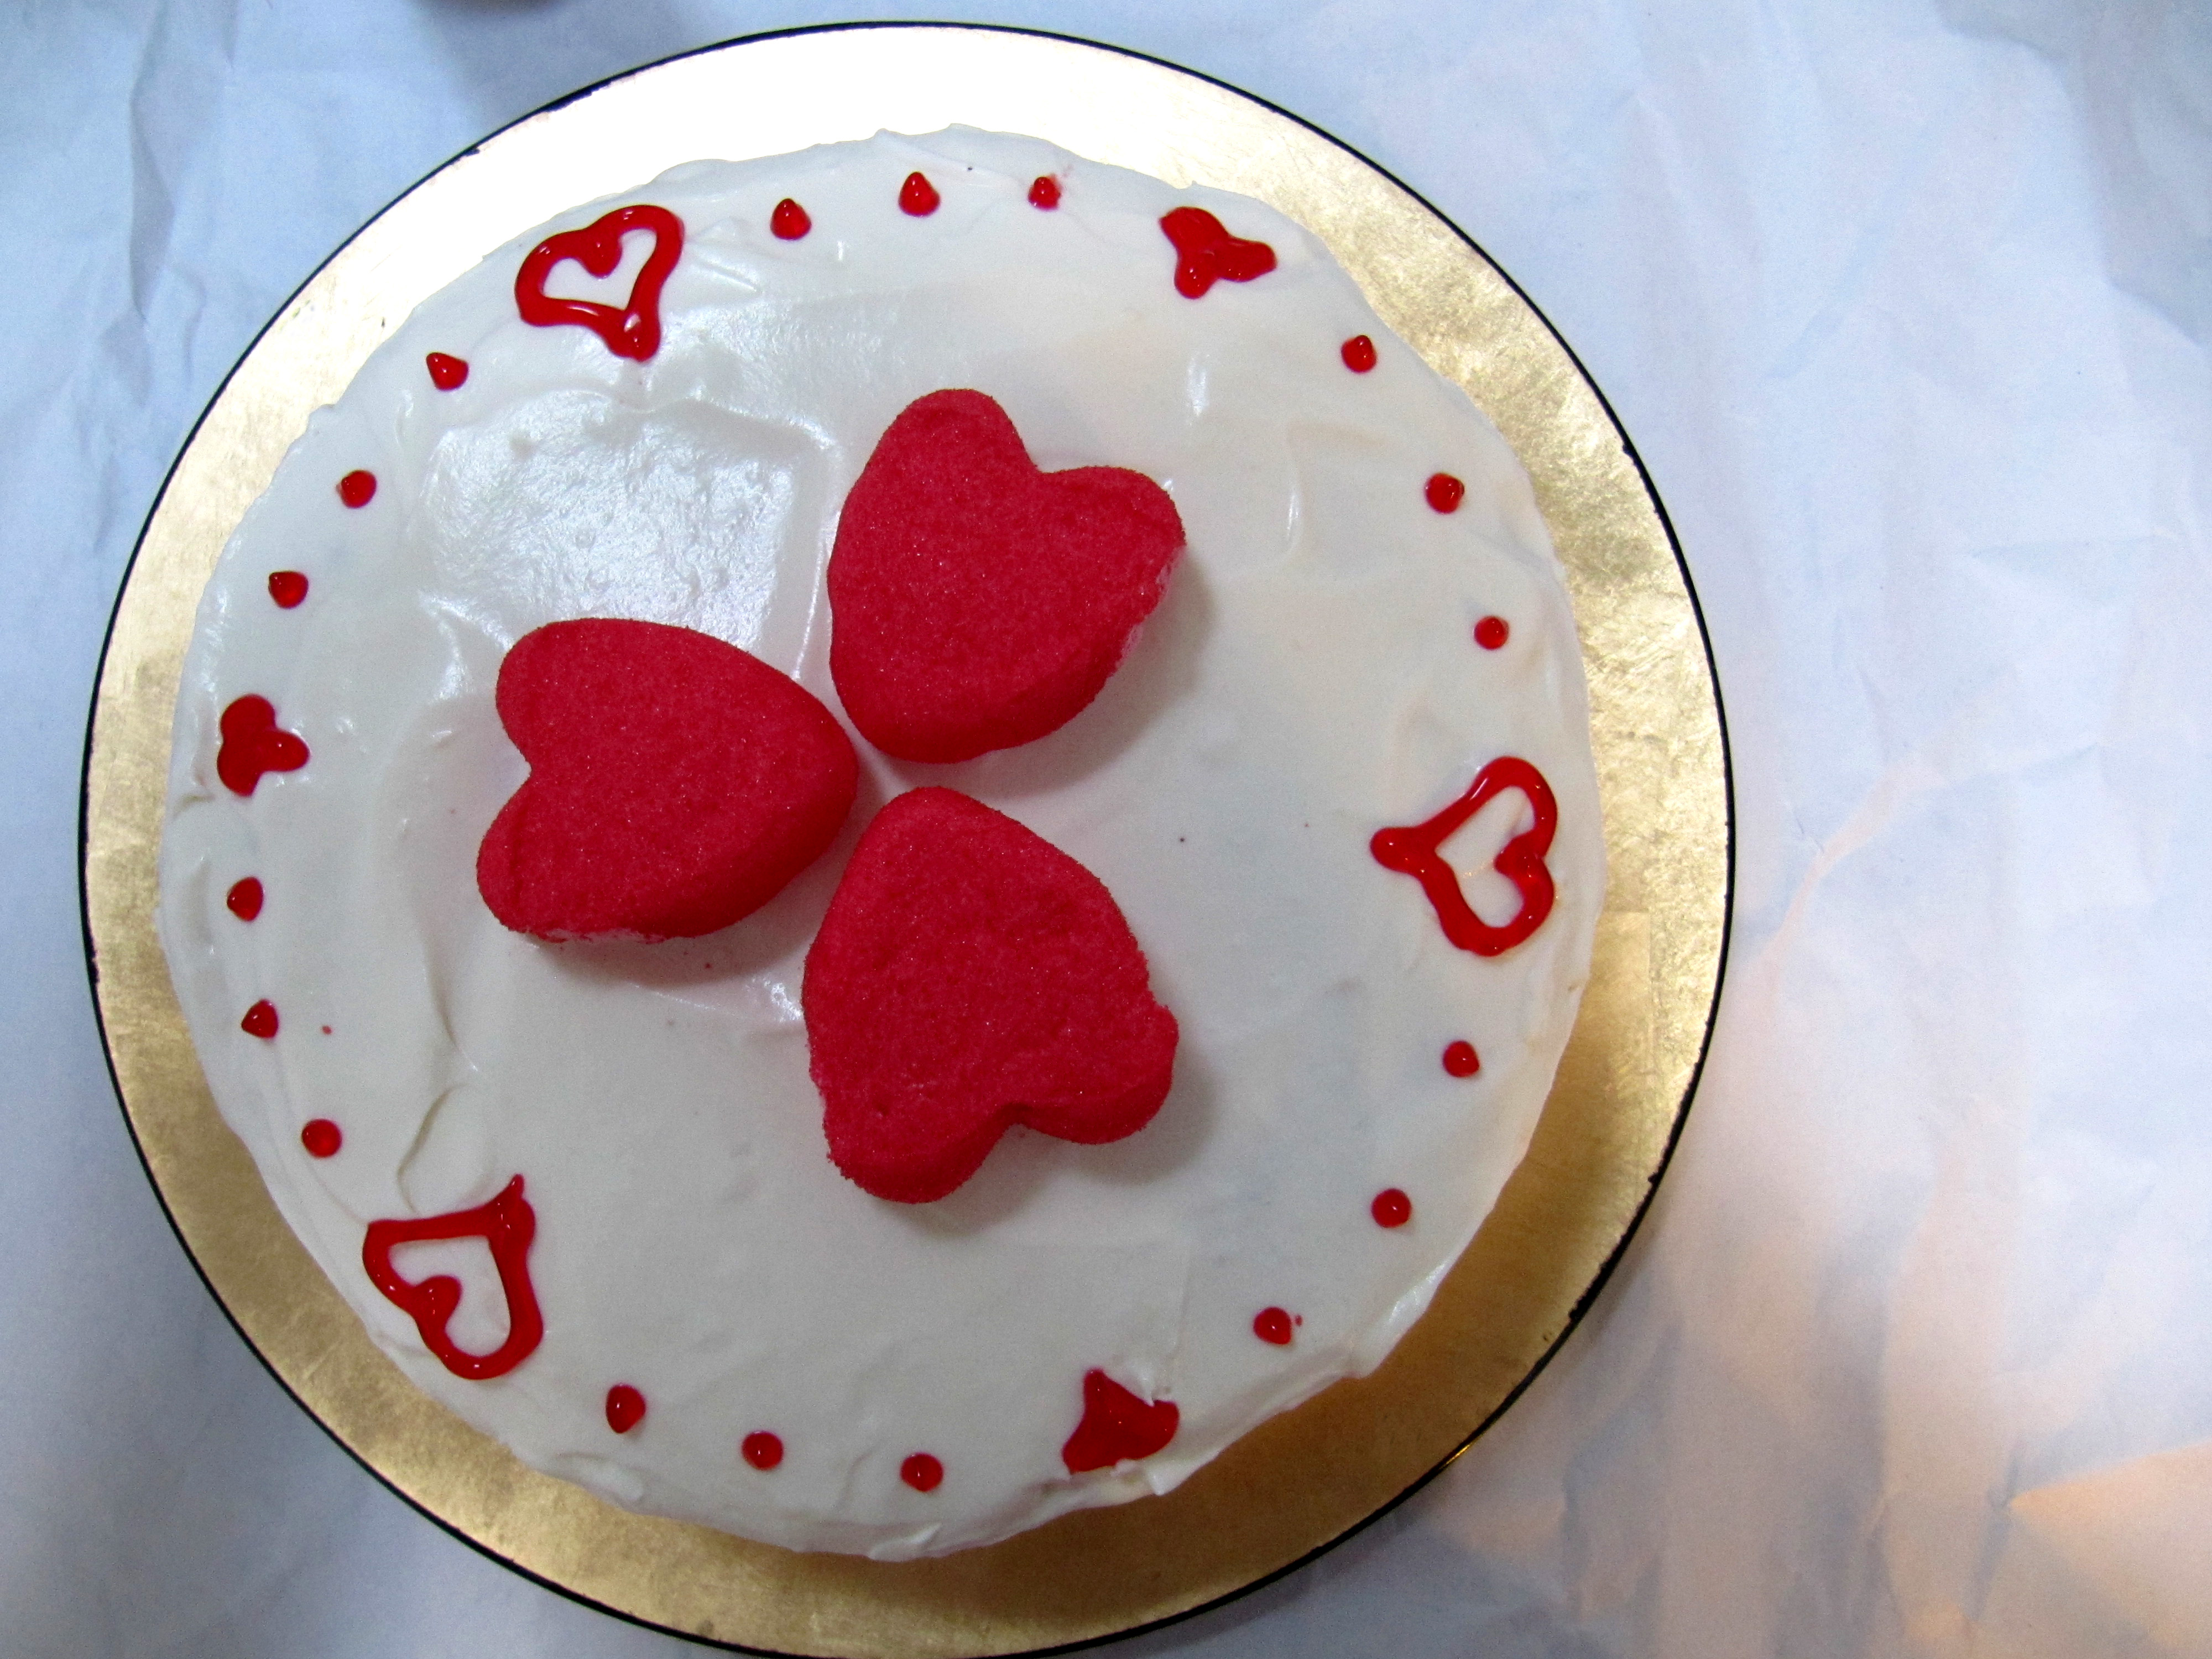
This cake was my way of showing the man that appreciates me so much how much I appreciate him. Red velvet cake is one of his faves, and raspberry mousse is one of mine, so I thought I’d bring them together in a cake full of love. Plus, raspberry and chocolate make a darn good combo.

I kinda just found a bunch of recipes, threw them together, and hoped for the best. But with cream cheese, chocolate, butter and raspberry, I didn’t really know how it could go wrong. And from the look on Nate’s face when he took his first bite, I’d say it was a success.

Nate gives it two thumbs up!

Happy Valentine’s Day! <3

Red Velvet Cake with Raspberry Mousse and Fluffy Cream Cheese Frosting

Recipe by Me

Cake

1 box Red Velvet Cake Mix
1 pkg chocolate instant pudding mix
1- 7 oz. container 2% greek yogurt
1/2 cup vegetable oil
1/2 cup applesauce or other fruit puree (I used stewed prune puree)
4 eggs, beaten
1/2 cup milk
1 tsp vanilla
1 cup mini chocolate chips

1/2 cup seedless raspberry jam (for cake assembly)

Raspberry Mousse

3/4 cup boiling water
1 pkg (3 oz) raspberry flavored JELLO
1 cup ice cubes
4 oz of 1/3 less fat cream cheese, softened
2 cups Non-dairy whipped topping, thawed (I used Cool Whip Free)

Frosting

8 oz. of 1/3 less fat cream cheese, room temperature
4 oz. butter, room temperature
8 oz. containter of non-dairy whipped topping (I used Cool Whip Free)
2 cups confectioners sugar
1 tsp vanilla

Cake:

Preheat oven to 350. Spray and flour two 9-in. round cake pans.

In a VERY large bowl, mix together everything except choclate chips. Stir in chocolate chips.

Divide batter between cake pans. Spread out batter and tap pan on counter once or twice to get air bubbles out.

Cook for around 30-45 min (depends on cake mix brand) or until tester comes out clean.

Cool on wire rack. When cool, remove from pans and cut each cake in half horizontally to form 4 cake round layers.

Mousse:

Line two 8-in. round pans with plastic wrap.

Add boiling water to gelatin mix. Stir 2 min until completely dissolved. Stir in ice until melted. When gelatin is cold and begins to congeal, remove remnants of ice that haven’t melted.

Blend cream cheese in bowl until smooth and creamy. Gradually beat in gelatin. Whisk is whipped topping after gelatin has slightly set.

Divide mousse between pans, spreading out evenly. Refrigerate 3-4 hours our until set.

Frosting:

Beat cream cheese and butter until creamy and blended.

Add powdered sugar and beat til well blended.

Add 3/4 of the whipped topping and beat well. Fold in remainder of whipped topping.

Refrigerate 1 hour.

Assembly:

Melt raspberry jam in microwave until spreadable but not hot. Put first cake layer on plate and spread with 1/3 of the jam.

Pipe a line of frosting around the outer edge of the round. Carefully flip 1 mousse round onto cake and remove plastic wrap.

Put next cake round on top of mousse layer. Spread with next 1/3 of jam, and then frosting to cover, about 1/4″ thick.

Put next cake round on top of frosting layer. Spread with rest of jam. Pipe another line of frosting around outer edge.

Flip next mousse layer onto cake. Put top layer on top of mousse layer.

Finish frosting cake with rest of frosting. Decorate as desired. Refrigerate again before cutting.


Mwah!

Neither Nate or I like partying. For those of you who haven’t read the About Me page, Nate is my boyfriend. I was so glad when I started dating him because for once I didn’t have to force myself to go to bars just because the guy I was dating wanted to go out. It’s so much easier with Nate because we both like low-key nights at home…cooking dinner and popping in a dvd.

An artistic shot by Nate

What’s also nice is that Nate is very close with his mother who lives in PA (near DE) and whom we visit whenever we have a long weekend. Nate and I are both big on “home.” It’s a concept that makes us both so happy. I can’t put my finger on why, but it’s just so comforting. I’m definitely the kind of person who, while I love my life, often wish I could go back to the carefree days of childhood when my biggest worry was a test I had to study for.

I love baking in a big kitchen!

Now I realize his mom’s home isn’t MY home, per se, but it’s a home, with a mom who cooks for us, where we can laze around and do nothing. It’s an escape from the city and the work week.

Sunrise in the country

When we visit, I like to contribute by cooking dinner or baking dessert. So when we headed down there for New Years, I called up my own mother to get a good recipe to make for dessert on New Years Eve. Nate’s mom was already taking care of dinner by her tradition of cheese fondue on New Years Eve. To be healthy, I requested some peppers and apples to dip in the cheese, along with the bread.

Healthy eats for dippin

My mom told me that I absolutely had to make this recipe she found on Bon Appetit that she LOVES, for Winter-Spiced Molten Chocolate Cakes with Rum-Ginger Ice Cream…and let me tell you, it was out of this world!

Mmmmm mmmm


I do happen to like plain molten chocolate cakes, and might even prefer them to this recipe because the chocolate flavor takes center stage, but if you want to make a different version of the recipe, this is definitely the one you should go to. They were a hit!

Happy New Year!

Winter-Spice Molten Chocolate Cakes with Rum-Ginger Ice Cream
taken in its entirety from Bon Appetite

Ice cream

    1 pint vanilla ice cream, softened
    2 tablespoons chopped crystallized ginger
    1 tablespoon dark rum

Cakes

    14 ounces bittersweet (not unsweetened) or semisweet chocolate, chopped
    1 1/4 cups (2 1/2 sticks) unsalted butter
    2 teaspoons ground coriander
    2 teaspoons ground cardamom
    1 teaspoon ground cinnamon
    1/2 teaspoon ground cloves
    1/2 teaspoon ground white pepper
    6 large eggs
    6 large egg yolks
    2 teaspoons vanilla extract
    3 cups powdered sugar
    1 cup all purpose flour
    Additional powdered sugar
    Crystallized ginger strips
Preparation:

For ice cream:
Place softened ice cream in medium bowl. Using plastic spatula, fold ginger and rum into ice cream. Transfer to airtight container. Freeze ice cream mixture until firm, about 4 hours. (Can be made 1 day ahead. Keep frozen.)

For cakes:
Generously butter eight 3/4-cup soufflé dishes. Stir chocolate, butter, coriander, cardamom, cinnamon, cloves, and white pepper in heavy medium saucepan over low heat until melted and smooth. Cool slightly. Whisk eggs, egg yolks, and vanilla in large bowl to blend. Whisk in 3 cups powdered sugar, then chocolate mixture, then flour. Transfer batter to prepared dishes, filling to top and dividing equally. (Can be made 1 day ahead. Cover and refrigerate.)

Preheat oven to 425°F. Bake cakes until batter has risen above dish, top edges are dark brown, and centers are still soft and runny, about 15 minutes, or about 18 minutes for refrigerated batter. Run small knife around cakes to loosen. Allow cakes to rest in dishes 5 minutes. Using hot pad and holding dish very firmly, place plate gently atop 1 cake and invert onto plate. Repeat with remaining cakes. Dust with powdered sugar. Top with crystallized ginger. Serve cakes with rum-ginger ice cream.

So I know it’s winter now, but like I said I need to backtrack a bit to catch you up on the cooking/baking I’ve done. This also fills the voids of the weeks I don’t always bake, since my bf is the only one eating it and the boy can only eat so much! Let’s go back to my favorite time of year…autumn!

Central Park in the Fall...my favorite time of year!

When fall hits, I have the urge to bake all things apple, pumpkin and cinnamon. Not only does it make my apartment smell like autumnal heaven, but it’s *almost guaranteed to taste amazing.

Me and a big ole pumpkin

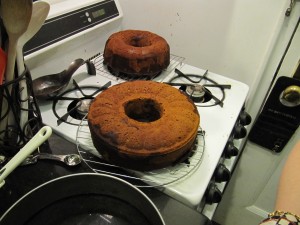
Fall is about when I started discovering the world of food blogs, so most of my recipes around this time came from them. I stumbled across this recipe for Chocolate-Pumpkin Marble Cake with Cream Cheese Glaze and knew I had to test it out. When I make new recipes in the future, I’ll document the whole process in photos, but since these next few postrecipes were all made before my blog, I’ll mainly only show the finished product…sorry :(

fresh outta the oven

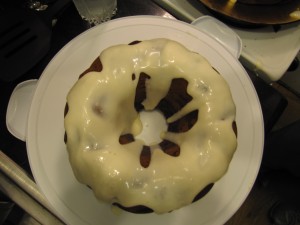
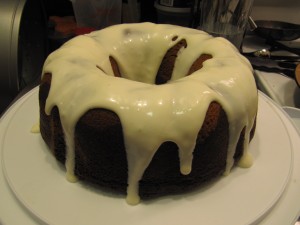
The cake was a bit of a pain to make because I decided to double it so I could bring one to work. It wouldn’t have been such a big deal in a bigger kitchen, but there was so much batter and so little counter space that I did the patented dump-half-the-batter-on-the-floor Amy move. Ok, maybe it wasn’t totally half, but it was a good amount. After cursing under my breath I got back to work and finished up. Glazing was the most fun part.

Yummers

I used the recipe as it was on the site, but if I were to redo it, I think I would replace some of the butter with oil since it came out a tad bit dry…but overall, a tasty combo.

pardon my crappo lighting

Chocolate-Pumpkin Marble Cake with Cream Cheese Glaze

taken from BacktotheCuttingBoard.com which was adapted from Myrecipes.com

Ingredients

Cake:

  • 1 1/4 cup pumpkin puree
  • 3/4 cup granulated sugar
  • 3/4 cup packed dark brown sugar
  • 1 cup butter, softened*
  • 5 large eggs
  • 1 tsp. vanilla
  • 2 3/4 cups cake flour, divided
  • 3 tsp. pumpkin pie spice
  • 1 tsp. baking powder, divided
  • 1/2 teaspoon baking soda, divided
  • 1 tsp. salt, divided
  • 3/4 cup Dutch-processed unsweetened cocoa
  • 1 1/3 cup regular or low-fat buttermilk, divided

*You can increase this if you don’t mind the extra calories for a moister cake, and as I said, I’d probably replace some of the butter with oil the next time around. Maybe 50/50

Cream Cheese Glaze:

  • 1/2 cup powdered sugar
  • 4 oz. (1/2 cup) regular or low-fat cream cheese
  • 1/2 tsp. vanilla
  • 3-4 tbsp. milk (or more if you want a thinner glaze)

Process

1. Preheat oven to 350 degrees (F). Rub a 10 inch tube pan or 12-cup bundt pan with butter (or spritz with cooking spray) and dust with 1 tbsp. flour until the interior is covered. Tap lightly to shake loose extra flour. Set aside.

2. Spread pumpkin puree over two layers of paper towels and press two more layers on top. Let sit for 10 minutes.

3. Meanwhile, in a large mixer bowl cream butter until light. Add both sugars in a steady stream and mix on medium for about 5 minutes.

4. Add eggs, one at time, mixing well after each. Add in vanilla.

5. Transfer half of the mixture into another large bowl (another mixer bowl would be helpful, but any large bowl will work). Set aside.

6. Scape the pumpkin off of the paper towel and add it to the first bowl. Mix well.

7. In a smaller bowl combine 1 3/4 cup flour, pumpkin pie spice, 1/2 tsp. baking soda, 1/4 tsp. baking powder and 1/2 tsp. salt.

8. Add half of the flour mixture to the pumpkin mixture and mix well. Mix in 1/3 cup buttermilk. Then add the remaining flour and mix until combined. Set aside.

9. In the smaller bowl combine 1 cup flour, 3/4 cup cocoa, 1/2 tsp. baking soda, 1/4 tsp. baking powder and 1/2 tsp. salt.

10. Add half of the flour/cocoa mixture to the other large bowl and mix well with a whisk or your mixer. Mix in 1 cup of buttermilk. Then add the remaining flour and mix until combined.

11. Spoon 1/3 of the pumpkin batter into your prepared pan. Drop heaping spoonfuls of the chocolate batter around the pan (not completely covering all the pumpkin). Spoon in the remaining pumpkin and chocolate batters. Gently swirl a knife around the pan several times.

12. Bake for 45-55 minutes or until a toothpick inserted in the center comes out with a few moist crumbs (make sure you’re checking in both the pumpkin and chocolate parts, I noticed large chocolate sections needed a few additional minutes). Cool in pan for 10 minutes, then remove from pan and cool for another 10 minutes on a rack.

13. Meanwhile, to make the glaze, mix powdered sugar and cream cheese until well blended. Beat in vanilla and milk, 1 tbsp. at time. Drizzle on the warm cake. Let cake cool completely.

12-16 servings

We Freak for Fall!

07. February 2011 · Write a comment · Categories: Baking, Bread · Tags:

Wow, my first real post. I’m not sure where to even begin. Part of me wants to tell you all about me, but I wouldn’t even know what to say. I suppose the real me will come across in my writing/pictures.  I want to start by telling you a few things though:

I’m not a photographer, although I do think I have the potential when I have the right environment. I have a crappy little point-and-shoot camera and there is NO natural light in my apt since the bedroom is the only area with windows. I think I’m going to make a light box soon, and bring it into my bedroom…but I’m hesitant to have food anywhere near my bed since I’m a complete klutz. I’m going to try to improve my photos but these first pictures were taken just for me, before I even had any idea to start a blog. They were mostly taken by my boyfriend who is so impressed by all cooking I do that he feels the need to document it.

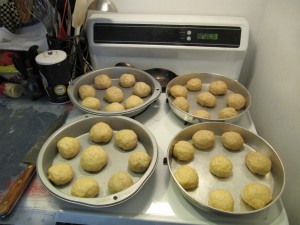
I’m also going to begin by posting things I made in the last few months, to catch you all up to today. I’m going to start with a Honey Wheat Dinner Rolls I made back in the fall.

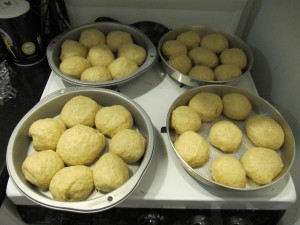
before rising

I love grocery shopping. I don’t know if it’s just me, or anyone who likes food, but I could spend hours in the store. When I met Nate, I had only been to Trader Joe’s once or twice. I thought it was some high priced grocery store like Whole Foods. It was only after I met him that I realized it’s way cheaper than most markets…especially those in nyc.

After rising

Nate is a creature of habit. Every week he buys the exact same items: whole wheat dinner rolls, turkey, apples, focaccia, peanut butter pretzels, baby carrots, and a couple other things. He would bring the dinner rolls over to my apt when I would make dinner for him. So I thought…maybe I can make him some homemade rolls.

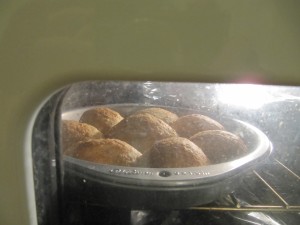
Almost done! (wow, my oven window is diiiirty)

I did some research online and came across a King Arthur Flour recipe with lots of good reviews. I have to say that they came out tasty, and Nate approved, but I think the effort it took wasn’t worth it when the rolls at TJs are suitable. I’d rather be making dessert ;)

Mmmm mmm. Fresh outta the oven rolls :)

Now listen…I know yeast and bread-baking is a complicated thing. I probably shouldn’t have started with a complicated recipe cuz you’ll get the wrong idea about me. I promise the things I usually make are way easier. But think of it this way…if it comes out crappy,  just keep it to yourself and no one has to know. At least you tried :)

King Arthur Flour Honey Wheat Rolls

Ingredients

  • 1 packet “highly active” active dry yeast, or 2 1/4 teaspoons active dry yeast, or 2 1/4 teaspoons instant yeast
  • 1 cup lukewarm water
  • 1/4 cup orange juice
  • 1/4 cup (1/2 stick) unsalted butter, cut into 6 pieces
  • 3 tablespoons honey
  • 1 cup King Arthur Unbleached All-Purpose Flour
  • 2 cups King Arthur Traditional Whole Wheat Flour or King Arthur White Whole Wheat Flour
  • 1 1/4 teaspoons salt
  • 2/3 cup instant mashed potato flakes
  • 1/4 cup nonfat dry milk
  • Directions

    1) If you’re using active dry or “highly active” yeast, dissolve it with a pinch of sugar in 2 tablespoons of the lukewarm water. Let the yeast and water sit at room temperature for 15 minutes, until the mixture has bubbled and expanded. If you’re using instant yeast, you can skip this step.

    2) Combine the dissolved yeast with the remainder of the water and the rest of the ingredients. Mix and knead everything together—by hand, mixer or bread machine set on the dough cycle—till you’ve made a smooth dough. If you’re kneading in a stand mixer, it should take about 5 to 7 minutes at second speed. In a bread machine (or by hand), it should form a smooth ball.

    3) Place the dough in a lightly greased bowl. Cover the bowl, and allow the dough to rise, at room temperature, till it’s quite puffy but not necessarily doubled in bulk, about 90 minutes to 2 hours. Rising may take longer, especially if you’ve kneaded by hand. Give it enough time to become quite puffy.

    4) While the dough is rising, lightly grease a 9″ x 13″ pan, or two 9″ round cake pans.

    5) Gently deflate the dough, and transfer it to a lightly greased work surface. Divide it into 16 pieces.

    6) Shape each piece into a rough ball by pulling the dough into a very small knot at the bottom (think of a balloon with its opening knotted), then rolling it under the palm of your hand into a smooth ball.

    7) Place the rolls in the 9″ x 13″ pan, or put eight rolls in each of the round cake pans, spacing them evenly; they won’t touch one another.

    8 ) Cover the pans with lightly greased plastic wrap, and allow the rolls to rise for 1 1/2 to 2 hours. They’ll become very puffy, and will reach out and touch one another. While the rolls are rising, preheat the oven to 350°F.

    9) Bake the rolls for 15 minutes, and tent them loosely with aluminum foil. Continue to bake until they’re mahogany-brown on top, but lighter colored on the sides, an additional 10 to 13 minutes.

    10) Remove the rolls from the oven, and after 2 or 3 minutes, carefully transfer them to a rack. They’ll be hot and delicate, so be careful. Serve warm, or at room temperature.