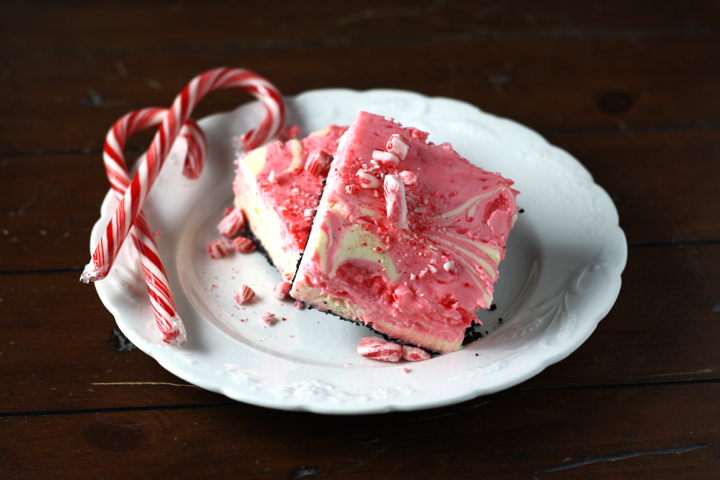
Peppermint White Chocolate Swirl Cheesecake Bars ~ ElephantEats.com

I hope that everyone who celebrates had a wonderful Thanksgiving! My family had Thanksgiving in Manhattan this year, for the first time ever.

This is the last year that Nate and I will be living in NYC, and the first that we were actually here on Thanksgiving, so my parents, brother, Nate and I decided to go to my office to check out the Macy’s Thanksgiving Day Parade.

Macy's Day Parade 2013 ~ ElephantEats.com

Snoopy!

It was a pretty awesome view since my building is right on the parade route. The only problem was that the balloons were kept low to the ground this year because they were worried about the wind, and the floor we were on was pretty high above them. It was still closer than I’ve ever been to the parade though!

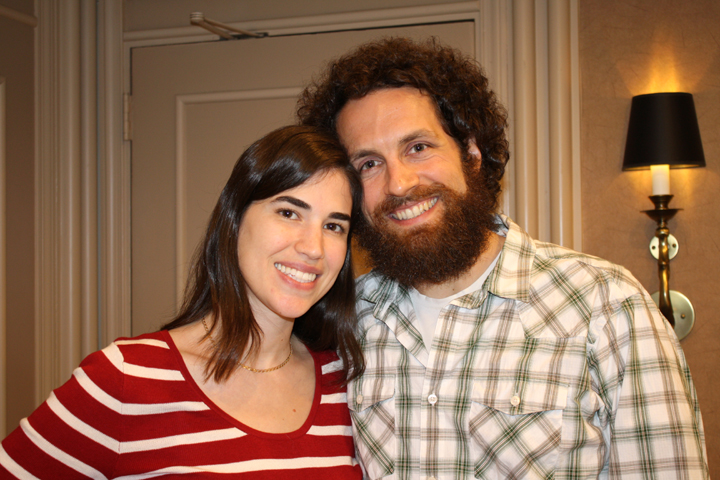
We took a nice family photo on Thanksgiving but I think my mom is using it for her holiday card, so you’ll have to settle for this pic of just me and Nate. I think I dressed for the wrong holiday :)

Thanksgiving 2013 ~ ElephantEats.com

Yes, I’m really that pale…

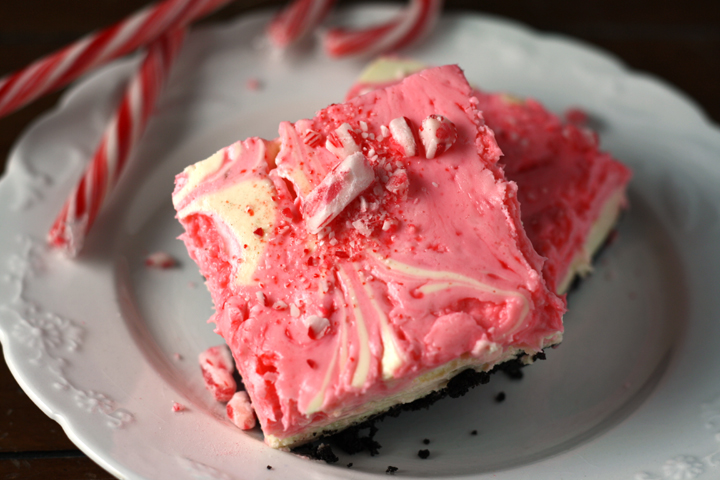
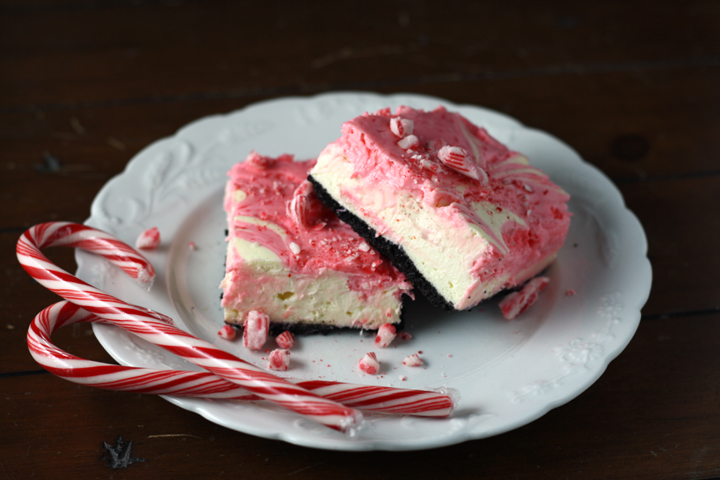
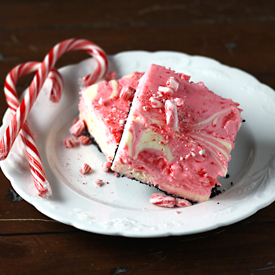
Actually, I think my outfit is kind of appropriate for this post, since it matches this dessert I’m sharing with you. I don’t know why but I just got this idea of peppermint white chocolate cheesecake bars in my head and couldn’t get it out. I had visions of these swirly pink and white bars perfect for a holiday dessert. 

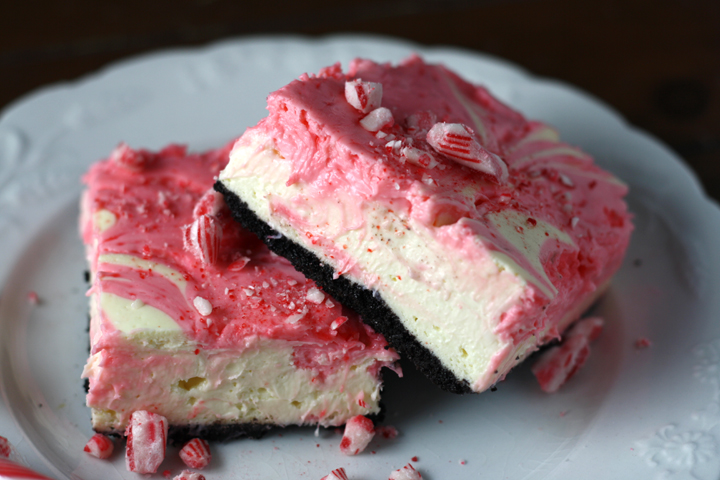
These definitely need to be refrigerated overnight if you like them to firm up a bit, but they’re more on the softer side of cheesecake bars- this is according to Nate who likes cold, dry, hard food. If you leave the candy cane bits out of the batter and just sprinkle them on top, they should firm up a little more, but I thought they were perfect!

Peppermint White Chocolate Swirl Cheesecake Bars ~ ElephantEats.com

Oh, and for another house update, since you guys seem to love that so much :) :

The contractor had told me at the beginning of last week that he was pretty much done with demolition and would start framing by Friday. On Wednesday he texted me, saying his guys had removed the ceiling in the basement and found some asbestos underneath that had been overlooked when they did the asbestos removal back in August…UGH! 

He told me that he called up the company that I had used for the removal before and they said it was ok for him to work, but he thought it would be best to wait til Monday when the asbestos guy would meet him at the house to check it out. Because of Thanksgiving, that only meant one day of work (Friday) would be wasted. 

Peppermint White Chocolate Swirl Cheesecake Bars ~ ElephantEats.com

So Monday, my contractor had a smaller than normal crew there working and the asbestos guy came to assess the situation and gave me a quote for removing it ( $$ :( ), but the good news is that he can do it this Thursday and that the contractor can continue to work in the meantime. 

But the exciting part is that I took my family over to the house on Friday since my brother had never seen it, and when I opened the door, I was SO surprised. There are NO WALLS in my house at all! Like completely gone…all that’s there are the studs. I had NO idea they were going to remove every single wall!! It was so crazy to see the house that way and I’m sorry I don’t have a pic, but it was getting dark out. I should be able to take one before they put up the drywall I think.

Anyway, I’m so psyched :) It totally made this project feel like it’s really happening!

Oh yeah, and on Friday morning my mom came with me and Nate to the bath store and we managed to pick out pretty much all of our faucets, sinks, toilets and a bath vanity. Still a few more things to decide but good progress. Thank you, Mom!!!
Peppermint White Chocolate Swirl Cheesecake Bars ~ ElephantEats.com

Peppermint White Chocolate Swirl Cheesecake Bars
Creamy cheesecake squares with a festive minty swirl!
Write a review
Print
Ingredients
  1. 2 cups finely crushed chocolate wafer cookies (about 35 cookies)
  2. 2 Tbsp sugar
  3. 1/3 cup unsalted butter, melted
  4. 4 8-oz packages cream cheese, softened (I used two light and two regular)
  5. 1 cup sugar
  6. 1 tsp vanilla
  7. 1 cup sour cream
  8. 4 eggs
  9. 6 oz. white chocolate chips
  10. red food coloring (I used 7 drops of red liquid food coloring)
  11. 1/2 tsp peppermint extract
  12. 3/4 cup crushed peppermint candy canes (about 6 oz), divided
Instructions
  1. Preheat oven to 350. Grease bottom of a 9x13 pan.
  2. For crust, mix crushed cookies, 2 Tbsp sugar and the melted butter. Press mixture evenly into bottom of prepared pan. Bake for 10 min then set aside to cool while making batter.
  3. For filling, in a large bowl, beat cream cheese, 1 cup sugar, sour cream and vanilla with electric mixer until smooth. Beat in eggs until blended. Pour 2/3 of batter over the prepared crust, spreading to edges and set the remaining 1/3 of the batter aside.
  4. Put white chocolate chips in a microwaveable container and microwave 1 min at 50% power. Stir well. Continute microwaving in 30 sec increments, stirring well in between until melted. There can still be a couple solid pieces- do not over cook!
  5. Stir white chocolate into the 1/3 of the batter that you set aside. Stir in about 6 drops red food coloring (or enough to give a pink hue), along with peppermint extract and 1/2 cup of the crushed candy canes.
  6. Put the pink batter on top of the white batter in the pan in 5-6 large blobs, making sure to leave white in between. Drag a knife back and forth through the batter to create swirls.
  7. Bake for 35-40 min or until set (a knife pierced 1" from edge comes out almost clean).
  8. Cool in pan for an hour or so, and then cover and chill for 4-24 hours. Cut into bars and sprinkle with remaining peppermint candies as desired.
Notes
  1. For slightly firmer bars, leave the chopped peppermint out of the batter, and only use as a garnish.
  2. Best served after being refrigerated overnight.

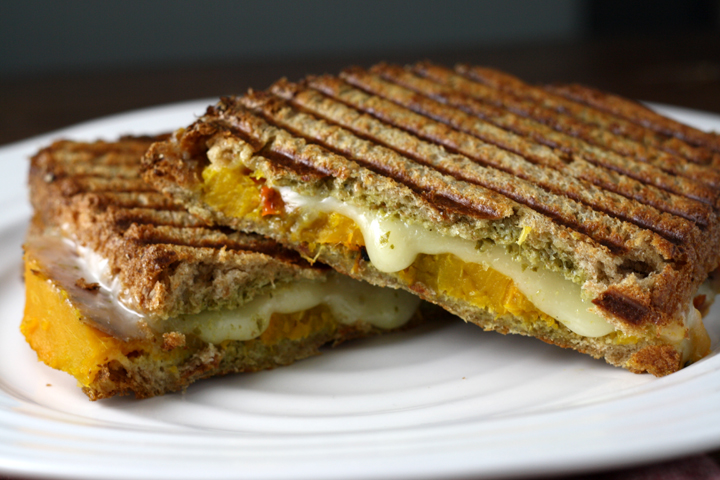
Butternut Squash Pesto Grilled Cheese ~ ElephantEats.com

Guys, I’m so far behind! I have so many things I still need to share with you but just haven’t either made the recipes or assembled the posts- the recipes from my cooking class in Italy, and also the finished coffee table ottoman I made!

But in the meantime, you’ll have to settle for this grilled cheese, which is pretty darn delicious. I mentioned this very early on in my blog, but Nate is a creature of habit. He literally eats the same breakfast and lunch EVERY day of the week. So occassionally, on the weekend, he’ll request grilled cheese instead of his daily turkey sandwich. 

Butternut Squash Pesto Grilled Cheese ~ ElephantEats.com

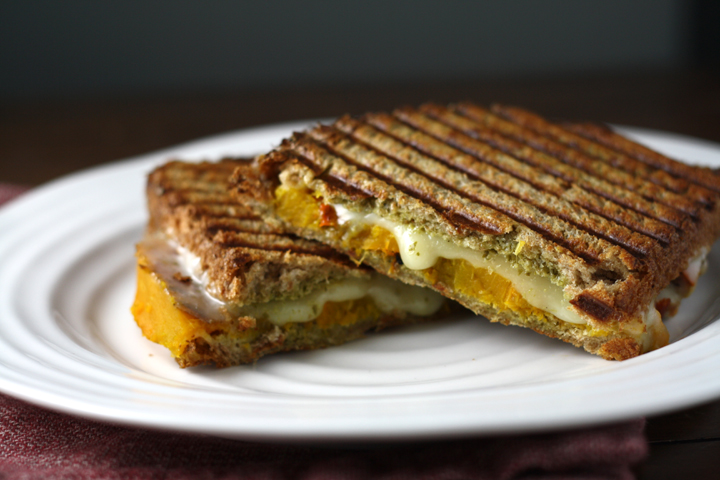
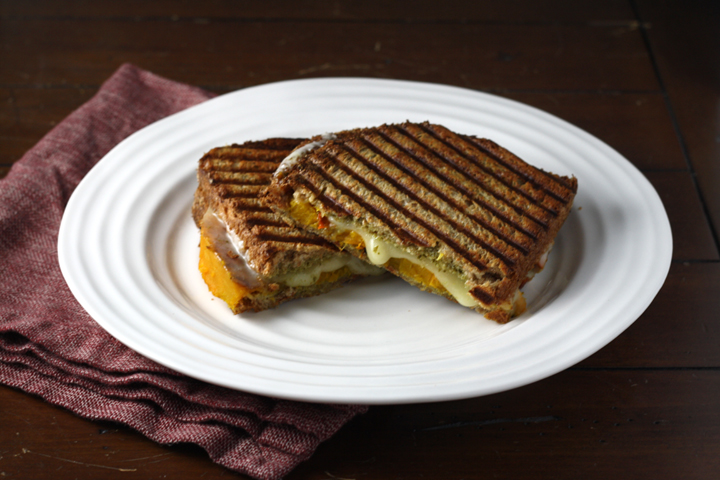
I usually just use up whatever is in the fridge on these days, sometimes coming up with really good combos. That’s how this sandwich came about. I do often add pesto to his grilled cheese, but on this particular occassion there was some leftover roasted butternut squash.

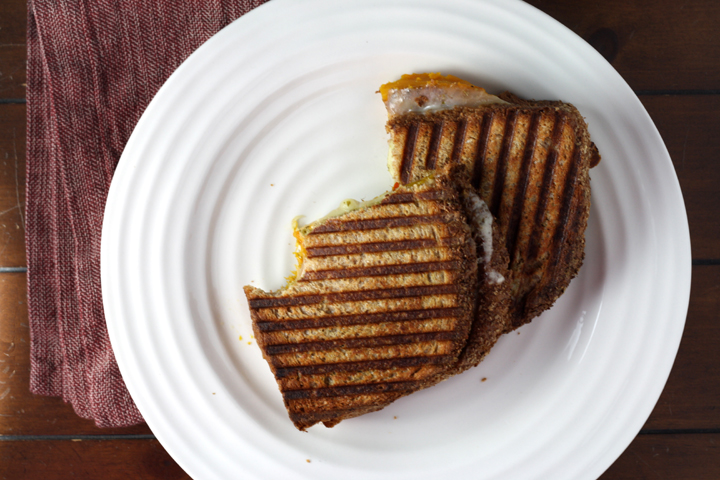
The combo of the squash, the pesto and the melty cheese was just too good not to share. I think you could also use some thanksgiving leftovers for a very tasty grilled cheese combo- maybe with some sweet potatoes? some cranberry sauce? Oh man, the combinations are endless!

Butternut Squash Pesto Grilled Cheese ~ ElephantEats.com

On other fronts, I’m scrambling to make decisions on my house because it’s going much faster than I thought. The demo is complete and framing will apparently be pretty much done by the end of next week. Because of this, my contractor informed me that I need to pick out my roof color by this Friday (!). And then I need to pick out all my bathroom fixtures and cabinetry by the end of next week so that the plumber will know where to put the plumbing. I didn’t realize that the cabinet itself made a difference, but they need to know how high any shelves inside it are, etc, that would obstruct the pipes so they can plan accordingly.

Needless to say, for a decision-making-a-phobe like me, I’m getting quite stressed out :( I really thought I’d have more than 2 wks to decide everything!

Butternut Squash Pesto Grilled Cheese ~ ElephantEats.com

Also, this weekend we went down to Nate’s moms and I had him videotape me preparing a dish so I could enter The Great American Cookbook Competition. It’s some contest Rachel Ray is having that my aunt told me about. I highly doubt I’ll win, but I figured it couldn’t hurt to try :) Hopefully Nate can make me look better on the video through editing than I actually came across on tape, because I most certainly could never be an actress. 

I hope that you all have a very Happy Thanksgiving, and Happy Chanukkah to those that celebrate!!!

Butternut Squash Pesto Grilled Cheese ~ ElephantEats.com

Butternut Squash Pesto Grilled Cheese
This isn't really much of a recipe, but more of an idea
Write a review
Print
Ingredients
  1. Bread slices
  2. Cheese slices
  3. Leftover roasted butternut squash, cut into slices
  4. Pesto
  5. Butter
Instructions
  1. Spread the insides of the bread slices with pesto. Top with a couple slices of cheese and then then enough squash to cover. Using a knife, spread/flatten the squash as much as possible.
  2. Close sandwich and spread butter over the outsides of the bread. Cook in a pan or in a panini press (my favorite way to make grilled cheese) until cheese is melted.
  3. Enjoy!
Notes
  1. The possibilities of fillings inside grilled cheese are endless!
https://elephanteats.com/

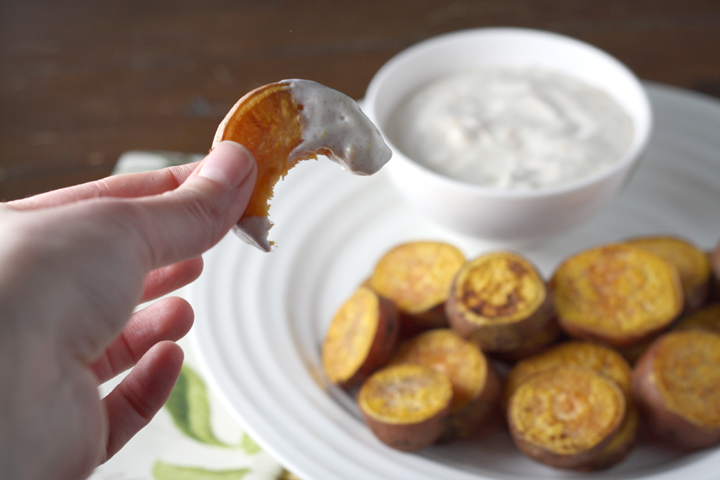
Thanksgivukkah! Spiced Sweet Potato "Gelt" with Orange Honey Cinnammon Sour Cream ~ ElephantEats.com

As I mentioned in my last post, I have a Thanksgivukkah recipe for you guys today.

What is Thanksgivukkah you ask? It’s when Thanksgiving and Chanukkah coincide! Chanukkah goes by the Hebrew (lunar) calendar and so it’s not always in December like Christmas. It has been in November before, but it’s extremely rare that in falls on Thanksgiving. 

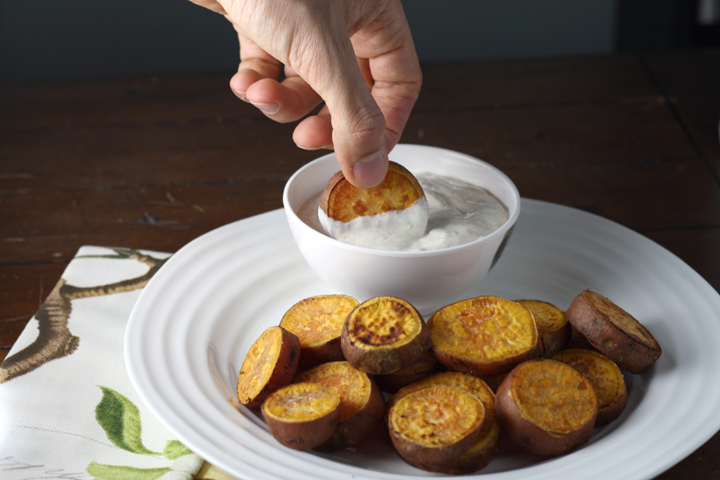
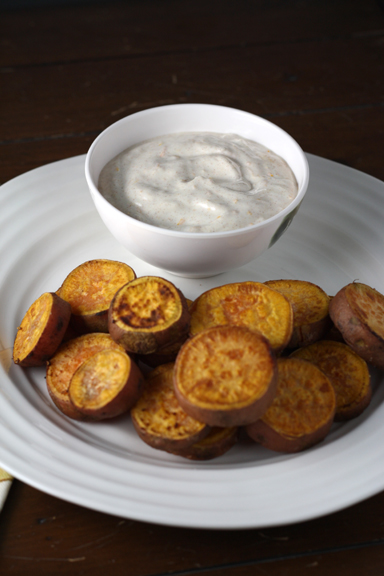
Thanksgivukkah! Spiced Sweet Potato "Gelt" with Orange Honey Sour Cream ~ ElephantEats.com

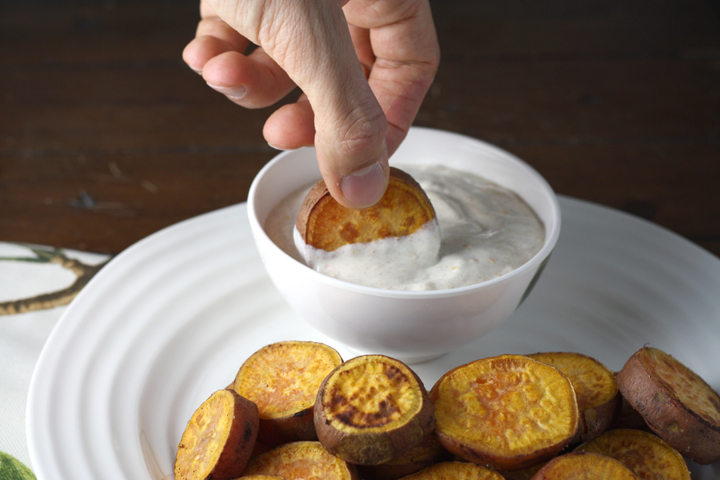
Nate is a lovely hand model

According to Wikipedia, the last time it happened since Thanksgiving was declared a U.S. federal holiday by President Abraham Lincoln was 125 years ago, in 1888. The next time Thursday, November 28 will fall during Chanukkah will be in the year 79811, assuming the Jewish calendar is not revised. Crazy huh?

Being that Jews love to eat, and food bloggers love to cook, you can guarantee that this Chanukkah will have some awesome Thanksgiving/Jewish inspired treats.

The traditional Chanukkah foods are latkes (potato pancakes) and sufganiyot (donuts). If you notice, both of these foods are deep fried in oil, which is no coincidence. Oil is very important to the holiday of Chanukkah. You can read more about it here if you’re interested.

Thanksgivukkah! Spiced Sweet Potato "Gelt" with Orange Honey Sour Cream ~ ElephantEats.com

I’ve already seen plenty of riffs on latkes for Thanksgivukkah, involving sweet potatoes rather than regular spuds. Honeslty I don’t think that’s so original, as Jews have been doing that already for years. Then I saw people made turkey donuts, which is just plain gross. I also saw a pumpkin rugelach or pumpkin kugel (pudding). 

But I wanted to be original. So I tried to think of other Chanukkah “things.” The other traditional food to eat on Chanukkah, if you can call it a food, is chocolate “gelt” or chocolate coins.Usually these coins are used to gamble while playing dreidel, a game involving a little spinning top.

Thanksgivukkah! Spiced Sweet Potato "Gelt" with Orange Honey Sour Cream ~ ElephantEats.com

Gelt is really just money, or coins, so I figured a recipe could look like gelt without actually involving the candy that we love to eat on this holiday. That’s when it occurred to me- sweet potato gelt! I thought about using carrots since they’re smaller and would look more like coins, but they’re not as Thanksgiving-y as sweet potatoes. 

I added the dipping to sauce to make it more kid-friendly (kids love dipping!) and also to inject some more fall flavor (citrus and cinnamon) into the dish. Obviously this dish goes way beyond Thanksgivukkah and would be a welcome addition to any dinner, or even as a fun pass-around appetizer. 

I hope you enjoy, and have a wonderful Thanksgivukkah! You know you want to celebrate it ;)

Thanksgivukkah! Spiced Sweet Potato "Gelt" with Orange Honey Sour Cream ~ ElephantEats.com

Spiced Sweet Potato "Gelt" with Orange Honey Sour Cream Dipping Sauce
Serves 4
A perfect appetizer or kid's food for Thanksgivukkah or just any day of the year!
Write a review
Print
Potatoes
  1. 4-5 sweet potatoes/yams (try to find ones with a small diameter to make smaller "coins")
  2. Cooking spray or olive oil
  3. salt/pepper/cinnamon for sprinkling
Dipping Sauce
  1. 8 oz. sour cream (I used low fat)
  2. 1 Tbsp orange zest
  3. 1 Tbsp freshly squeezed orange juice
  4. 1 Tbsp honey
  5. 1/4 tsp cinnamon
Instructions
  1. Preheat oven to 425. Cover a large baking sheet with foil and spray with cooking spray.
  2. Cut sweet potatoes crosswise into 1/2" thick rounds. Either toss with oil or place on the prepared baking sheet and spray with cooking spray. Sprinkle with salt/pepper/cinnamon.
  3. Put potatoes in oven and cook, flipping them halfway, 20-25 minutes or until cooked and soft enough to be pierced with a fork, but firm enough to be picked up without falling apart.
  4. While potatoes are cooking, whisk dipping sauce ingredients together in a small bowl.
  5. Let potatoes cool to room temperature so you can pick them up without burning your fingers and serve with sauce on the side for dipping!
https://elephanteats.com/

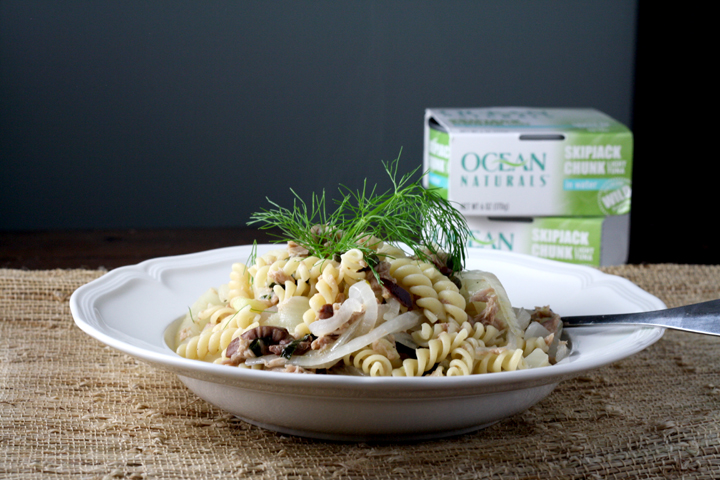
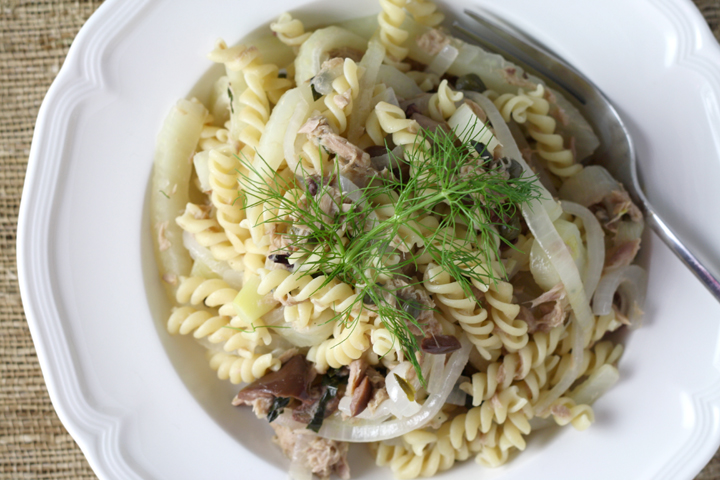
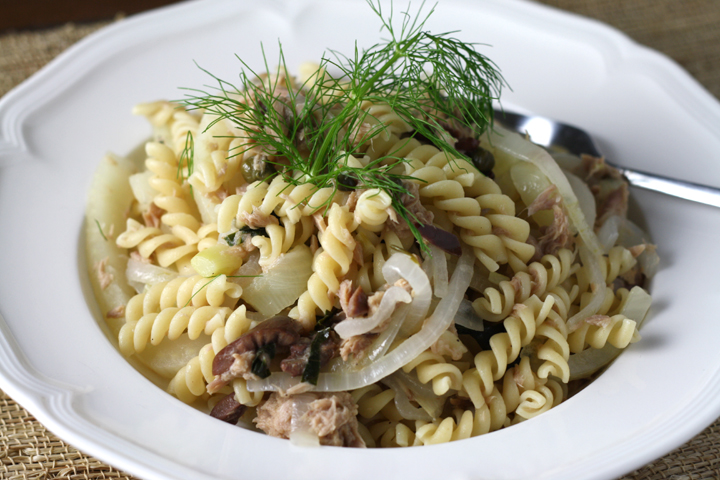
Light Lemony Tuna Pasta with Fennel, Capers, and Olives ~ ElephantEats.com

I was recently sent some Ocean Naturals canned tuna to try. I rarely eat canned tuna because I just plain forget it exists, so I was so glad that this reminded me how great it is. 

Canned tuna contains high-quality protein and Omega 3 fatty acids. Tuna, especially canned tuna, is a convenient and versatile way for you to add fish to your family’s diet.

Light Lemony Tuna Pasta with Fennel, Capers, and Olives ~ ElephantEats.com

But I’m sure you guys know all that, right? What I didn’t know was that tuna is often over-harvested and some species are more endangered than others. Ocean Naturals guarantees that all of their “responsibly-caught” tuna is harvested:

  • From target species populations that are healthy and abundant and are currently being harvested at a level that promotes the stocks’ longevity
  • Using catch-methods that limit ecosystem impacts
  • In regions where the fishery is managed by regulatory bodies that help sustain the long-term productivity of all impacted species

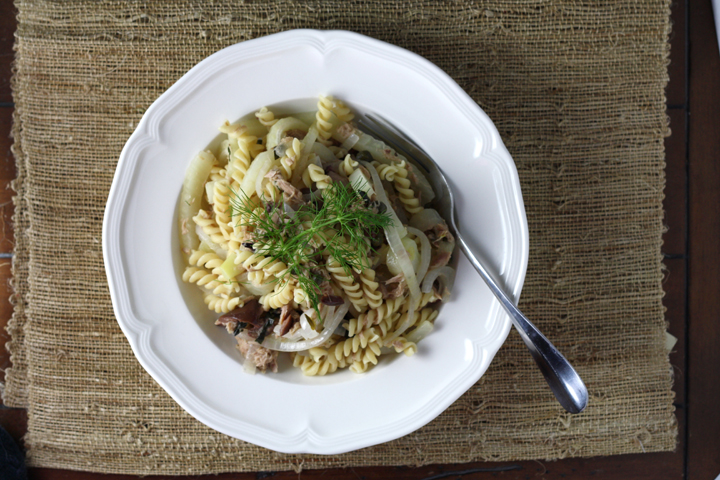
Light Lemony Tuna Pasta with Fennel, Capers, and Olives ~ ElephantEats.com

Nate has made me really think about our impact on the ecosystem in general, so it made me really happy to know that some companies are doing their part to preserve it and limit their impact on it. 

Lately I’ve also become overly concerned with what I put in my body, and hate that everything seems to contain something that’s unhealthy either from the packaging or the food itself. For example, it scares me that those plastic water bottles I drink from daily could be leaching chemicals into the water. Well, Ocean Naturals  tuna doesn’t have anything added- it’s simply premium tuna with a dash of salt, packed in either olive oil or water. No fillers, additives, or preservatives. It’s nice to know that some foods don’t have anything artificial added!

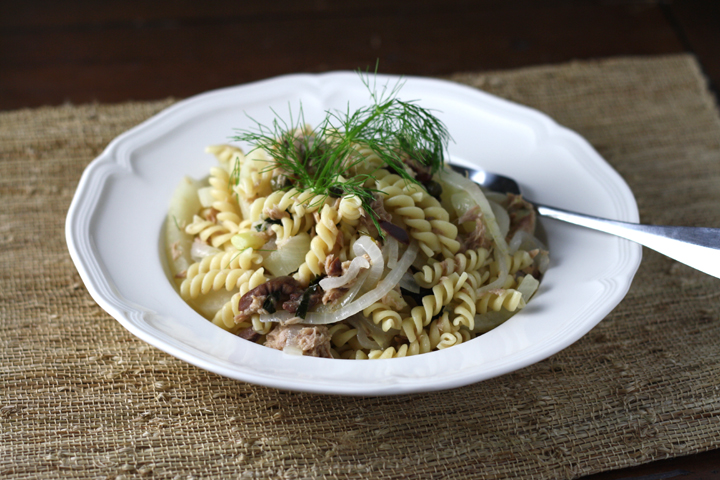
Light Lemony Tuna Pasta with Fennel, Capers, and Olives ~ ElephantEats.com

Anyway, since I got sent this tuna, I didn’t want to just make a boring old tuna salad. Nate has been training for the NY marathon (it’s this weekend!) so every Friday is pasta day to fuel his long weekend runs. I decided to make a pasta that incorporated the tuna. It’s kind of based on the flavors of a sandwich he loves at ‘WichCraft Sandwiches.

**I was given these products free of charge, but all opinions are my own. I would never post about a product I didn’t love and plan to use again.

Light Lemony Tuna Pasta with Fennel, Capers, and Olives ~ ElephantEats.com

Zesty Roasted Pumpkin Seeds ~ ElephantEats.com

If you’ve been following my blog, you know that for the last few years, I’ve been really getting into pumpkin carving at Halloween. I had seen these really cool pumpkins online and thought “i could do that,” so I picked up some wood-carving tools and was on my way!

Two years ago, I did a “Where the Wild Things Are” pumpkin:

Where the Wild Things Are jack-o-lantern ~ ElephantEats.com

My 2011 “Where the Wild Things Are” jack-o-lantern

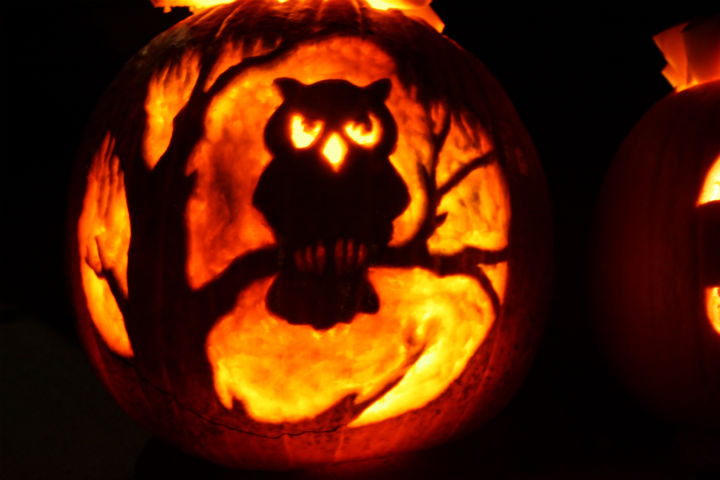
Last year was an owl in honor of our wedding (in which there was a real owl!).

I, sadly, missed winning Movita’s Carve-Off 2012 competition by a hair!

Owl jack-o-lantern ~ ElephantEats.com

My 2012 owl jack-o-lantern

Now that I’ve had 2 years to hone my pumpkin-carving skills, I think that I did my best one yet!

Movita actually posted a link on her facebook page  to the Maniac Pumpkin Carvers last week. I had never been to their page before, but when I looked thru their SERIOUSLY AWESOME pumpkins, I saw that the Wild Things pumpkin I had found on pinterest two years ago (that inspired mine) was actually theirs. 

Nightmare Before Christmas jack-o-lantern ~ ElephantEats.com

I wanted to pick up some pumpkin carving tips, so I actually emailed them (not expecting a response) to find out A) where they cut the hole in their pumpkins since it’s obviously not the top and B) how they light them so well.

Nightmare Before Christmas jack-o-lantern ~ ElephantEats.com

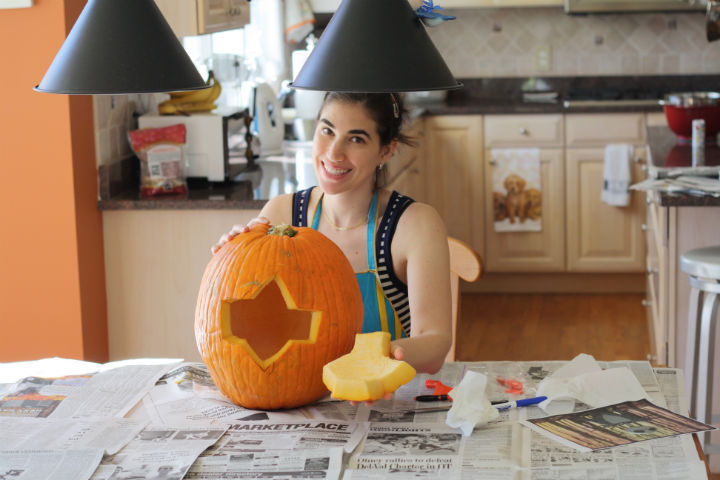
Well, they wrote back like immediately which made me so excited. I found out that they actually cut a hole in the back of the pumpkin, which is what I did this year.

Nightmare Before Christmas jack-o-lantern ~ ElephantEats.com

 They also told me they rig it up with LED or CFL lights inside the pumpkin…but I didn’t have time to get the lights, so I just stuck a flashlight in my pumpkin and called it a day :)

Nightmare Before Christmas Jack Skellington jack-o-lantern ~ ElephantEats.com

My 2013 “Nightmare Before Christmas” Jack Skellington jack-o-lantern

We also finally remembered to use the tripod to take pics this year, since that’s really the only way to get a good pic of anything in the dark.

Nate carved the Oogie Boogie Man to go along with the “Nightmare Before Christmas” theme. I don’t know how we’re going to top these pumpkin next year. 

Nightmare Before Christmas jack-o-lantern ~ ElephantEats.com

*I’ve updated this post to include a few pumpkin carving tips:

  1. Find a pumpkin with a nice wide, flat-ish surface on the part you’re going to carve.
  2. Cut a hole in the backside of your pumpkin that’s big enough for your hand to fit through. Remove all the seeds (and save them to eat!) and then scrape away all the stringy pumpkin gook.
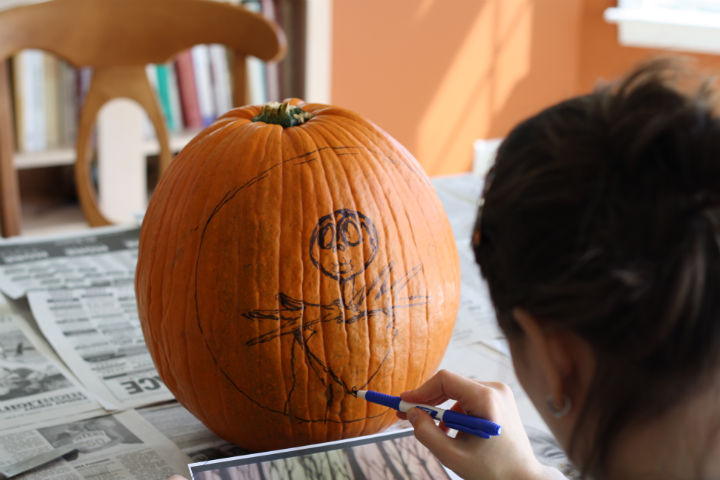
  3. Find an image. It’s best to work from an image that’s in black and white. Either find one that is already b+w or convert it with some photo-editing software. Pixlr.com is a good one and I think picmonkey.com might be able to do it too. 
  4. Use dry-erase or washable markers to sketch out the image on your pumpkin
  5. Get some wood carving tools, knives, or any other instruments you think will help with scraping the flesh off your pumpkin- some of these need to have small points as you might have intricate details to scrape.
  6. This is kind of obvious, but the lightest areas on your inspiration image will be the parts that you scrape/carve the deepest.
  7. I don’t actually ever cut all the way through the pumpkin flesh- the light areas are simply scraped quite deep into the flesh.
  8. Start with scraping/carving out the lightest areas on your pictures so you have a reference of how deep the lightest areas are compared to not scraping at all (the darkest areas) and then you can estimate how far to scrape for the in-between gray areas.
  9. When you think you’re done, take one of those pumpkin scooper tools they sell in the pumpkin carving sets and scrape the inside of the pumpkin behind your design as much as you can. This will ensure that there isn’t much flesh between the inside and your “lightest” areas. Your design will show better this way because when you put the light inside, it will be able to shine through best.
  10. Either rig up a light bulb or put a mini flashlight in your pumpkin. The little pumpkin lights they sell in the store aren’t bright enough to shine through a “scraped” pumpkin enough to really show off your design.
  11. That’s it! Now light up the pumpkin and impress all your friends!

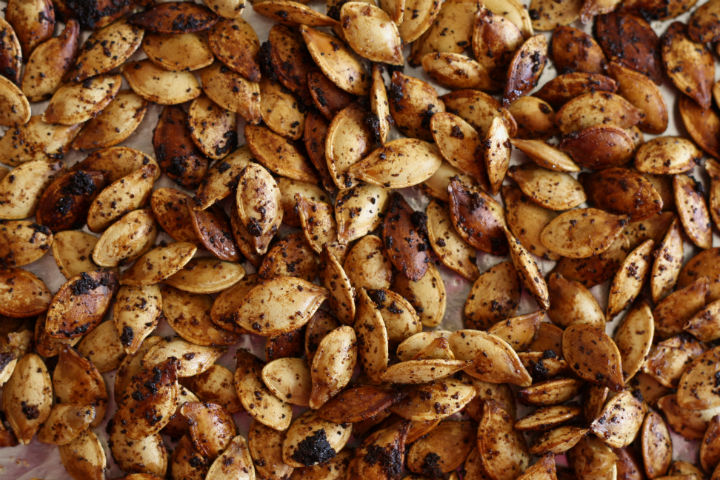
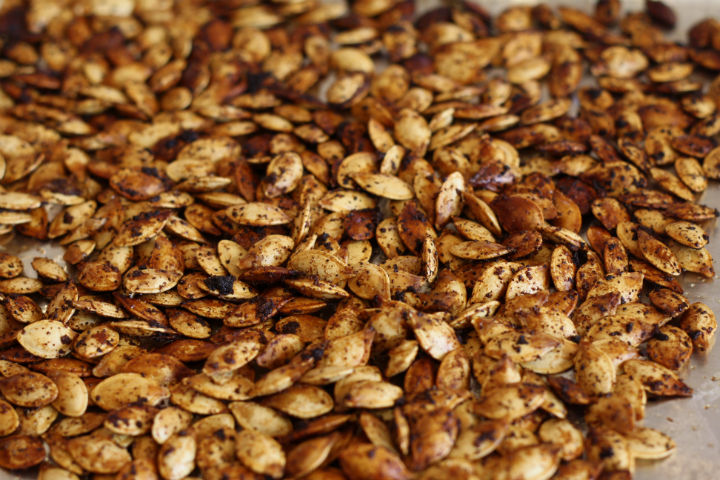
Since we had two huge-ass pumpkins, I was able to get quite a few pumpkin seeds from them. Roasting pumpkin seeds has been a tradition in my house since I was little whenever we carved Jack-o-Lanterns. When I made them the first year I knew Nate, he became obsessed with them and now he looks forward to pumpkin carving for the seeds more than for the pumpkin I think :)

Last year I saw a Rachel Ray recipe that recommended boiling the seeds before roasting them. I decided to give it a try and they came out great! So I thought I’d share that recipe with you today. Enjoy!

Zesty Roasted Pumpkin Seeds ~ ElephantEats.com 

Zesty Roasted Pumpkin Seeds
Crispy, salty, spicy seasoned pumpkin seeds!
Write a review
Print
Ingredients
  1. 1 cup cleaned raw whole pumpkin seeds
  2. 1 tablespoon plus 1 tsp fine sea salt
  3. 1 tablespoon olive oil
  4. 1 tsp garlic powder
  5. 1 tsp onion powder
  6. a pinch cayenne
  7. 1 tsp worcestershire sauce
Instructions
  1. Preheat the oven to 375 degrees .
  2. In a small saucepan, bring 4 cups water, the seeds and 1 tbsp. salt to a boil. Simmer for 10 minutes, then drain. Pat the seeds dry between layers of paper towels.
  3. Toss the seeds with the olive oil and remaining 1 tsp. salt. Spread in a single layer on a greased foil-lined baking sheet. Roast until golden, 10 to 12 minutes (or possibly a little longer).
  4. Toss with one of the seasoning blends at right and roast for 5-10 minutes more or until crispy. Keep an eye on them because they burn fast!
Adapted from http://www.rachaelraymag.com/recipe/oven-roasted-pumpkin-seeds/
https://elephanteats.com/